Coupons are the potential tools to attract new customers, market your store products and retain loyal shoppers. Import Export Suite for WooCommerce Plugin helps you to import/export all your coupons from one store to another in an efficient and quick manner. To export the WooCommerce coupons:
- Select the post type as Coupon.
- Select an export method.
- Filter data.
- Map and reorder export columns.
- Use advanced options/ batch export and scheduling.
Export Coupons
To export WooCommerce coupons, click on WebToffee Import/Export(Pro) > Export.
Step 1: Select a post type
As a first step, you need to choose the post type as Coupon.
Step 2: Select an export method
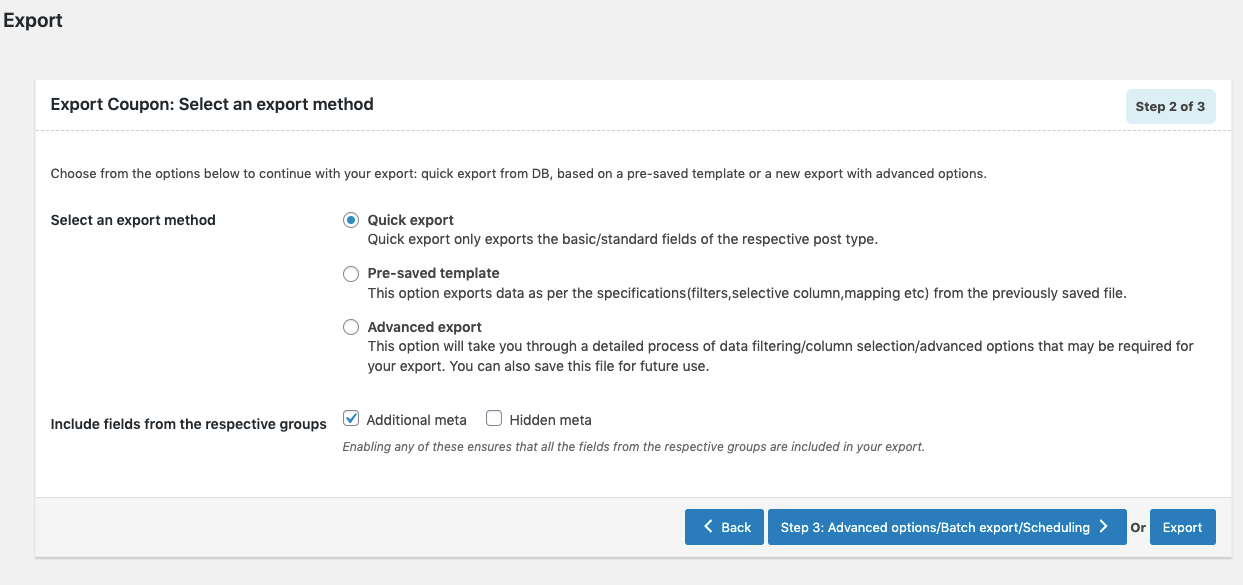
Choose from the below options to continue with your export:
- Quick export
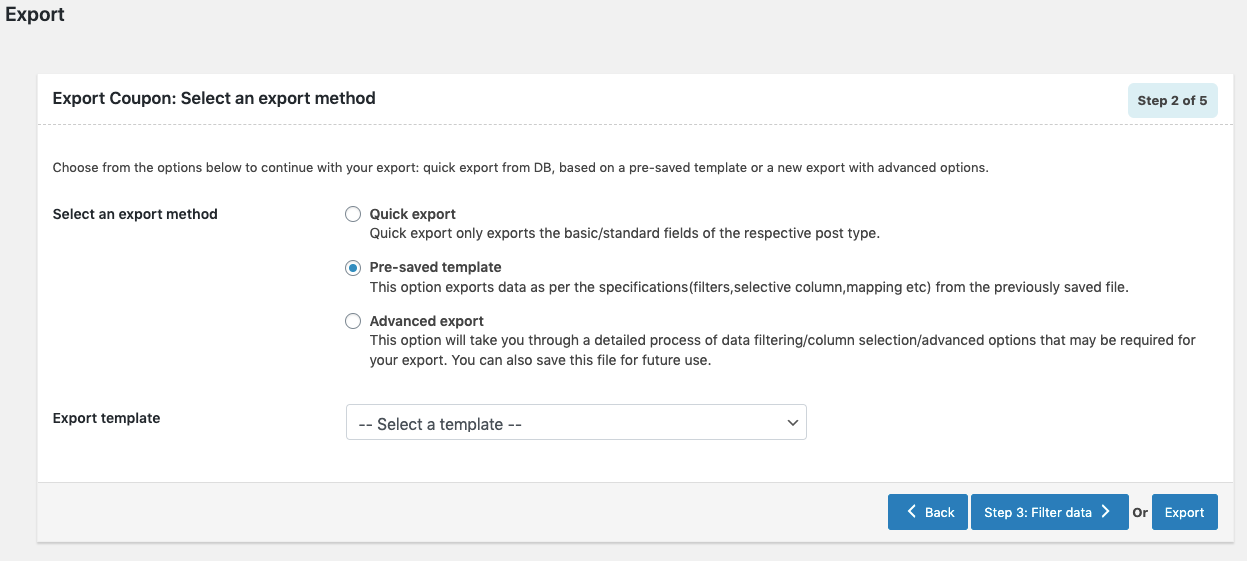
- Based on a pre-saved template
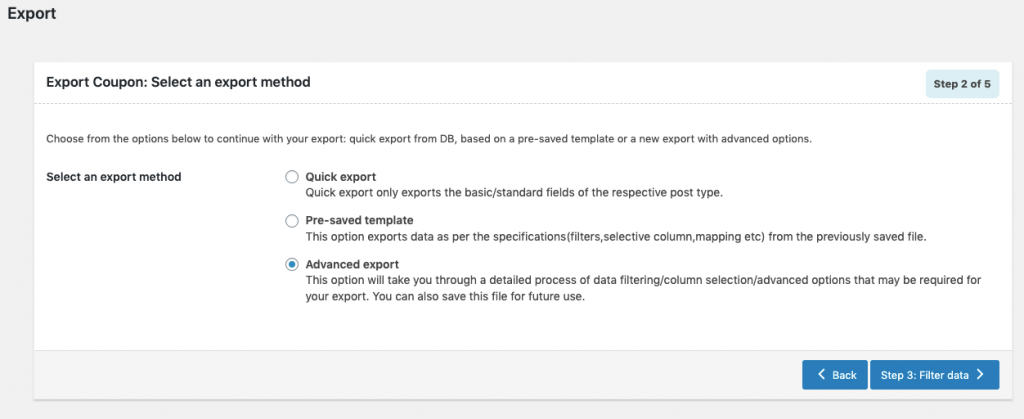
- Advanced export
Let us have a look at each of these export methods:
Quick Export
- exports the basic/standard fields of the respective post type.
- To include fields from Additional meta and Hidden meta select the respective group’s checkboxes.
- Click the Export button to complete the action or proceed to Step3 for advanced options.
- Navigate to Step 5 to know more about Advanced options/ Batch export/ Scheduling.
Pre-saved template
- exports data as per the specifications(filters, selective column, mapping.. etc) from the previously saved file.
- By selecting this option, one can choose a previously saved template from the Export template dropdown.
- Click the Export button to complete the action or proceed to Step3 to filter data.
- Navigate to Step 3 to know more about filtering options.
Advanced Export
- This option will take you through a detailed process of filtering/column selection/advanced options that may be required for your export.
Step 3: Filter data
Click on Step 3, to view the following window where one can filter data on the basis of:
- Total number of coupons to export : The actual number of coupons you want to export. e.g. Entering 500 with a skip count of 10 will export users from 11th to 510th position.
- Skip first n users : Specify the number of users to be skipped from the beginning. e.g. Enter 10 to skip first 10 users from export.
- Coupon Statuses : Export coupons with respect to their status.
- Coupon Type : Select the coupon type for export.
- Coupon amount: From: Specify the minimum discount amount for which the coupon was levied.
- Coupon amount: To : Specify the maximum discount amount for which the coupon was levied.
- Coupon Expiry Date: From: Specify the date from which the coupon will expire.
- Coupon Expiry Date: To: Specify the date till which the coupons will remain invalid.
- Sort columns: Sort the columns to get an exported file in a specified order.
- Sort By: Select the order in which you want the sorted columns to appear.

- Click on Step 4 to proceed further.
Step 4: Map and reorder export columns
The column names appearing in this section can be edited if required. The preferred names and choices that were last saved can be viewed on choosing a pre-saved template. One can also move the columns to reorder the arrangement.
Here, one can map and reorder the export columns under the following 3 fields:
- Default fields
- Additional Meta
- Hidden meta
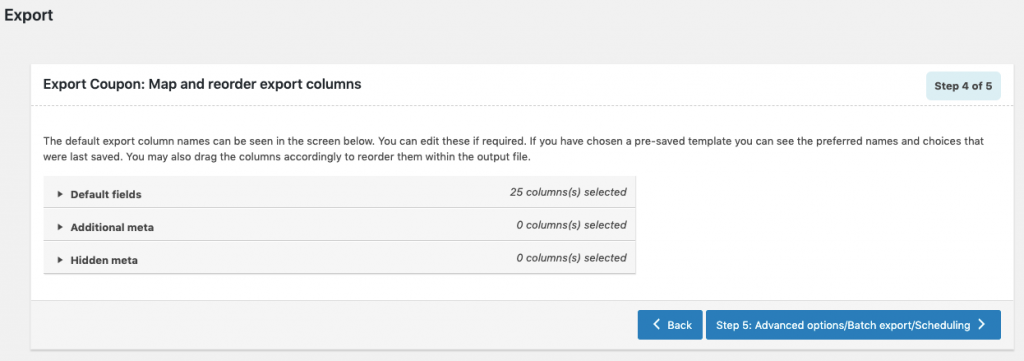
- Click on Step 5 to proceed.
Step 5: Advanced Options/Batch Export/Scheduling
On reaching Step 5, the following window will appear, from where one can:
- Export File Name: Specify a filename for the export file
- Export File Format: Both CSV and XML file formats are available.
- Delimiter: Separator for differentiating the columns in the CSV file. Assumes ‘,’ by default.
- Enable FTP export: On opting ‘Yes’, choose an FTP profile and specify the export path.
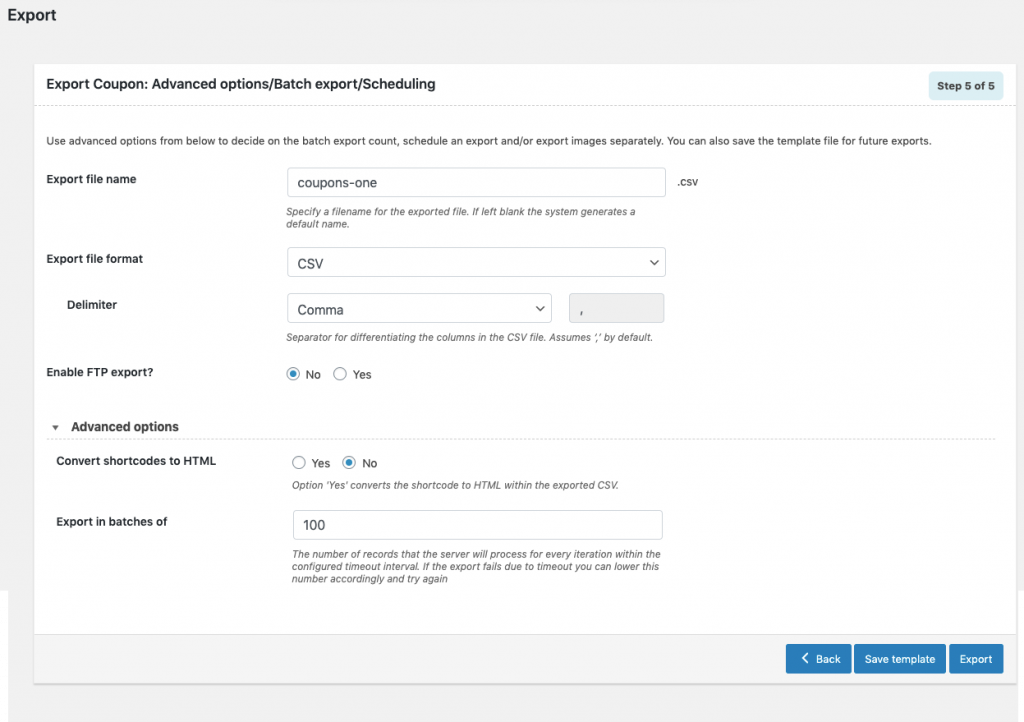
On expanding Advanced options, one can:
- Convert shortcodes to HTML
- Export in batches
- Save the template file for future export (if needed).
- Click on Export to finish.

