The Import Export Suite for WooCommerce Plugin helps you to import and export multiple post types from one online store to another. During export, you can either export the data directly into the store or schedule the action for later.
Steps to schedule export
To schedule the export, provide the FTP details of the server to which the file will be downloaded. To give the FTP credentials:
- Navigate through WebToffee Import Export (Pro) > General Settings > FTP Settings.
- Add a new FTP profile and save.
- Go through WebToffee Import Export (Pro) > Export.
- Select the post type and export method.
- As a next step, Filter data > Map and reorder the columns.
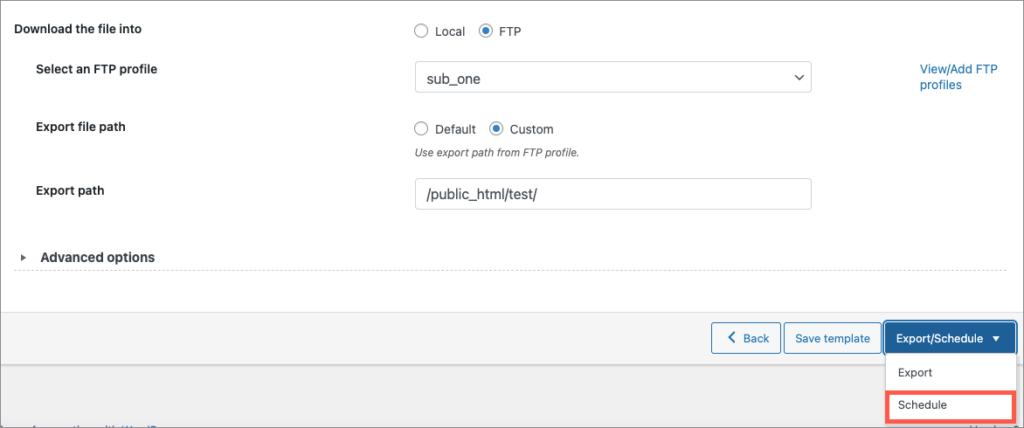
- On reaching step 5, choose the FTP option under Download the file into.
- Now, select the FTP profile(for reference, read Creating FTP profiles for export and import ) and click on Schedule.
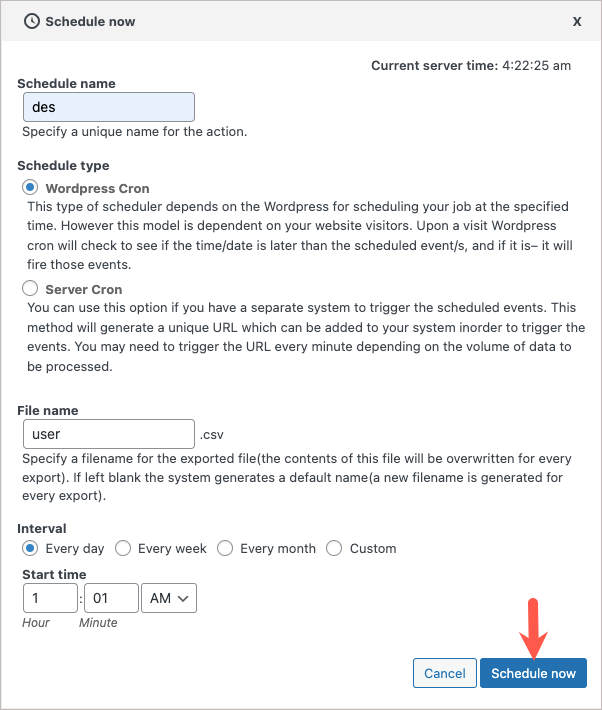
Types of cron schedulers
The plugin supports two different schedule types:
- WordPress Cron: Upon a visit, WordPress Cron will check to see if the time/date is later than the scheduled events, and if it is– it will fire those events.
- schedules your job at the specified time.
- is dependent on your website visitors.
- Server Cron: You may need to trigger the URL every minute depending on the volume of data to be processed.You can use this option :
- to generate a unique URL that can be added to your system in order to trigger the events.
- if you have a separate system to trigger the scheduled events.
File name : Specify a filename for the exported file(the contents of this file will be overwritten for every export). If left blank the system generates a default name(a new filename is generated for every export).
Schedule the time at which you want the automatic export to occur and also give other necessary information for the export.
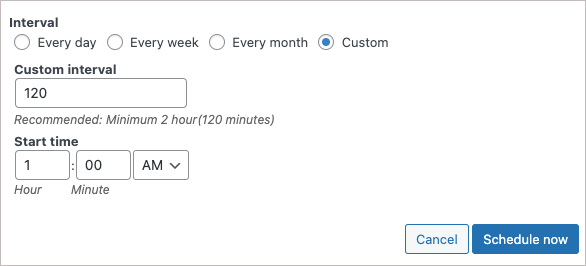
On setting the interval as custom, you will have to set the custom interval option in minutes as shown below.
And then click on Schedule Now.
Related article: