Local product inventory feed in Google is a list of the products that you sell in every store. This service lets businesses manage their online presence across Google, Google Search, and Google Maps. For businesses that have a Google Business Profile (formerly My Business account), Google lets them list their store inventory for free on Google. This article explains how to collect the file URL of the feed generated using the plugin WebToffee WooCommerce Product Feed and Sync Manager. To setup local inventory feed in Google merchant center:
- Create a feed with channel as Google Local Product Inventory.
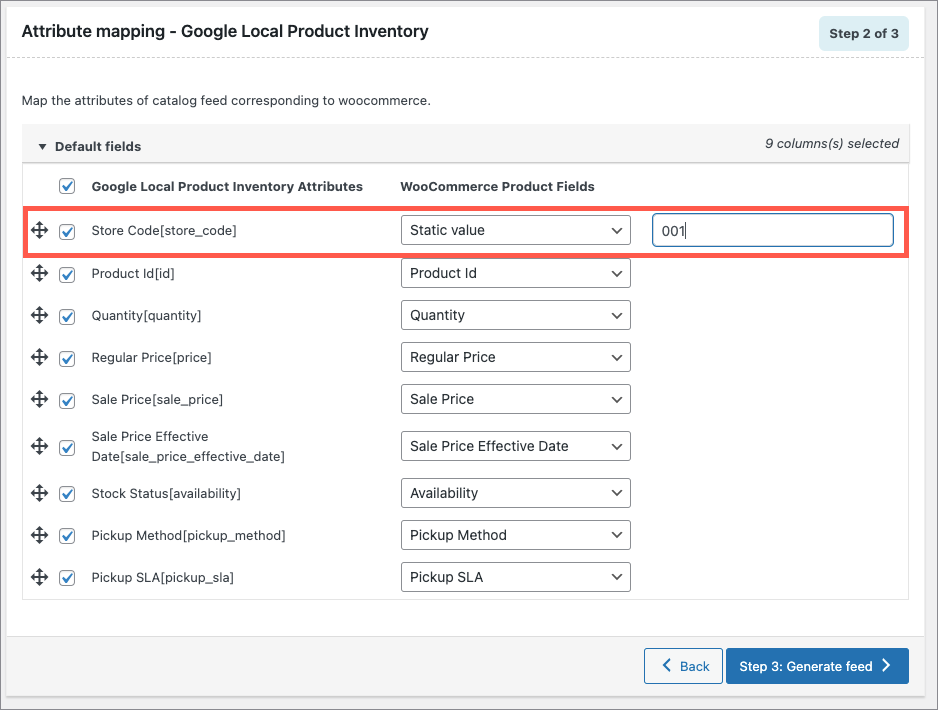
- Under the attribute Store Code[store_code], map the WooCommerce product field as Static value.
- Enter the store code copied from the google my business account.
- Generate the feed and copy the feed URL.
- Login to Google merchant center.
- Add local product inventory feeds.
- Schedule the fetches and create the feed.
Pre-Requisite
To add a local inventory feed in Google Merchant Center:
- You must follow all the steps in the local inventory program configuration guide.
- Configure the “Free local product listings” and/or the “Local inventory ads” programs in the Growth > Manage programs tab of your Google Merchant Center account.
- Create a primary product feed and configure it by not forgetting to check the Local inventory product listings and Free product listings destinations.
Creating the local inventory feed and collecting file URL
Install and activate the WebToffee WooCommerce Product Feed and Sync Manager plugin and follow the below mentioned steps.
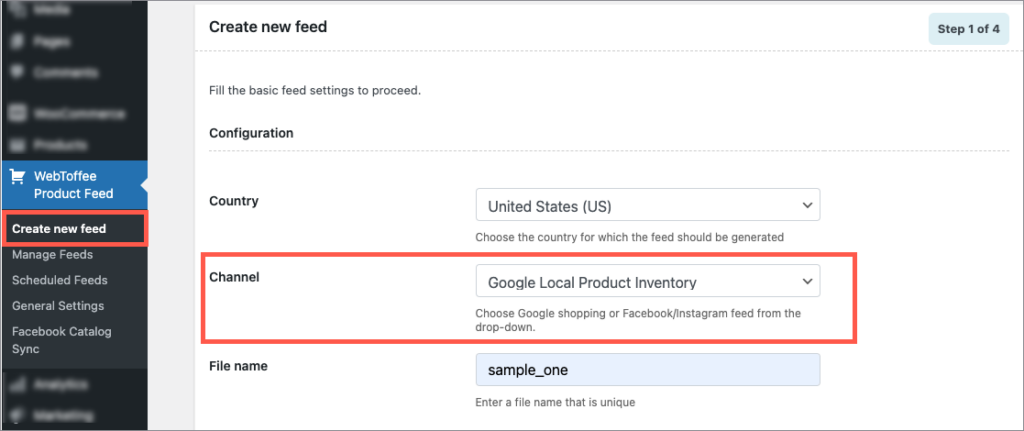
- Step 1: Navigate to WebToffee Product Feed > Create new feed. Choose channel as Google Local Product Inventory, enter the file name, and fill up other details.
- In step 2, map the attributes. Under the attribute Store Code[store_code], map the WooCommerce product field as Static value and enter the store code copied from the google my business account. Example: 001. Click on Generate feed.
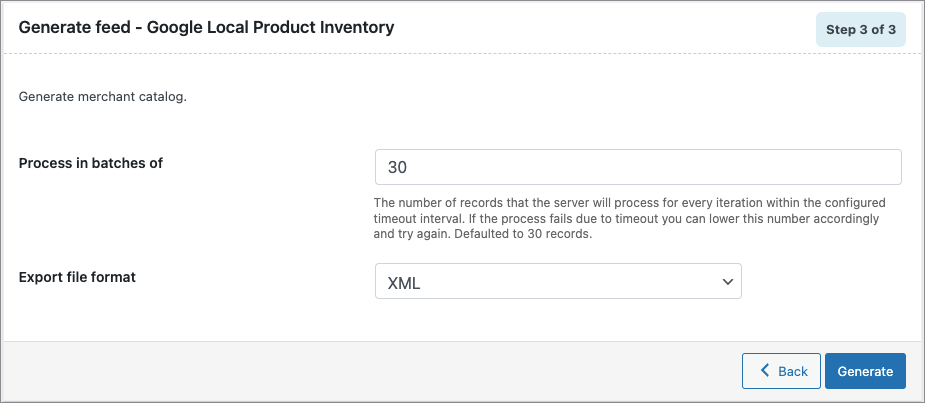
- In step 3, enter the number of records you want to process in batches and choose the export file format (both XML and TXT are supported). Click on Generate.
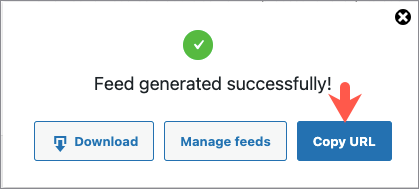
- On successful feed generation, a pop-up will appear as shown below. Click on Copy URL to collect the file URL.
Setting up local product inventory feed
To add your inventory product feed:
- Log into your Google Merchant Center account.
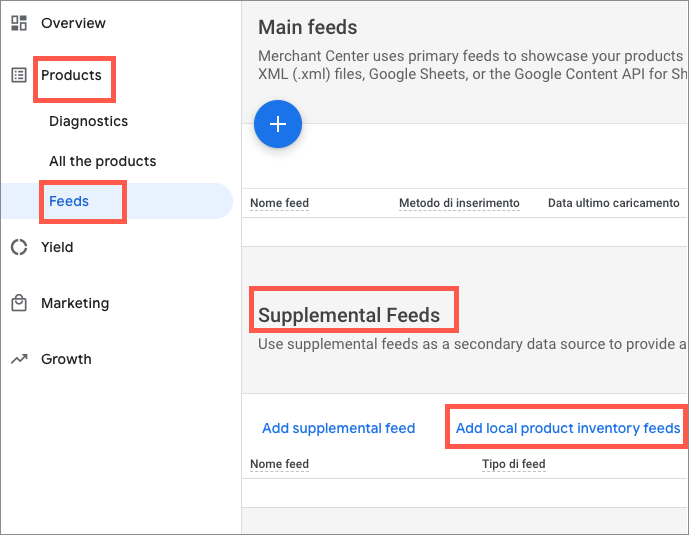
- Navigate to Products > Feeds.
- Under Supplemental Feeds, click on Add local product inventory feeds.
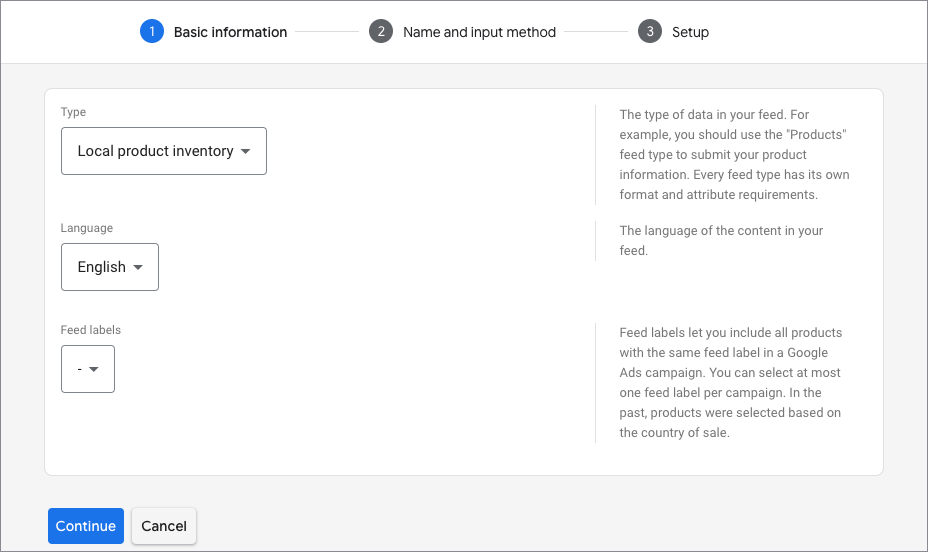
- Step 1: Enter the Basic details.
- Select the Type as Local product inventory.
- Select the language associated with the product data and feed labels. Click on Continue.
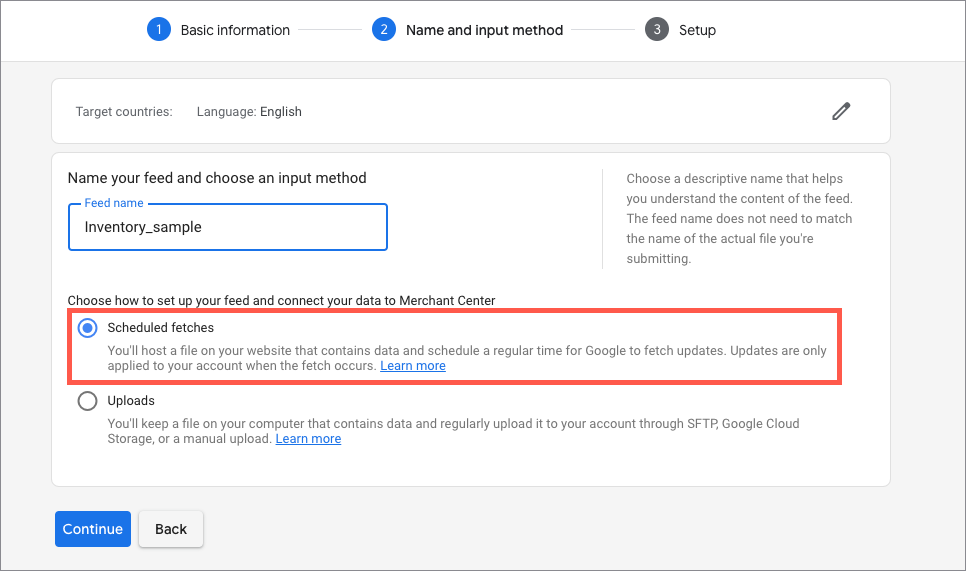
- Step 2: Determine the Name and Input method.
- Give a name to your local product inventory feed under the Feed name.
- Select the Scheduled fetches method, and click on Continue.
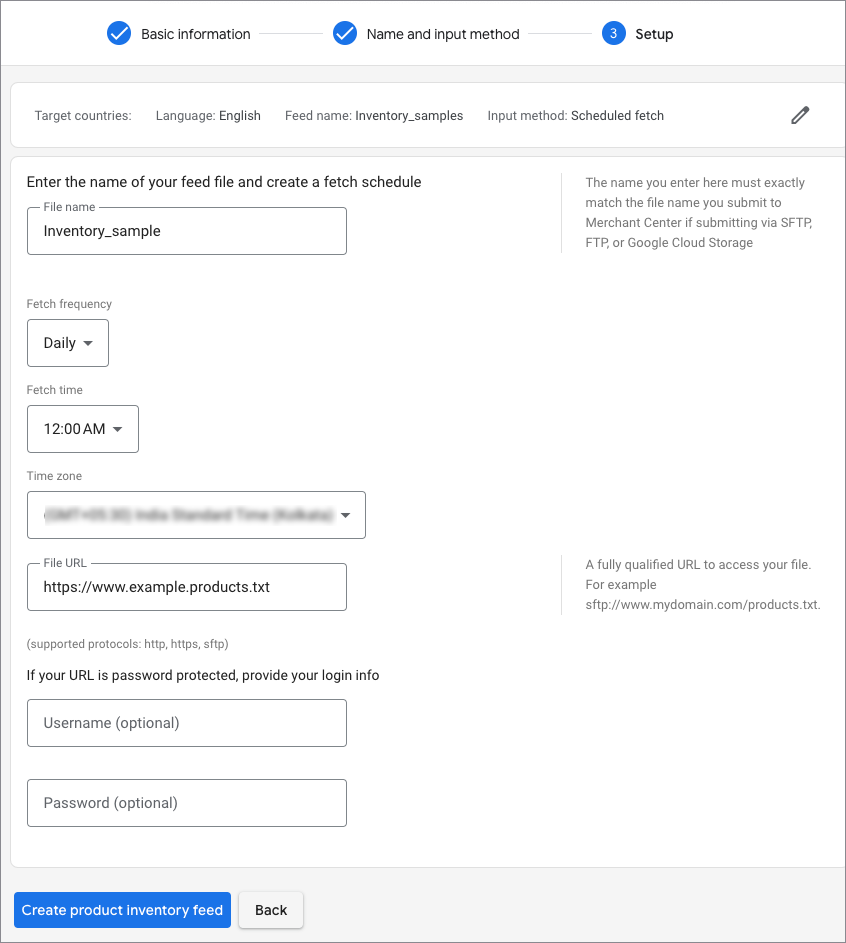
- Step 3: Schedule the fetches and create the feed.
- Enter the name of your feed file and other fetch schedule details.
- Enter the copied file URL. Click here to know how the URL is generated using the plugin, WebToffee WooCommerce Product Feed and Sync Manager.
- Click on Create product inventory feed to finish.
