The StoreRobo Product Import Export app supports import/export of multiple products with images and other meta fields. The app lets you easily bulk update product data such as product price, stock etc. To begin:
- Choose the Import file location.
- Select the import template and filter options.
- Map the import columns if the import template is Custom CSV.
- Click on the Import button to finish.
Steps to bulk update product data
From the Shopify admin dashboard, click on Apps > SR Product Import Export > Home and import the products in three easy steps.
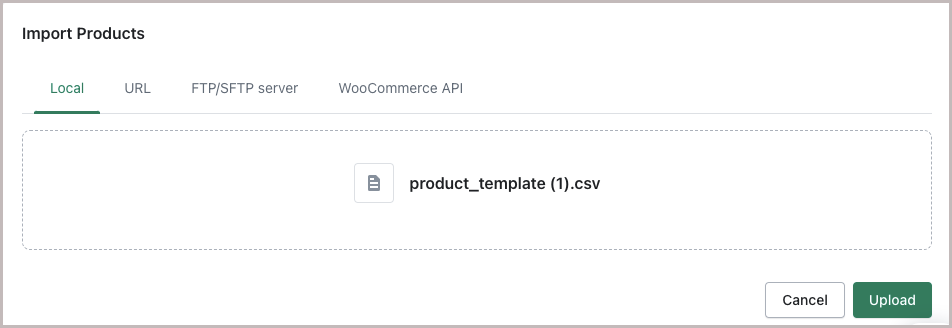
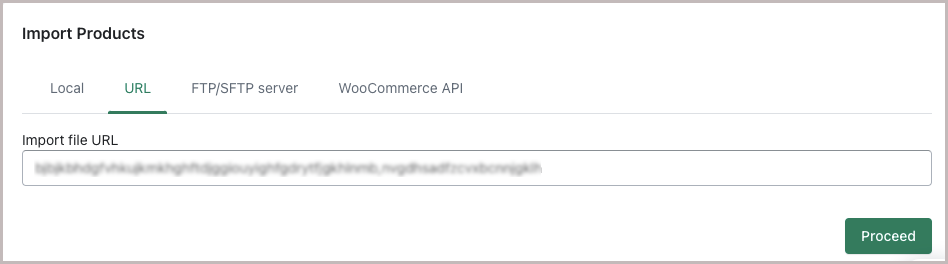
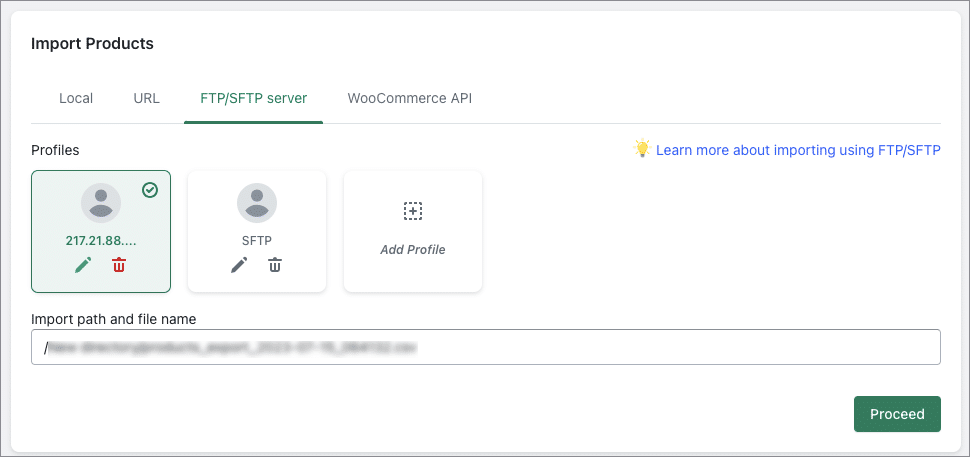
Step 1: Choosing the Import file location
Under Import Products, choose the import file location among:
- Local
- URL
- FTP/SFTP server
On importing the file from Local, upload the input file and click on Upload.
On importing the file with a URL, input the file URL and click on Proceed.
On importing the file from FTP/SFTP server, select the FTP profile, provide the import path and click on Proceed. Here, you can also add a new FTP profile. To know more, refer to Importing Products in Shopify Using FTP/SFTP.
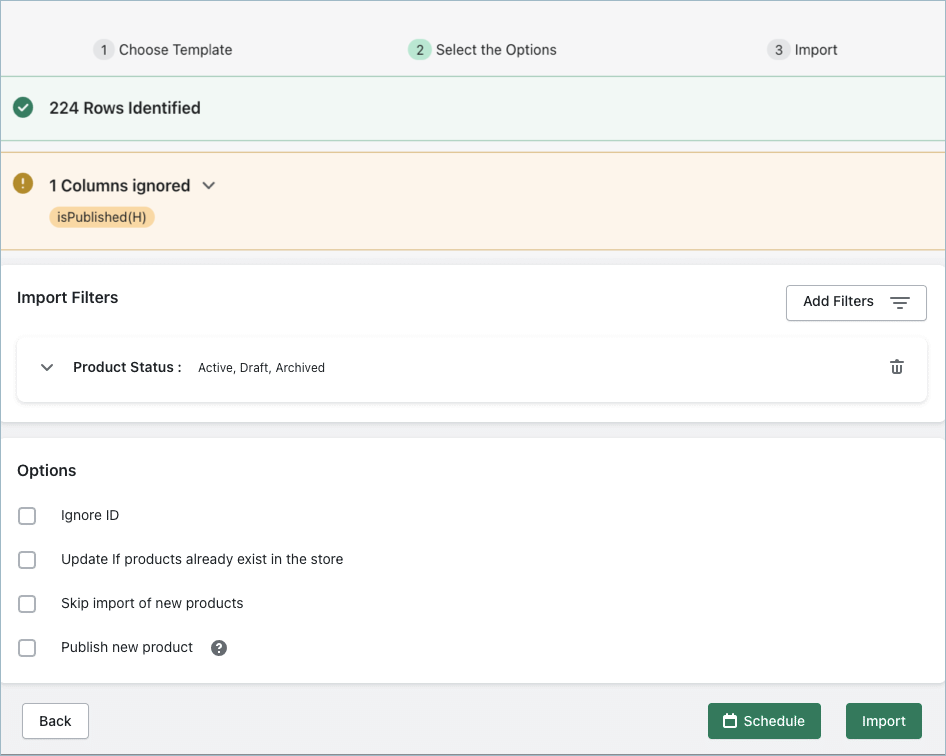
Step 2: Selecting the options
- Once the file is uploaded, you will be moved to the second step. Based the file uploaded, the import template will be automatically detected among Shopify CSV, WooCommerce CSV and Custom CSV.
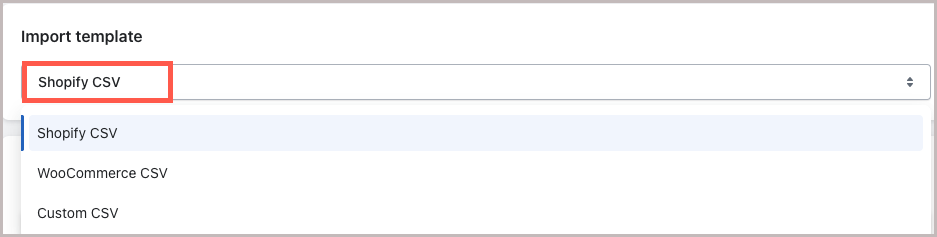
- Manually choose the template if needed. At the top, the number of Products identified and the number of Columns ignored from the CSV file will be displayed. Click on the dropdown arrow to view what fields are ignored.
- Filter the products based on the product status and select the options as needed.
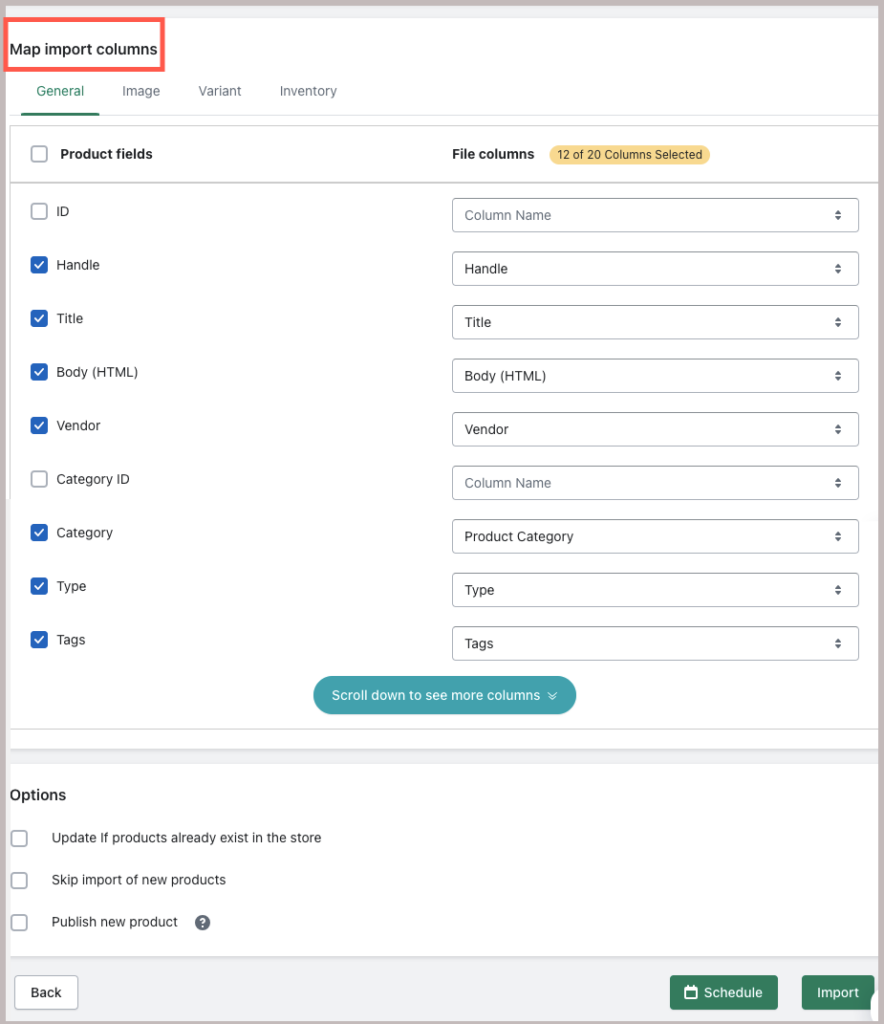
If the Import template is chosen as Custom CSV, the below-shown mapping screen will appear.
Step 3: Import
Click on Import to import the products. Alternatively, to schedule the import, click on Schedule. Once the import is complete, the product data will be updated successfully.
For a more detailed step-wise procedure on import, refer to How to import product using StoreRobo.