The StoreRobo Product Import Export app facilitates product import-export options on your store. The app lets you migrate products from one Shopify store to another in a quick and efficient manner. To migrate the contents:
- Choose the required Import or Export template.
- Select the filter options if needed.
- Map the columns in case a Custom template is selected.
- Click on the respective Import or Export button to finish.
Once the StoreRobo Product Import Export app is installed, click on Apps > SR Product Import Export > Home, from the Shopify admin dashboard.
Exporting Shopify content
From the Home page, you can access the product export options. From the Export Products option, you can export products from your Shopify store. This offers a three-step export process.
Step 1: Choose template
The first step is to choose a template to export products from your Shopify store. Currently, the app supports only the Shopify CSV template, so select Shopify CSV from the Choose Export Template dropdown and click on Proceed.

Step 2: Select the Options
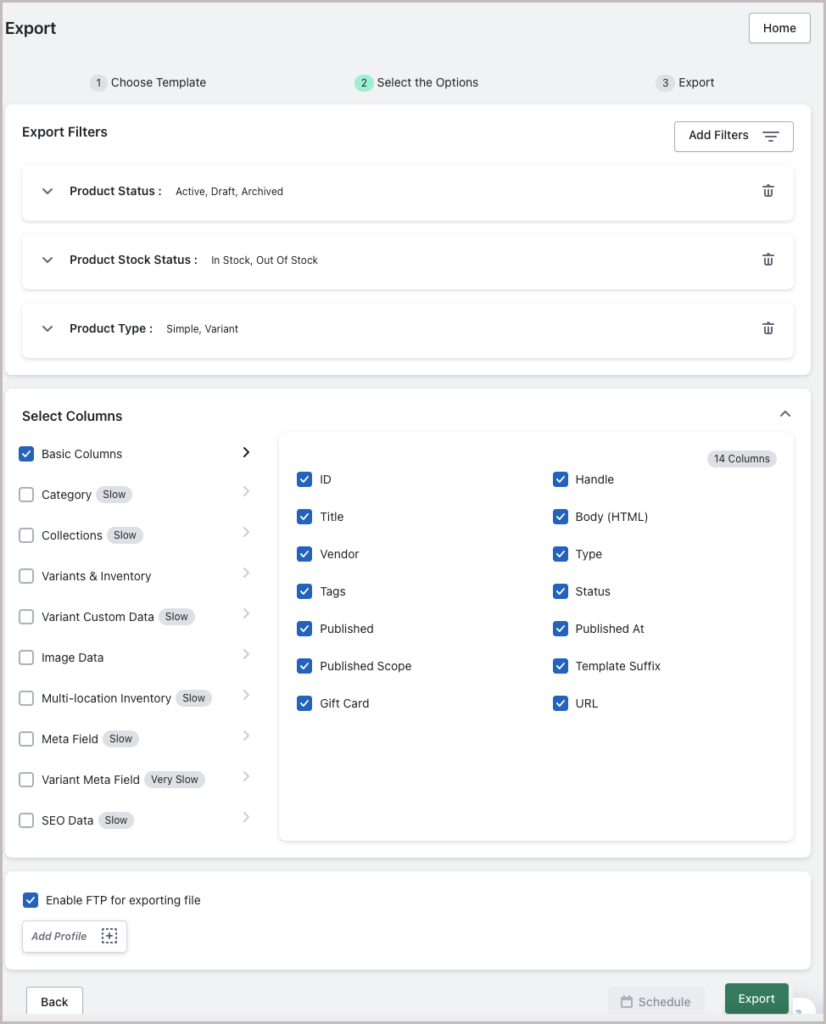
Next, apply filters based on product status, product stock status, and product type. After selecting the product filters and the columns, click on the Export button to proceed to the next step.

Step 3: Export
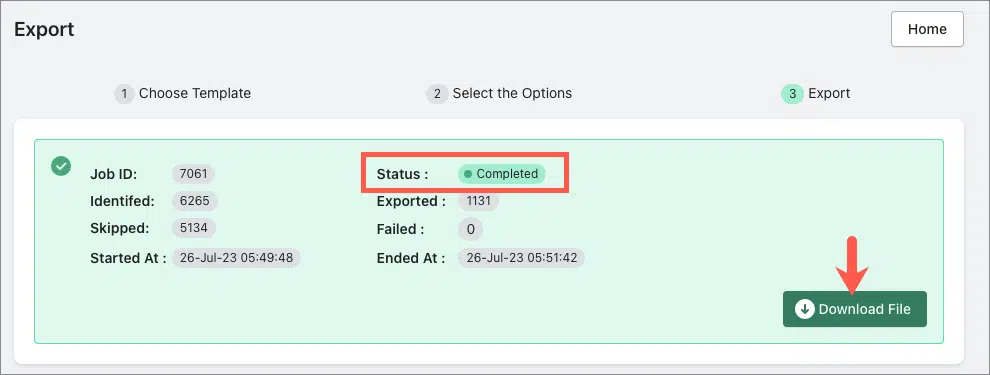
Clicking on the Export button in the previous step will initiate the export process on your store. After finishing the export, you can see the Status as completed. Click on the Download File button to download the product CSV file exported from your Shopify store.

Importing Shopify content
Once the exported file is downloaded, you can navigate to the Import Products option from the Home page. Here, the data is imported in three steps.
Step 1: Choose Import file location
At first, choose the import file location among the three options:
- Local: Uploading the Shopify CSV from the local storage.
- URL: Uploading the Shopify CSV via url.
- FTP/SFTP server: Using the FTP/SFTP server to upload the file.

Step 2: Select the options
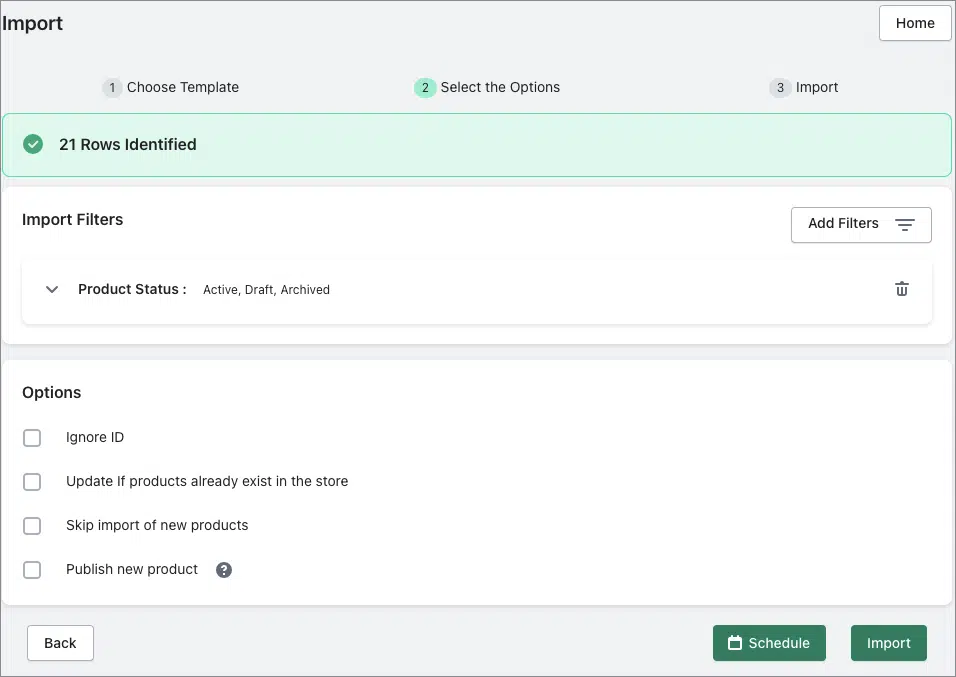
- Once the file is uploaded, you will be moved to the second step. Here, based on the uploaded file, the import template will be automatically detected among Shopify CSV, WooCommerce CSV and Custom CSV. Here, the uploaded file is Shopify CSV.
- Filter the products based on the product status and choose the required options.

Step 3: Import
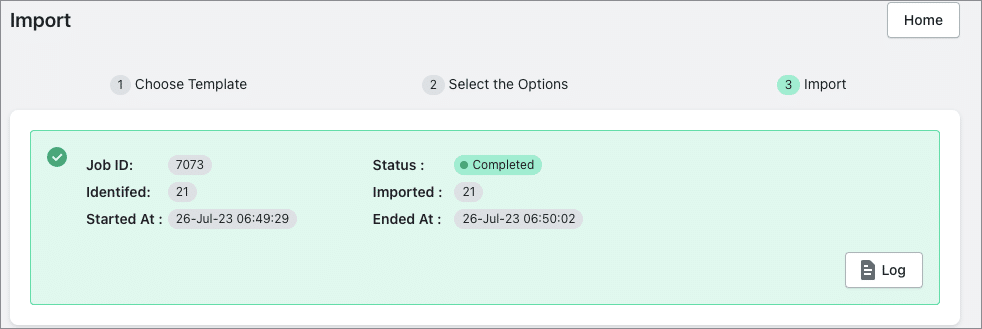
Click on Import to import the products. Alternatively, to schedule the import, click on Schedule.

To get a step-wise procedure of the export-import operation, refer to: How to export and import products in Shopify.