StoreRobo Import Export Suite is a Shopify app designed to streamline the management of your store data. In this guide, we’ll walk you through the seamless import or export of your custom collections.
Custom Collections
A custom collection is a grouping of products that merchants can create to make their store easier to browse. Merchants create a custom collection first and then select the products that will go into it.
Export custom collections
Once you have the app on your store:
- From the Shopify admin dashboard, go to Apps > SR Product Import Export > Home.
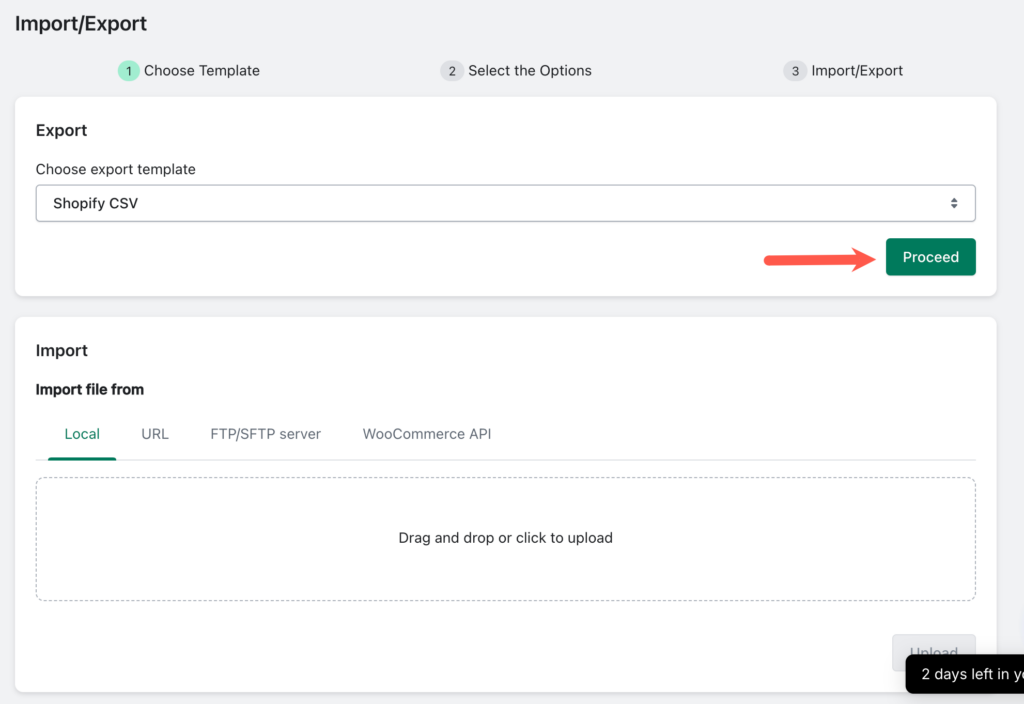
Step 1: Choose Template
Under the Export section, choose an export template – The available export templates are:
- Shopify CSV
- Google Shopping Feed.
Click Proceed to move forward.
Step 2: Select data to export
- Under Select data, choose the data type as Custom Collections.
- Expand the selected data type.
- Under Columns, choose specific data columns to export.
>> Explore the available columns for export
- Additionally, to filter the data columns, click on Add new filter under Filters.
- Set up the necessary filters.
>>Know more about available Custom Collection filters
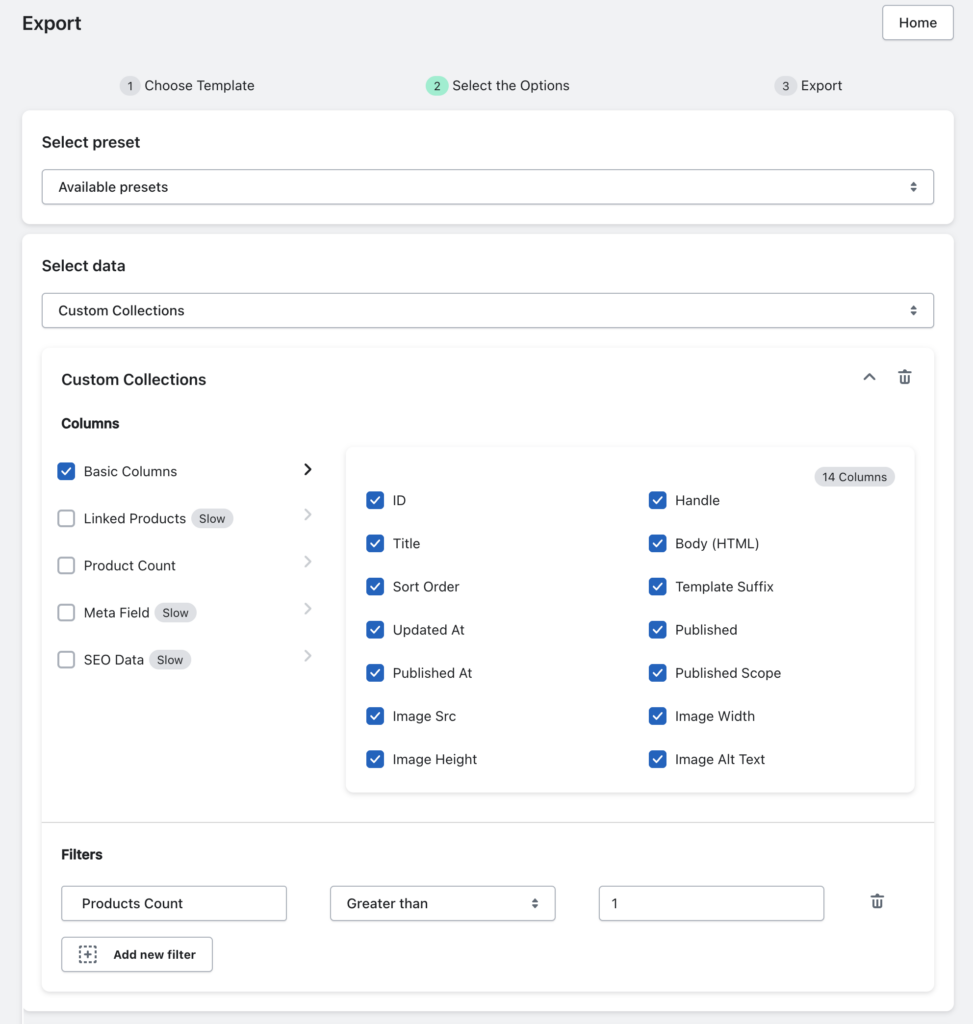
- If you intend to export the data to an FTP server, enable the Export file to FTP/SFTP and configure a new FTP profile. Detailed instructions on setting up an FTP/SFTP profile in StoreRobo can be found in the relevant article.

- To save your current configuration as a preset, ensuring you won’t need to reconfigure columns or filters next time for the same export, simply click on Save and key in a name for your preset under the Save preset section.

- You can choose to export the data immediately or schedule it for a future date.
Step 3: Export
Click on Export to begin the process. Alternatively, to schedule the Export, click on Schedule.
>>Know more about export scheduling.

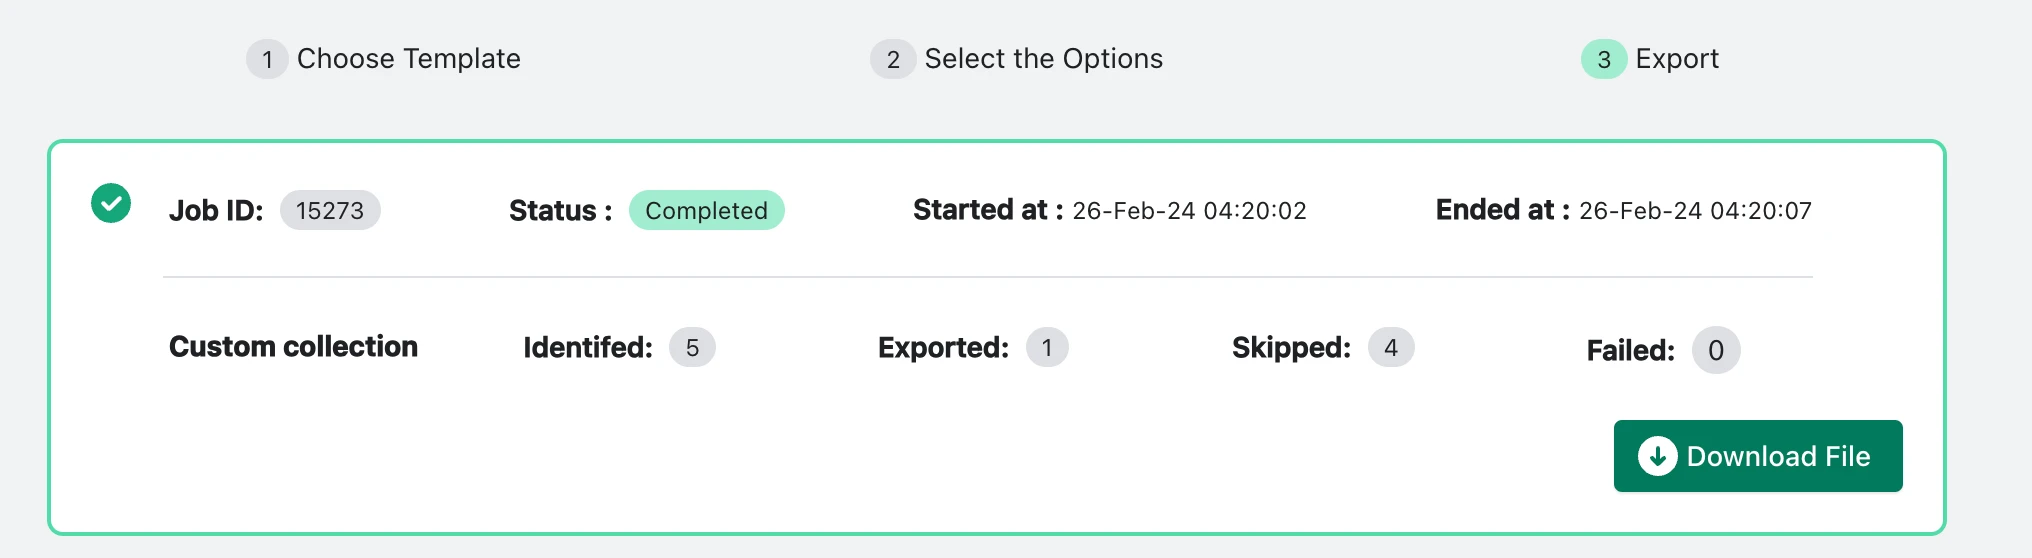
Monitor the export progress until the status changes to Completed.
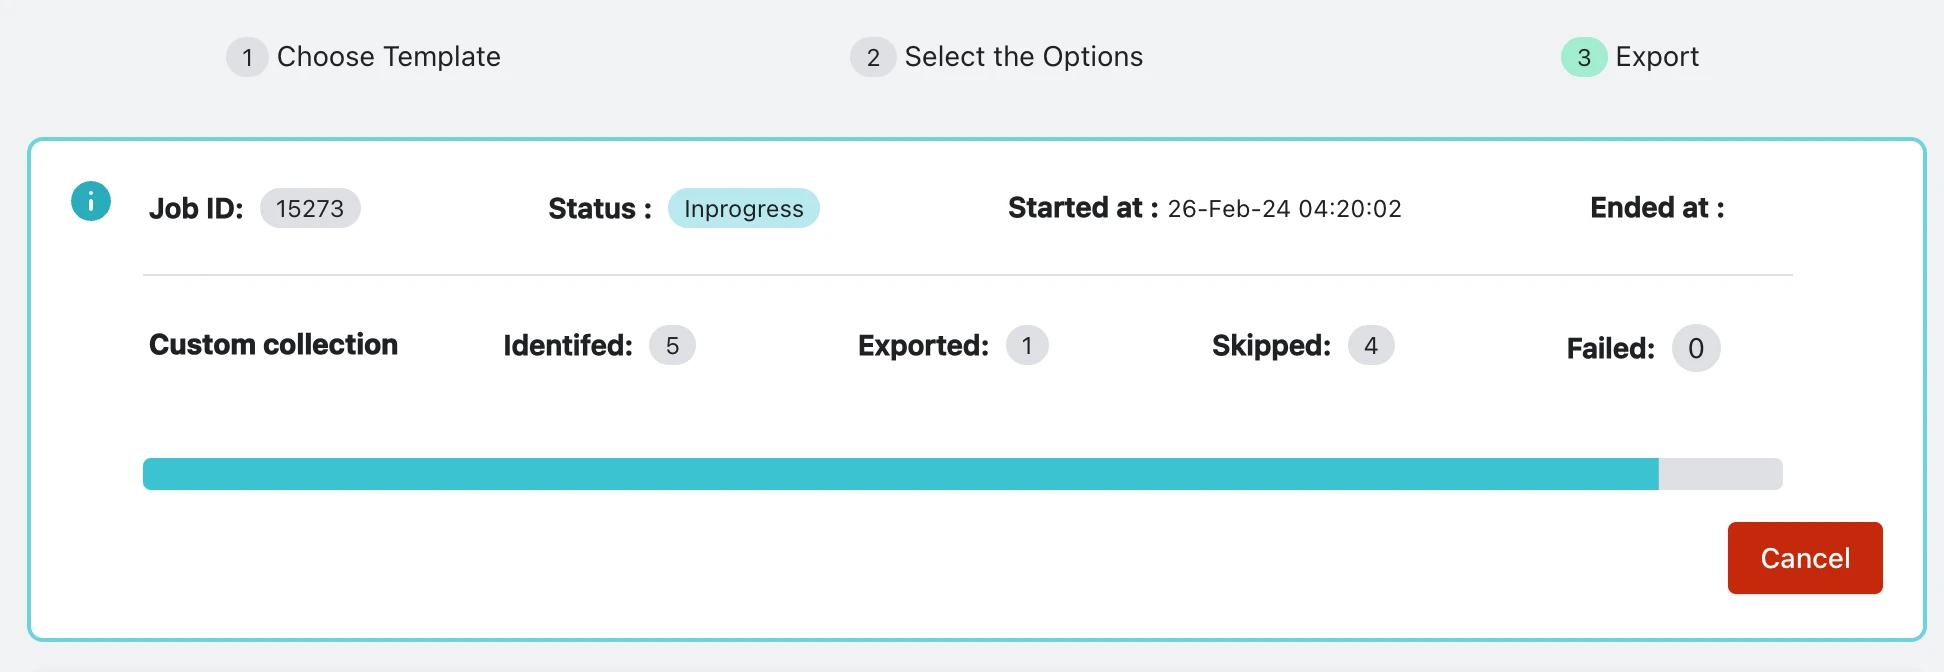
Once the Status changes from Inprogress to Completed, the export will be completed and you will be notified by email.
If you had chosen FTP/SFTP export, the data will be uploaded to the server. Otherwise, you can download it from here
Import custom collections
>> Sample CSV file and Data types to import
Once you have the app on your store:
- From the Shopify admin dashboard, go to Apps > SR Product Import Export > Home.
Step 1: Choose Template
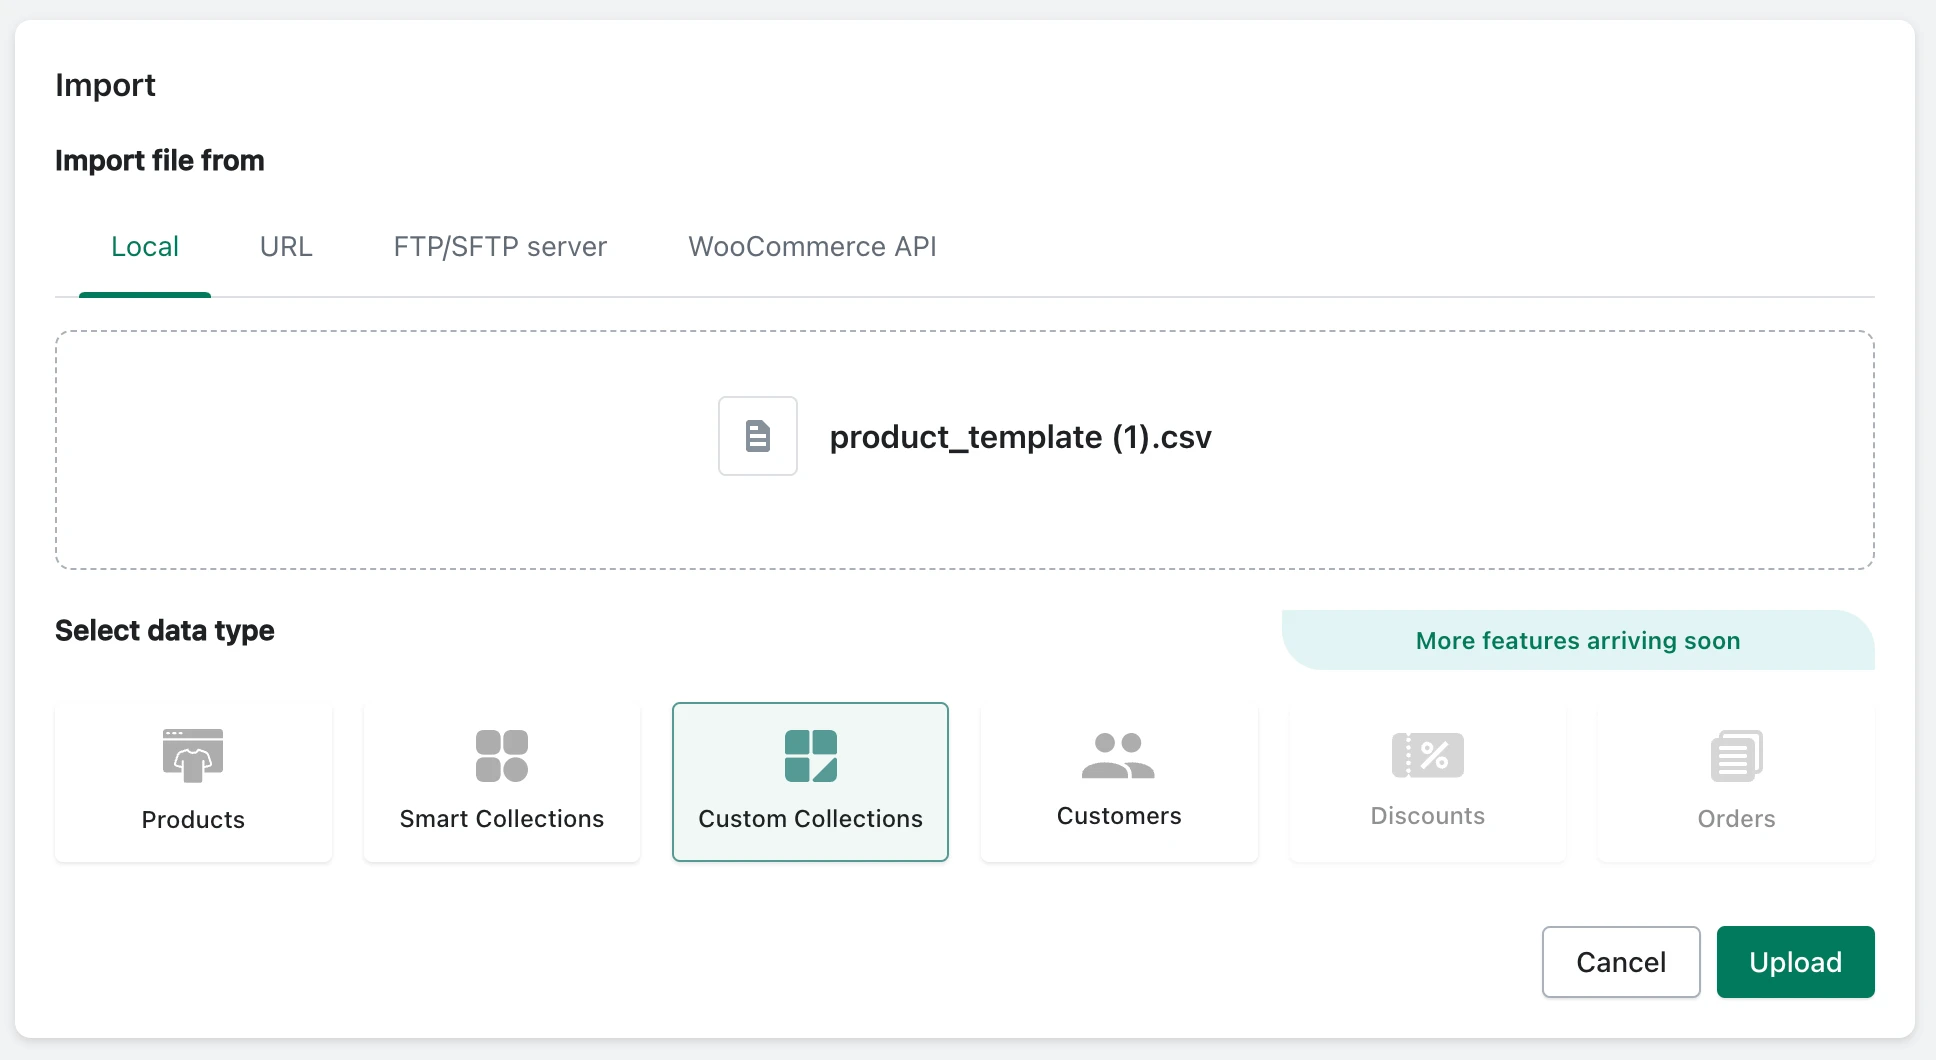
- Under the Import section, choose an import path. The supported import locations are:
- Local storage – Upload the file directly to the app from local device.
- URL – Enter the URL to a file that is hosted on the web
- FTP/SFTP server – Connect to an FTP profile that has the data.
- WooCommerce API – Connect to WooCommerce site with data using API.
- Once the import path is selected, under Select data type, select Custom Collections.
- Click on Proceed (Upload for local storage).
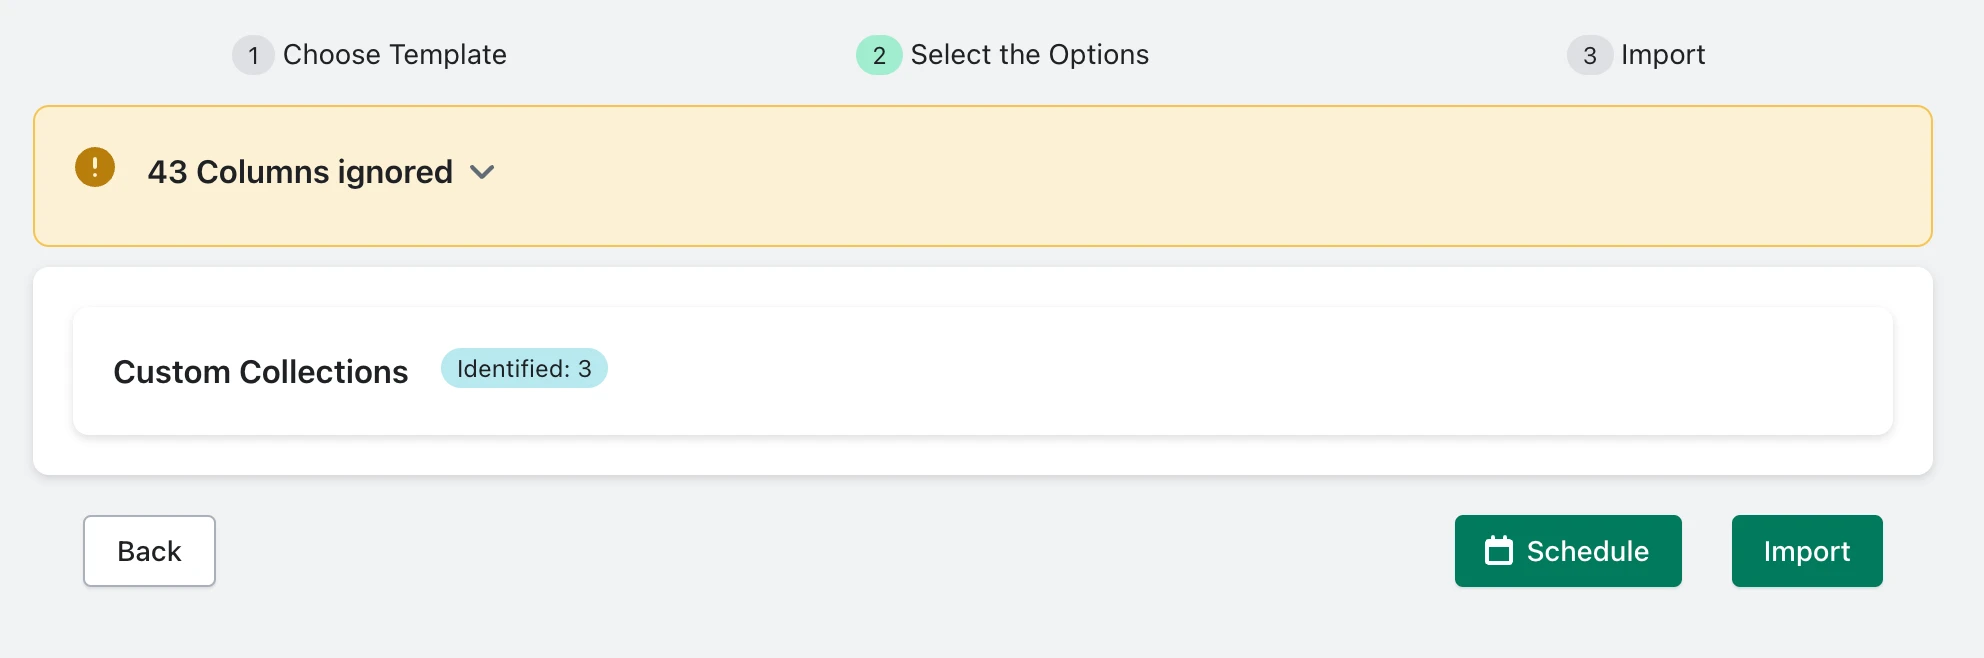
Step 2: Review import data
Once the data is processed and uploaded, the application will automatically detect all available custom collections in the selected file.
You can choose to export the data immediately or schedule it for a future date.
Step 3: Import
Click on import to begin the import process. Alternatively, to schedule the Export, click on Schedule.
>>Know more about import scheduling.
Monitor the export progress until the status changes to Completed.
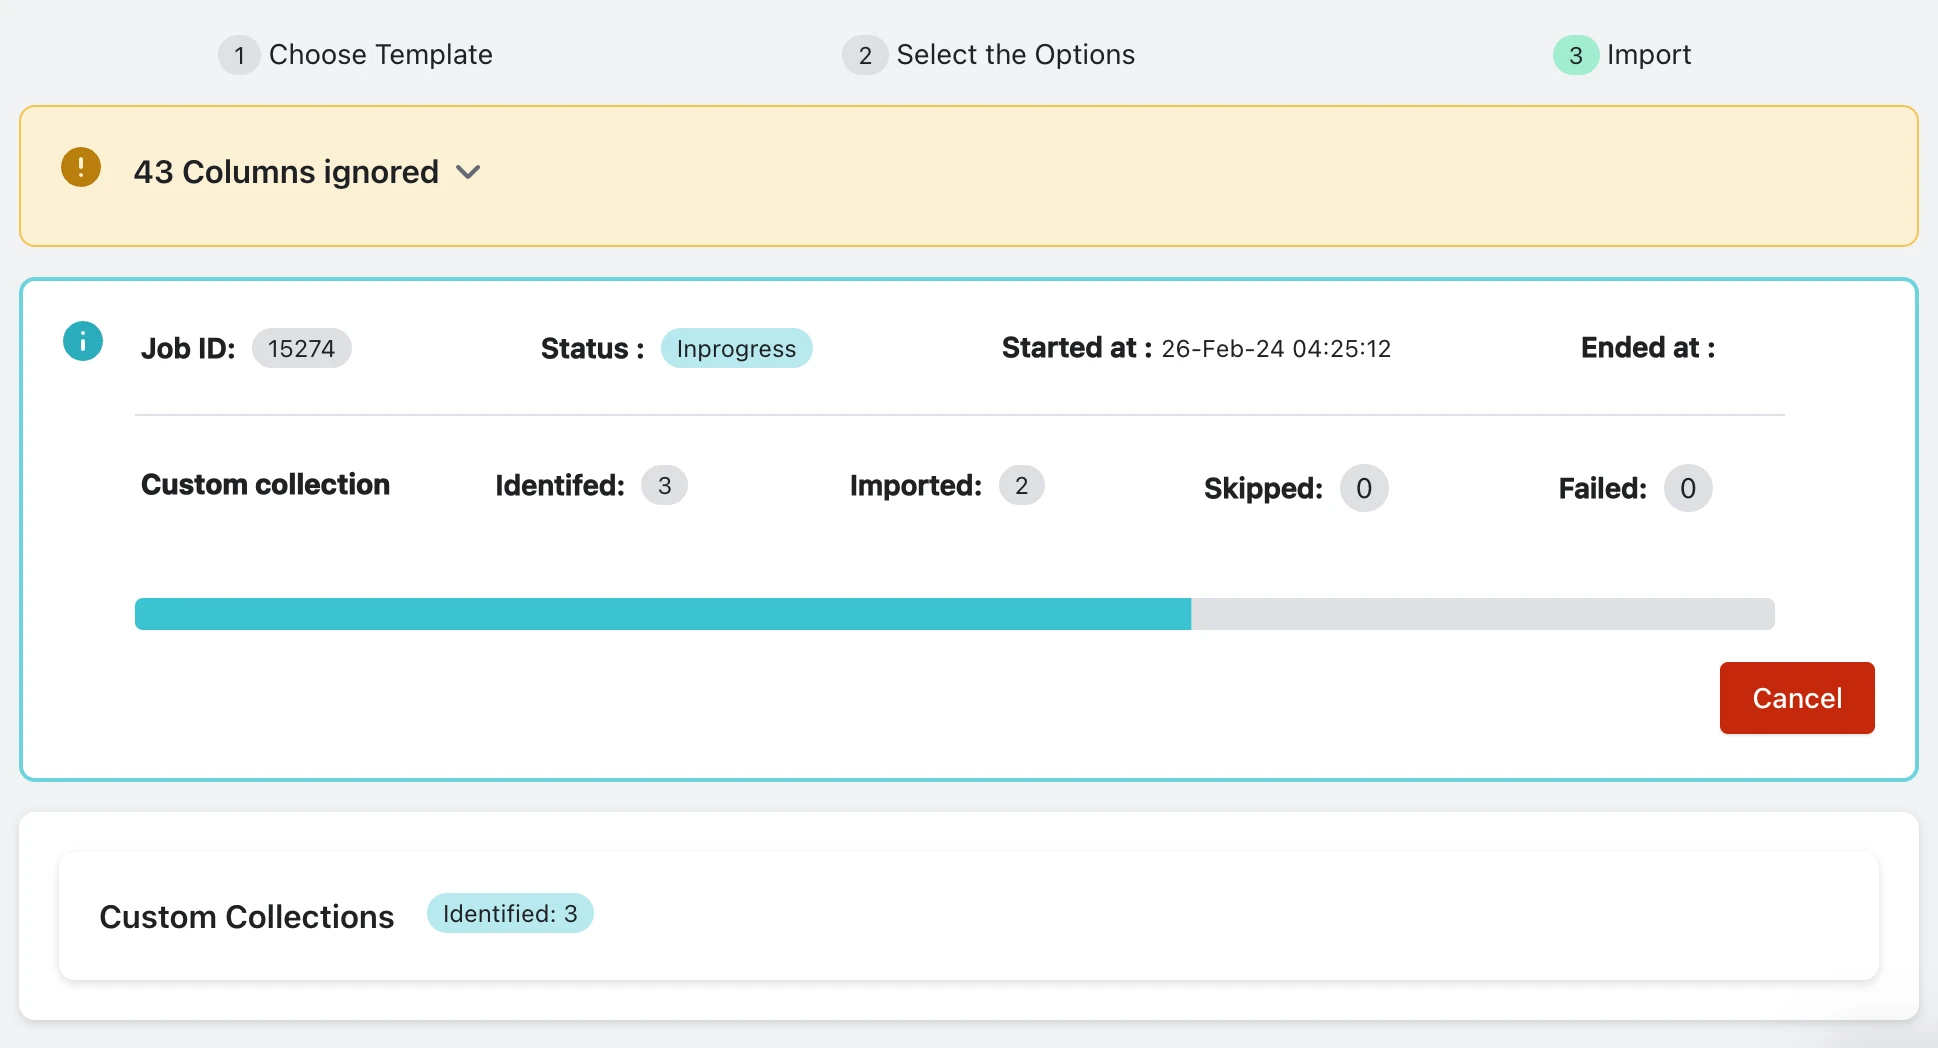
On successful completion of the import process, you will be notified via email.
