StoreRobo Import Export Suite is a Shopify app designed to streamline the management of your store data. In this guide, we’ll walk you through the seamless import or export of your Shopify product data.
Export Products
Once you have the app on your store:
- From the Shopify admin dashboard, go to Apps > SR Product Import Export > Home.
Step 1: Choose Template
Under the Export section, choose an export template – The available export templates are:
- Shopify CSV
- Google Shopping Feed.
Click Proceed to move forward.
Step 2: Select data to export
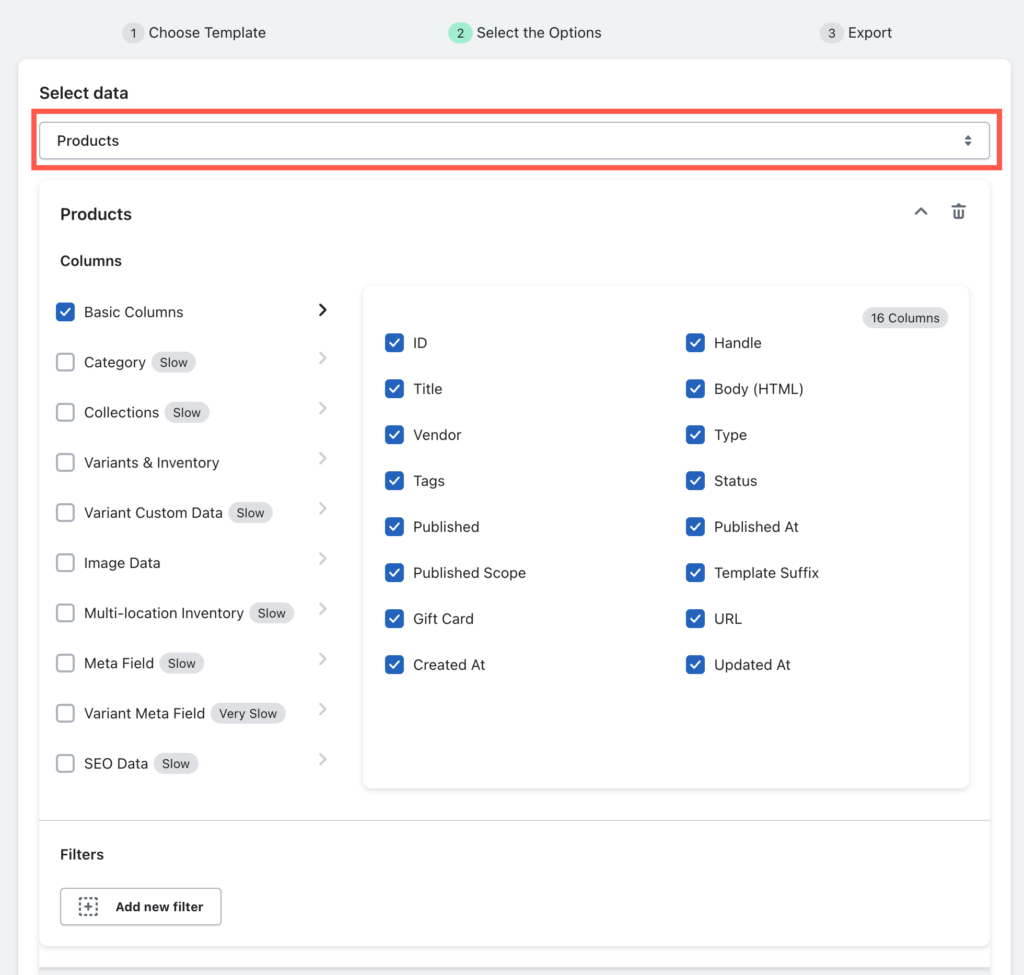
- Under Select data, choose the data type as Products.
- Expand the selected data type.
- Under Columns, choose specific data columns to export.
>> Explore the available product columns for export.
- Additionally, to filter the data columns, click on Add new filter under Filters.
- Set up the necessary filters.
>> Know more about available product filters.
- If you plan to export the data to an FTP server, enable the Export file to FTP/SFTP option and set up a new FTP profile. Alternatively, if you already have an existing FTP/SFTP profile, select it.
>> Setting up an FTP/SFTP profile in StoreRobo

- To save your current configuration as a preset, ensuring you won’t need to reconfigure columns or filters next time for the same export, simply click on Save and key in a name for your preset under the Save preset section.

- You can choose to export the data immediately or schedule it for a future date.
Step 3: Export
Click on Export to begin the process. Alternatively, to schedule the Export, click on Schedule.
>>Know more about export scheduling.

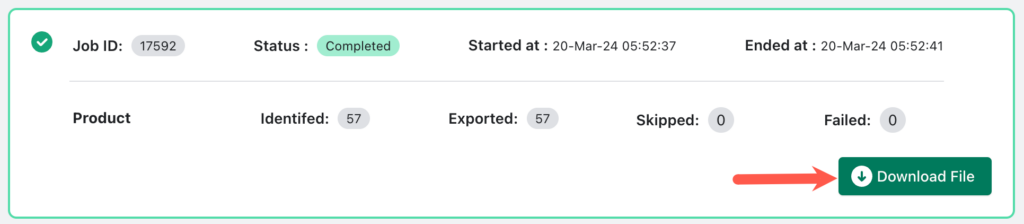
Monitor the export progress until the status changes to Completed.

Once the Status changes from Inprogress to Completed, the export will be completed and you will be notified by email.
If you had chosen FTP/SFTP export, the data will be uploaded to the server. Otherwise, you can download it from here.
Import products
>> Sample CSV file and Data types to import
Once you have the app on your store:
- From the Shopify admin dashboard, go to Apps > SR Product Import Export > Home.
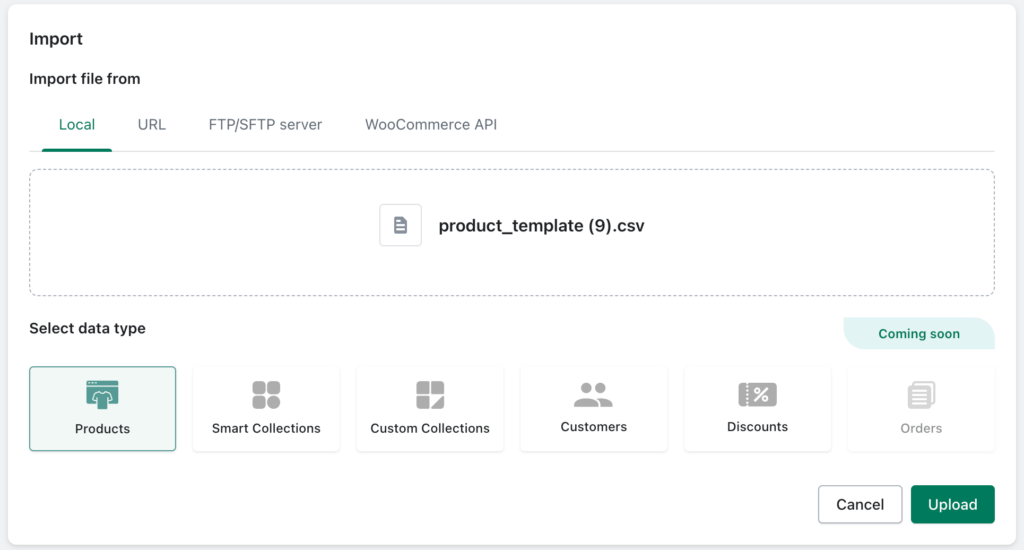
Step 1: Choose import file
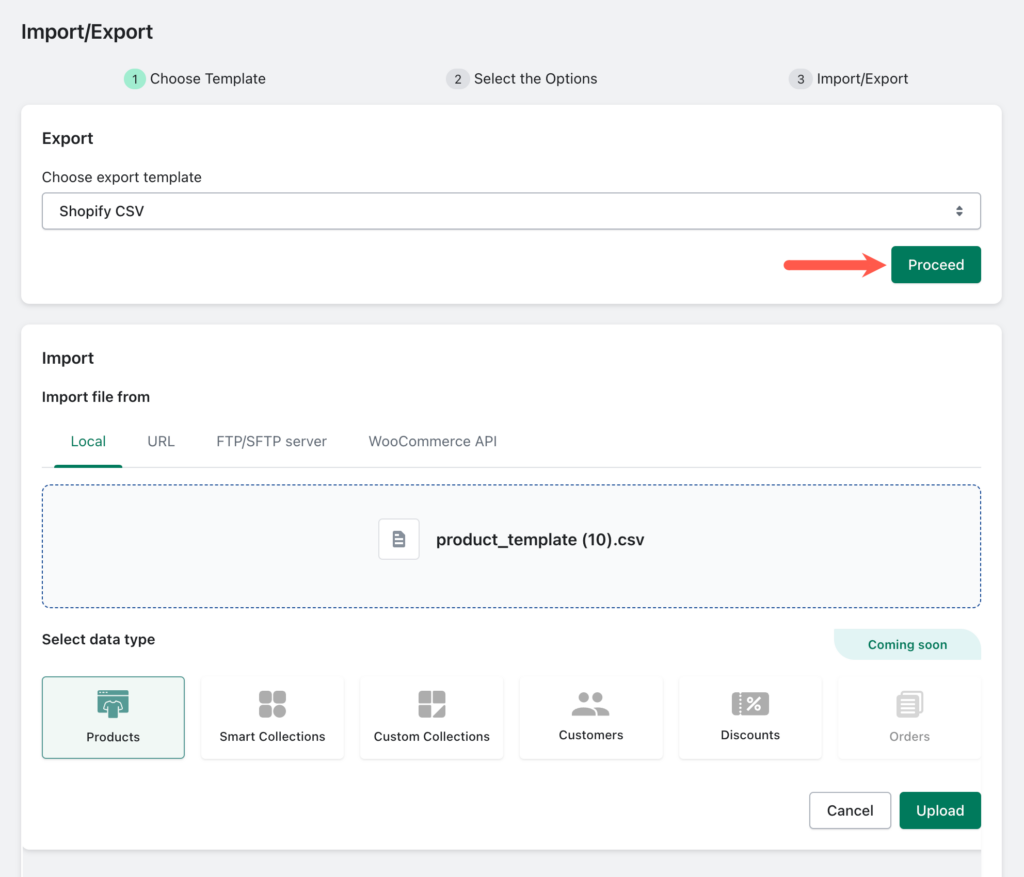
- Under the Import section, choose an import path. The supported import locations are:
- Local storage – Upload the file directly to the app
- URL – URL to a file that is hosted on the web
- FTP/SFTP server – FTP URL to a file that is hosted on a FTP server
- WooCommerce API – Import data directly from WooCommerce store.
- Once the import path is selected, under Select data type, select Products.
- Click on Proceed (Upload for local storage).
Step 2: Select import template and filters
Select a template
Based on the uploaded file, the import template will be automatically detected among Shopify CSV, WooCommerce CSV, and Custom CSV.
If the selection is wrong select the import template from the drop-down. The available options include:
- Shopify CSV
- WooCommerce CSV
- Custom CSV
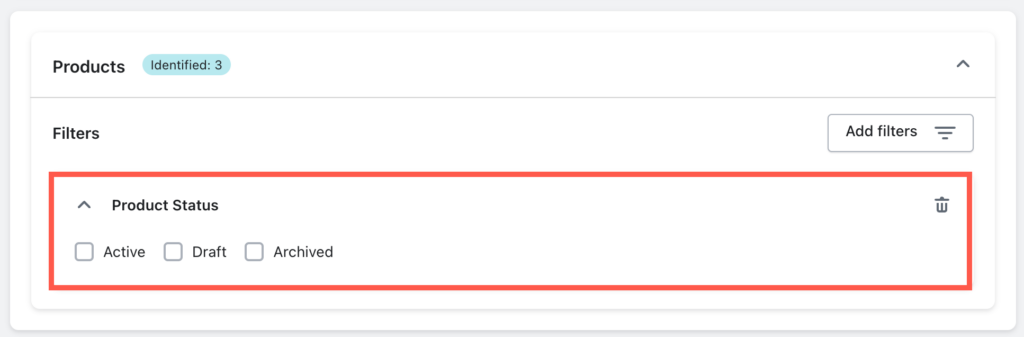
Filter data
You have the option to filter products from being imported based on the product status. Under the Product Status dropdown, choose the product status on which the products are to be imported.
The three available options are:
- Active: Import active products only.
- Draft: Import drafted products only.
- Archived: Import archived products only.
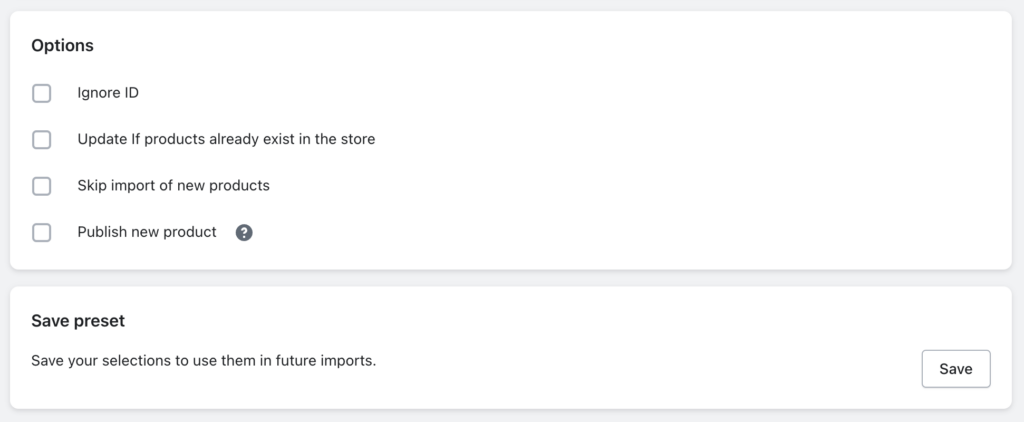
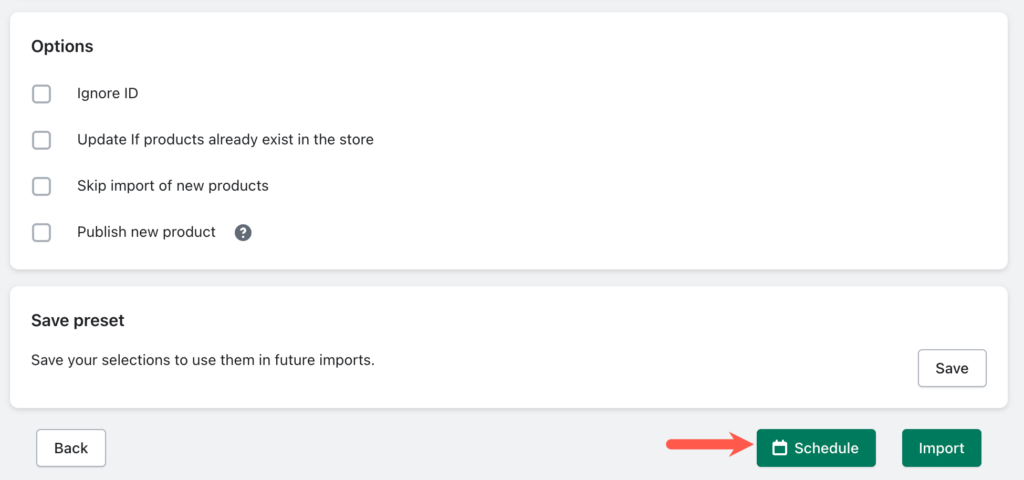
Select options
Here, you have different options to import products to your Shopify stores.
- Ignore ID
- Update If products exist in the store
- Skip import of new products
- Publish New product
Additionally, save the current selections as a preset under Save preset. Then click on Save and provide the preset name.
If the Import template is chosen as Custom CSV, the below-shown mapping screen will appear.
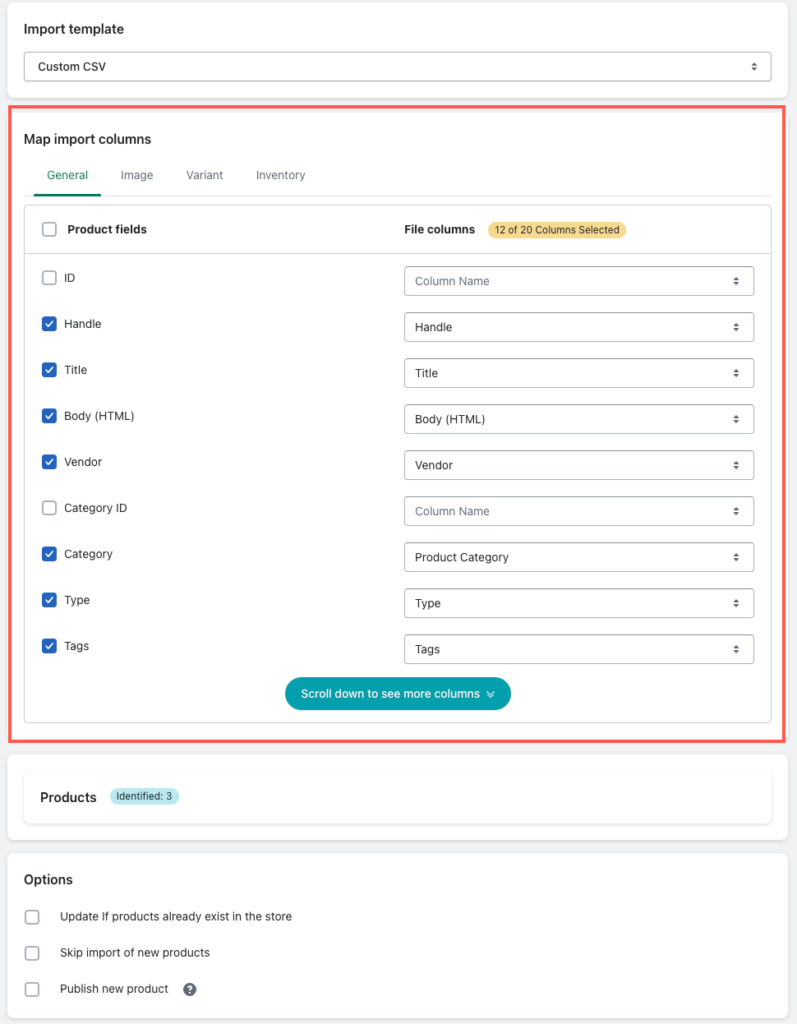
Shopify uses specific terms for its data fields, while your source file (like a CSV) might use different names for the same information. Mapping tells Shopify which column in your file corresponds to the data it needs, like Product Title or Variant Price. This ensures your data gets imported into the correct fields within Shopify.
After choosing the required options, click on Import to import the products. It is also possible to schedule the import.
Step 3: Import
Click on import to begin the import process. Alternatively, to schedule the Export, click on Schedule.
>> Know more about import scheduling.
Clicking on the Import button in the previous step will initiate the import process in the store. The duration of the import will depend on the number of products getting imported.
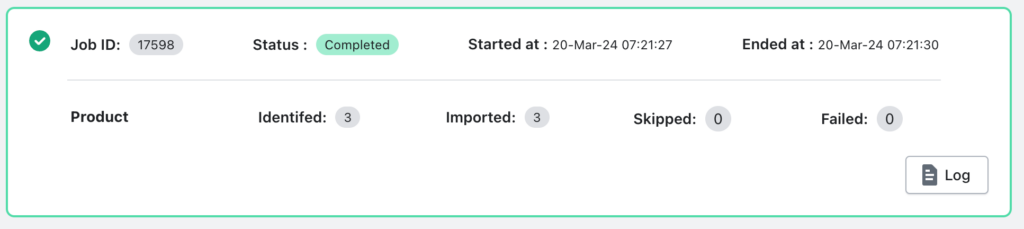
After finishing the import, the Status will be changed to completed. Click on the Log button to download the product import log.
The fields in the import screen are similar to the export screen.
- Job ID – The ID for the product import action.
- Identified – Total number of products identified in your store.
- Skipped – Number of products skipped from being imported. (Only visible if you selected any product filters or choose to skip products from being imported)
- Started At – The start date and time information.
- Status: The status of the import process.
- Imported – Number of products imported.
- Failed – Number of failed products from importing. (if any)
- Ended At – The end date and time information.