Managing your Shopify store often involves importing and exporting data, whether it’s adding new products, updating product information, or exporting customer details. However, these repetitive tasks can consume valuable time. Fortunately, StoreRobo Import Export Suite by WebToffee offers a powerful solution called Presets to streamline this process.
Import/Export presets
Presets act as saved templates for your import and export tasks. They capture the specific configuration you used for a particular data transfer, including the data types you selected, the formatting options, filters, and even the file mapping location (for imports).
This means you can:
- Save Time: No need to reconfigure import/export settings every time you perform a similar task. Simply select the relevant preset and get started!
- Reduce Errors: Presets ensure consistency by using the same configuration every time, minimizing the risk of errors caused by manual setup.
- Improve Efficiency: Streamline your workflow by quickly accessing and applying pre-defined configurations for your data transfers.
Export preset
Follow these steps to create and use an export preset:
Creating export preset
Once StoreRobo Import/Export Suite is installed,
- Head to Apps > StoreRobo Import/Export Suite from the admin panel.
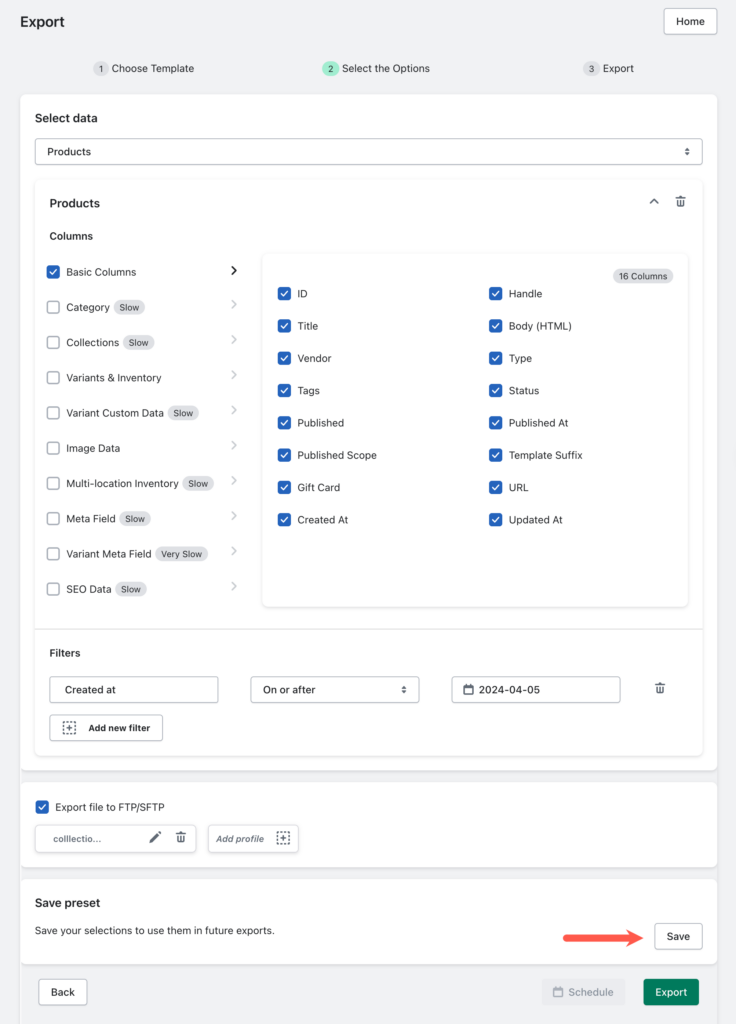
- Under Export, select an export template and click on Proceed.
- Select the data type to export, set up filters, and configure the FTP server if needed.
- After all the configurations are set, Simply click on Save under the Save preset section.
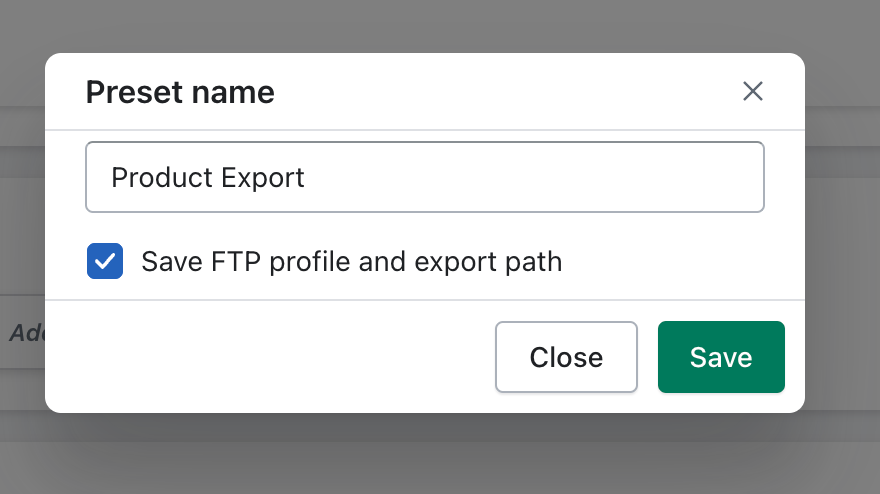
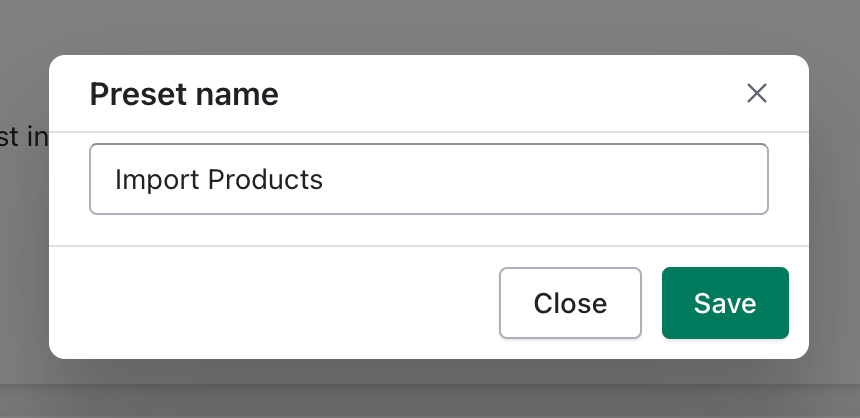
- In the popup, provide a name for your preset.
- If you want to save the FTP configuration within the preset, select the option Save FTP profile and export path.
- Finally, click on Save to save the preset.
Now the entire selection you just made is saved as a preset. When you want to do another export with the same configuration, simply select this preset instead of configuring all these options again.
Using export preset
Once StoreRobo Import/Export Suite is installed,
- Head to Apps > StoreRobo Import/Export Suite from the admin panel.
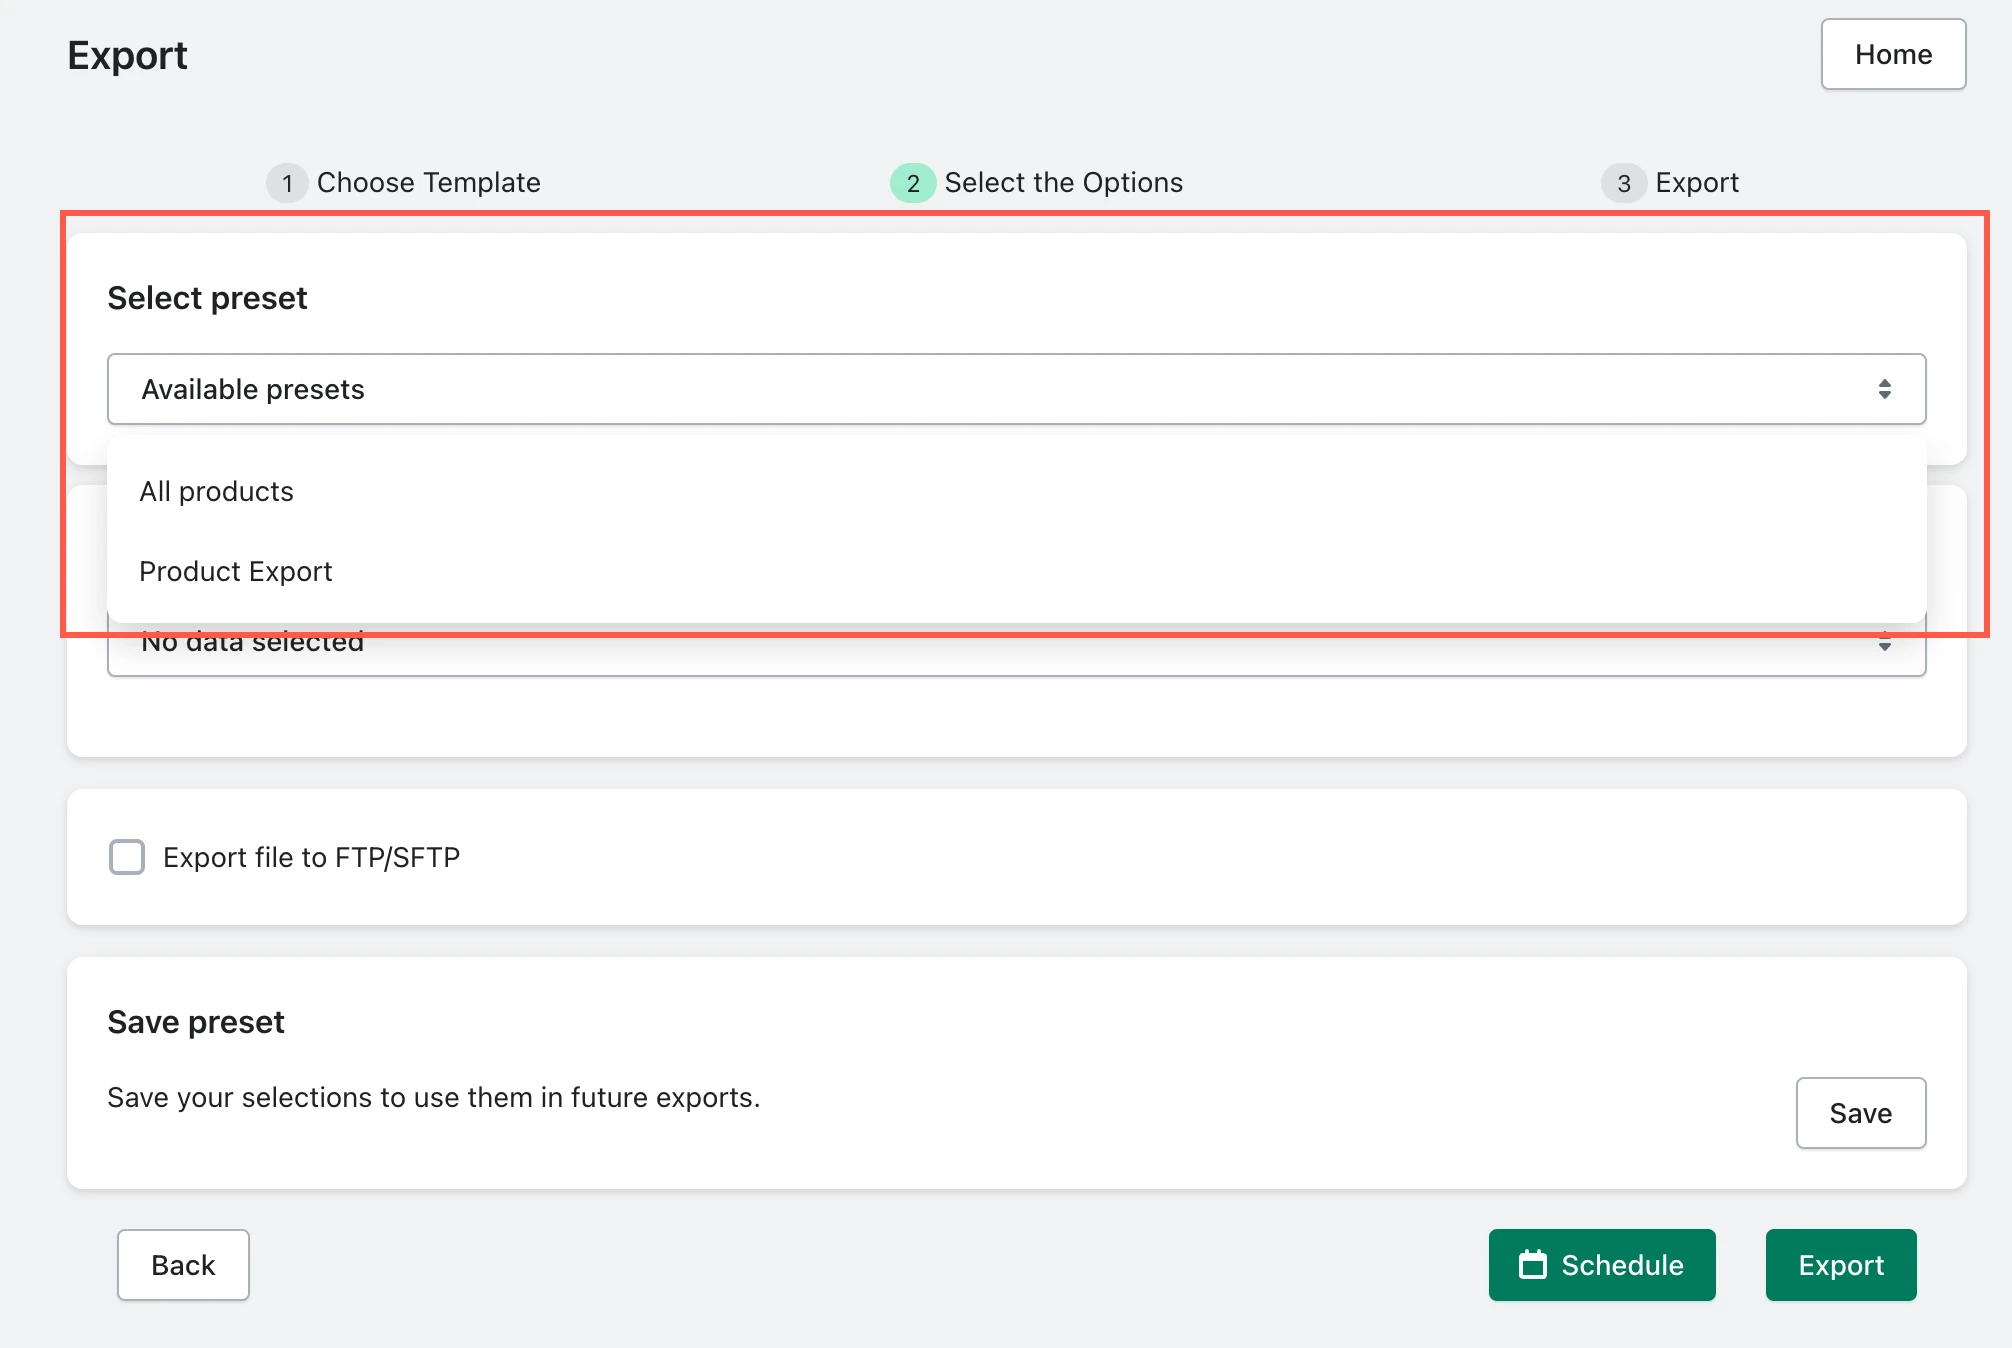
- Under Export, select an export template and click on Proceed.
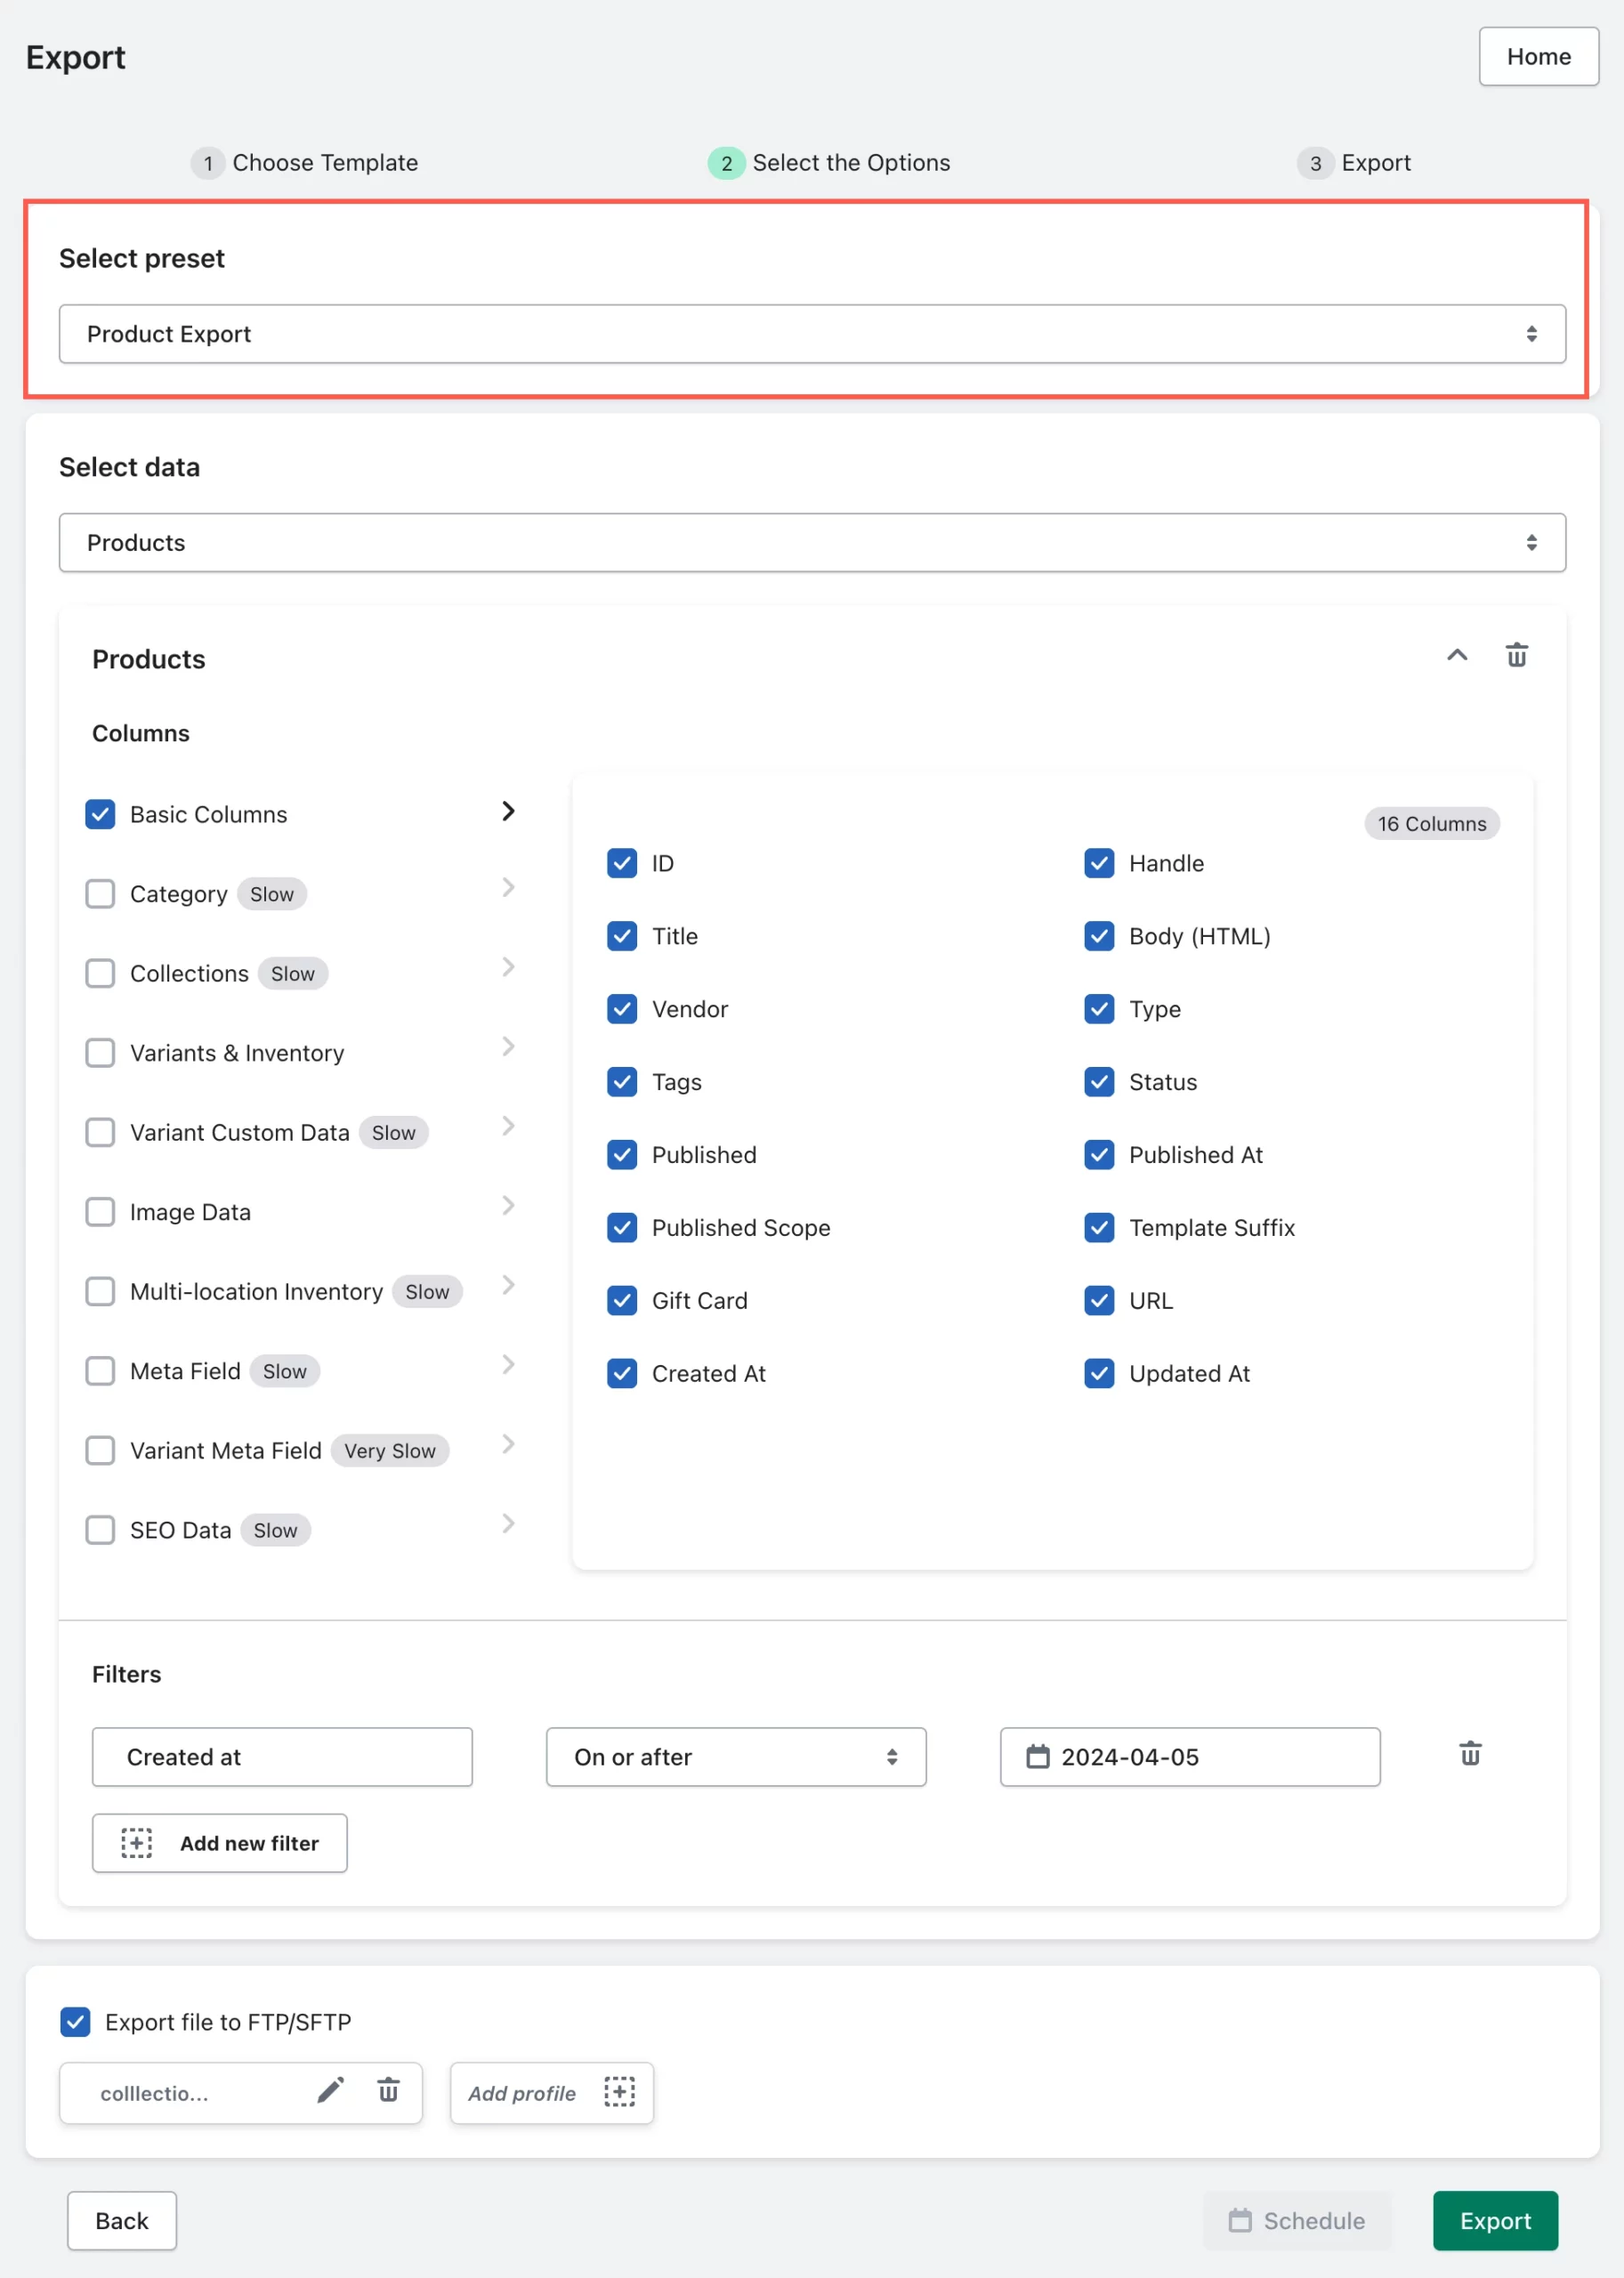
- Expand the Available preset option and select the desired preset.
- The preset’s configurations will be applied automatically.
On selecting the filter, all the options will be automatically selected based on the selected preset.
Now, with a simple click, you can export the data. All the time-consuming configurations and heavy lifting are taken care of by the presets.
Import preset
Here’s a step-by-step guide to creating and using a preset for your import tasks:
Creating import preset
Once StoreRobo Import/Export Suite is installed,
- Head to Apps > StoreRobo Import/Export Suite from the admin panel.
- Under Import, select the file to import, select an export template, and click on Proceed.
- Select the import template, set up filters, and configure the options for import.
- After all the configurations are set, Simply click on Save under the Save preset section.

- In the popup, provide a name for your preset.
- Finally, click on Save to save the preset.
Now the entire selection you just made is saved as a preset. When you want to do another import with the same configuration, simply select this preset instead of configuring all these options again.
Using import preset
Once StoreRobo Import/Export Suite is installed,
- Head to Apps > StoreRobo Import/Export Suite from the admin panel.
- Under Import, select the file to import, and select an export template.
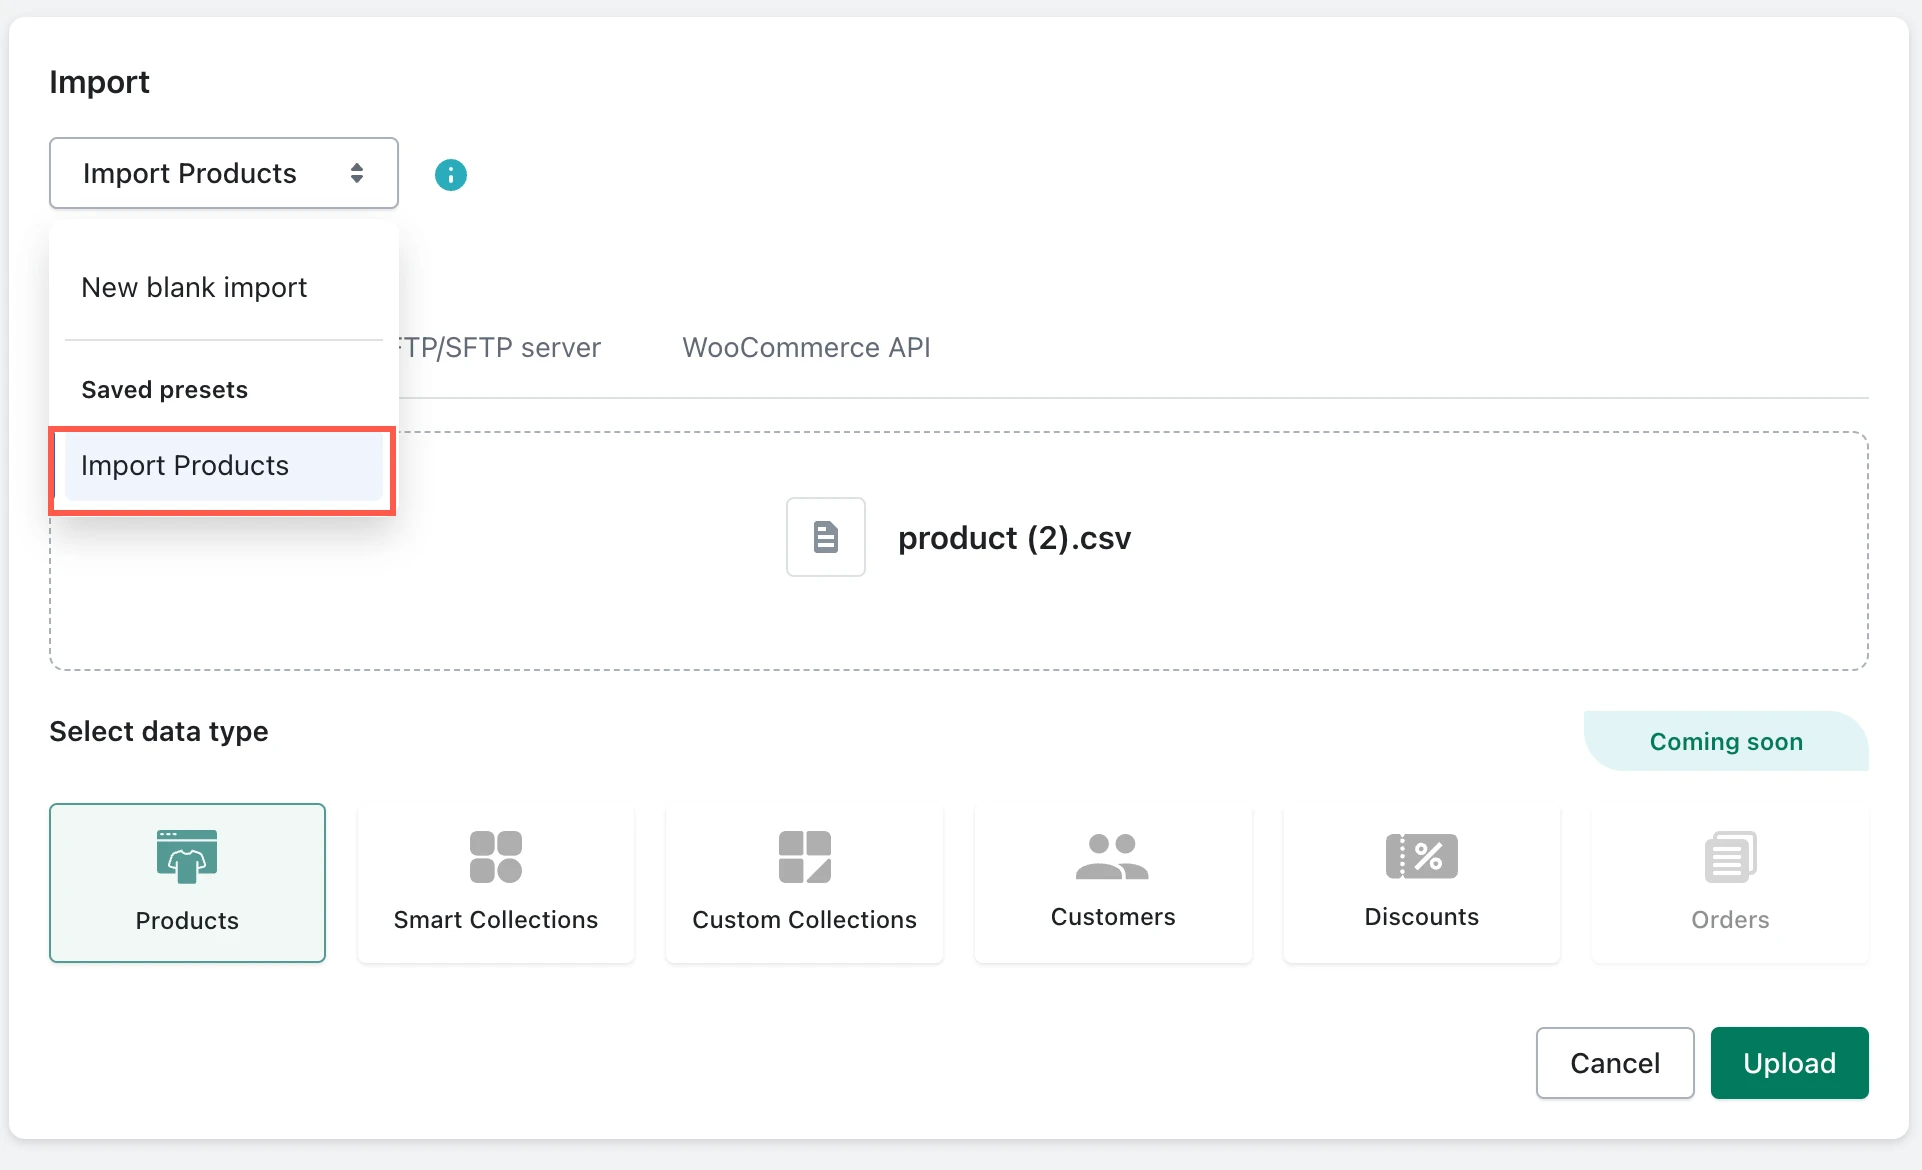
- Now, on top of the import section, you will have the option to move on with a manual import process or to choose a preset you have already saved.
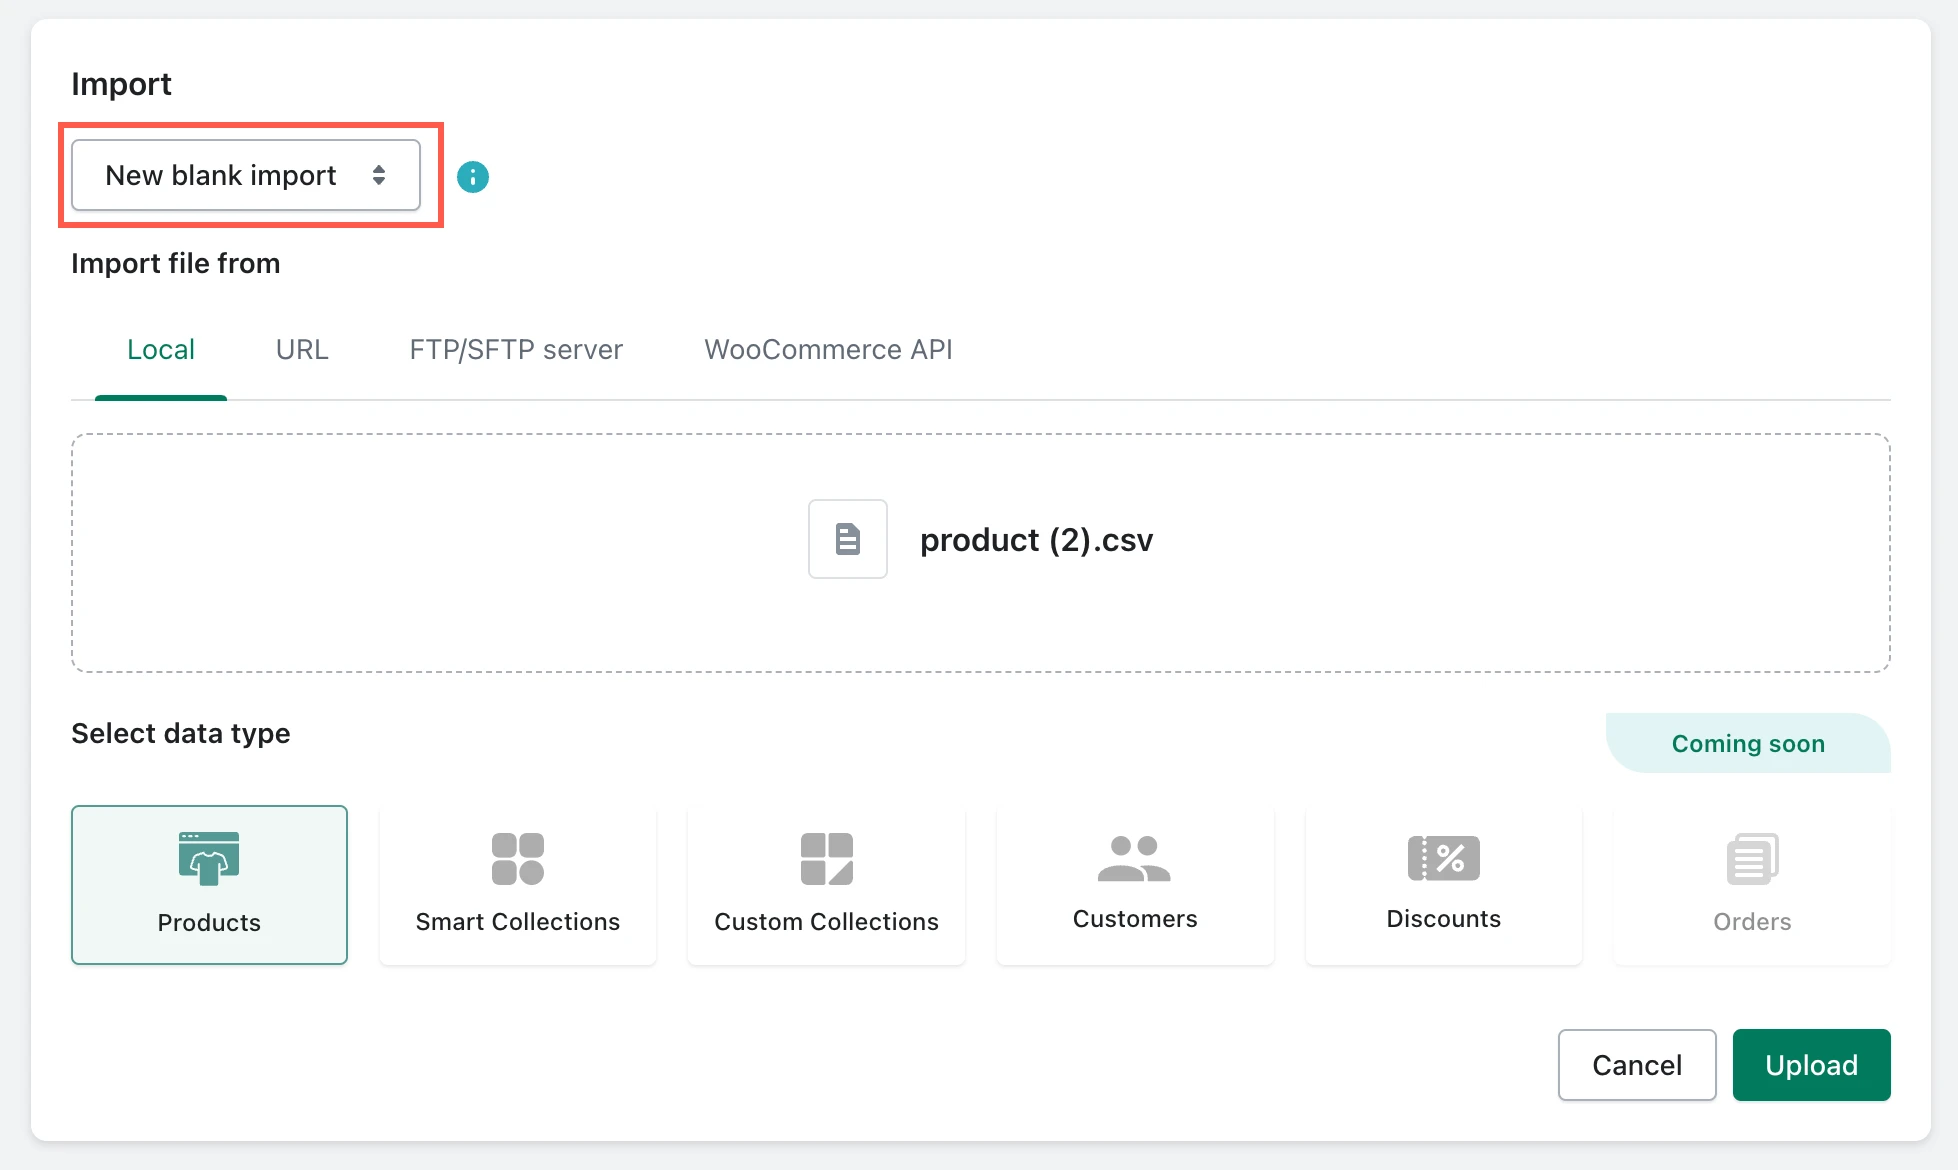
- Expand the option, select the preset, and click on Proceed.
Now on the page where you have to set up the filters and options, all the configurations will be automatically selected based on the selected preset.
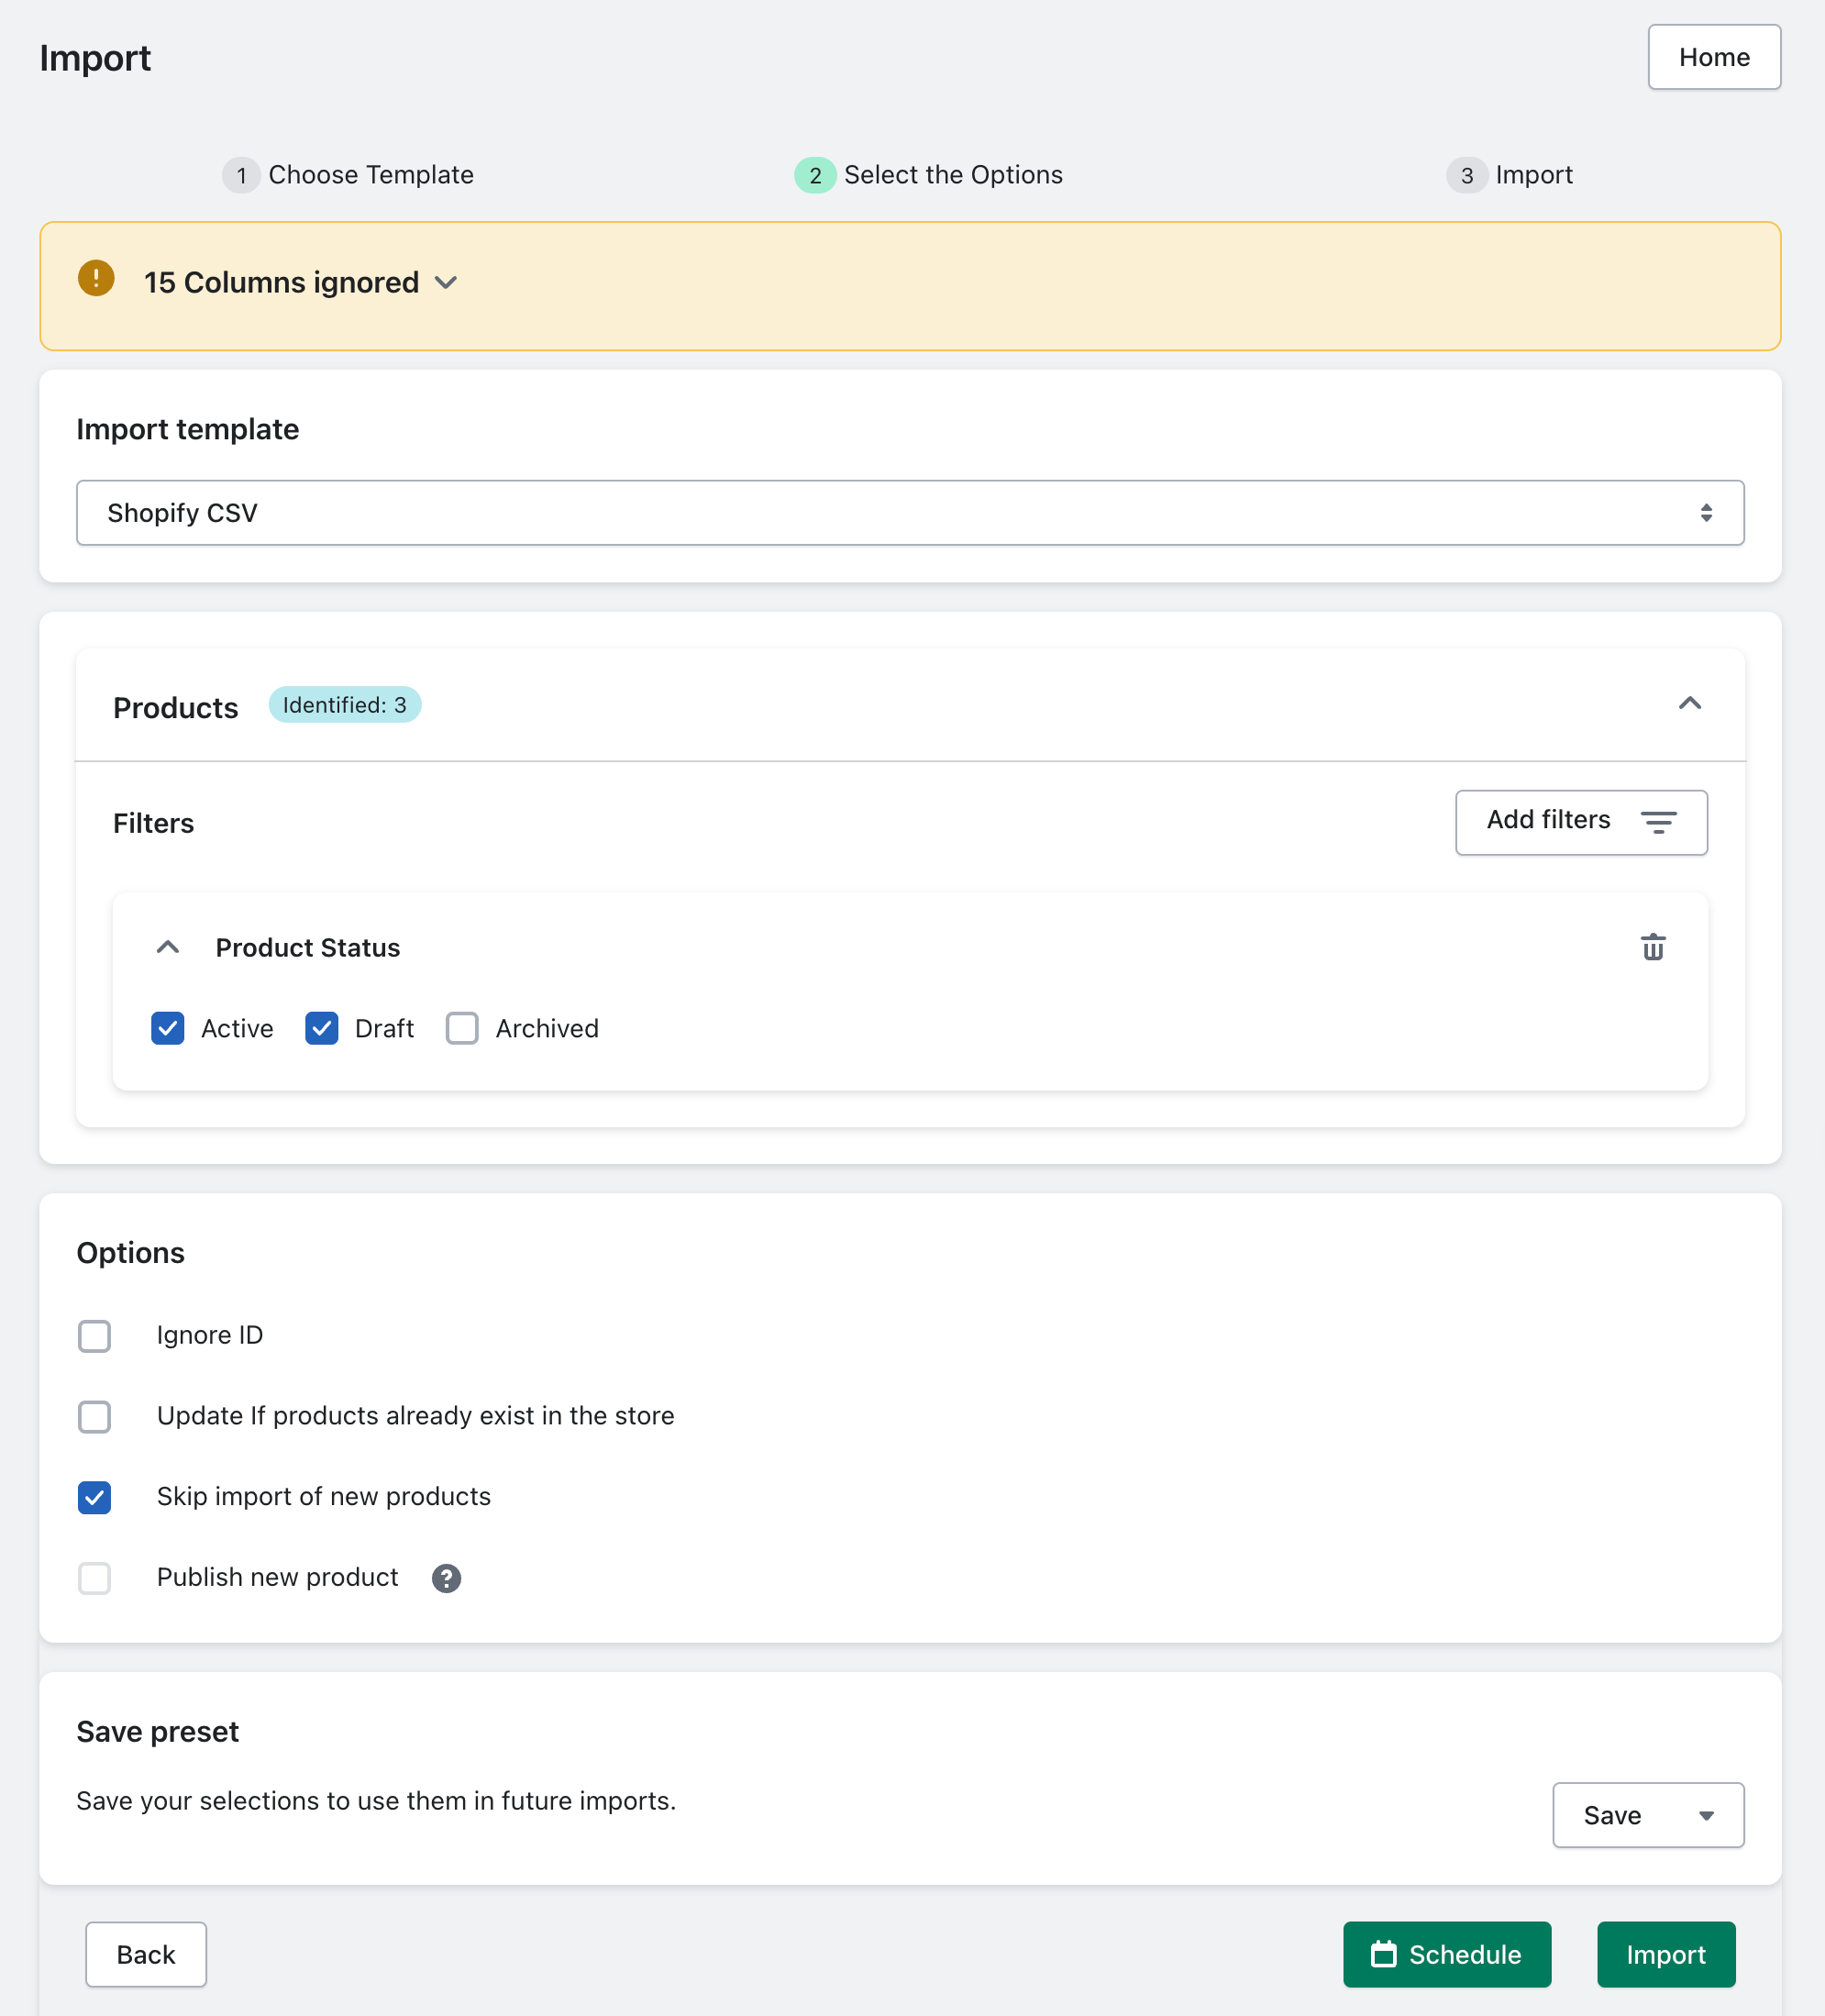
Now, with a simple click, you can import the data. All the time-consuming configurations are taken care of by the presets.