The StoreRobo Import Export Suite app lets you export and import products from WooCommerce to Shopify. During the action, you can either export/import the data directly into the store or schedule the action for later. This article explores about:
Steps to schedule export
To schedule the export:
- From the Shopify admin panel, navigate to Apps > SR Product Import Export > Home.
- Under Export Products, choose the Shopify CSV and click on Proceed.
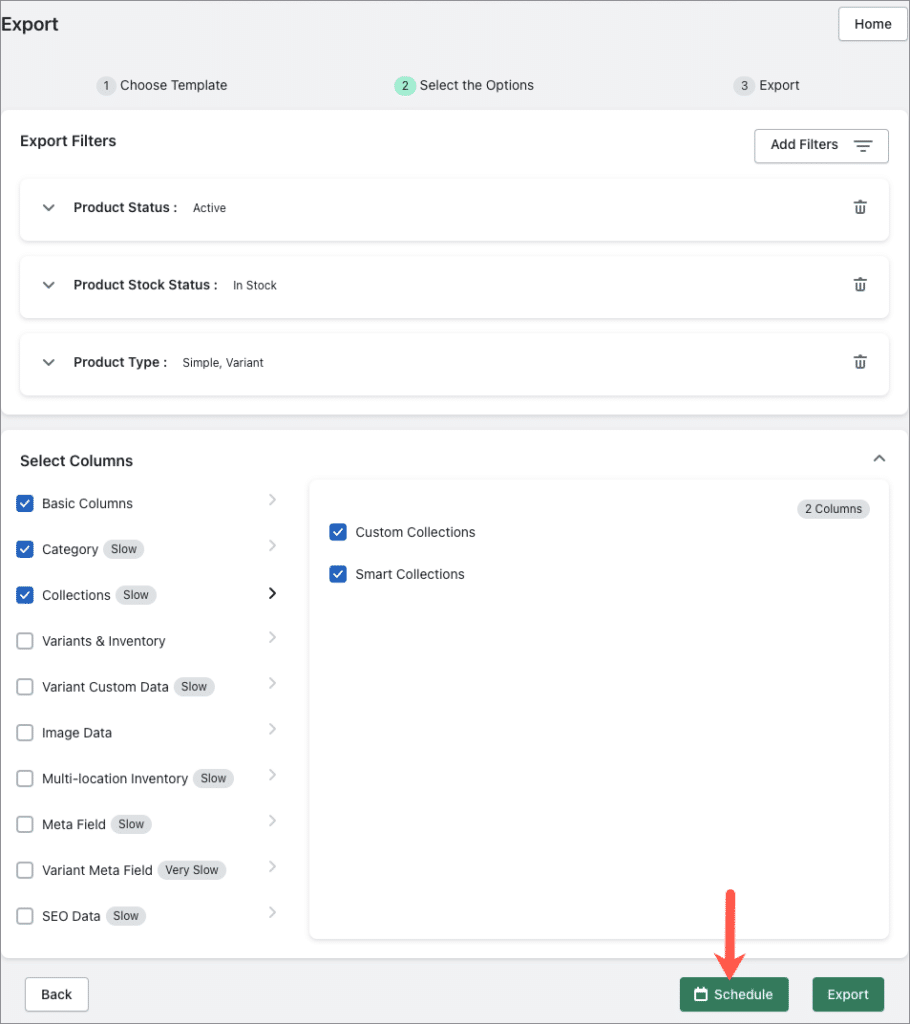
- After configuring the export data as needed, click on Schedule.

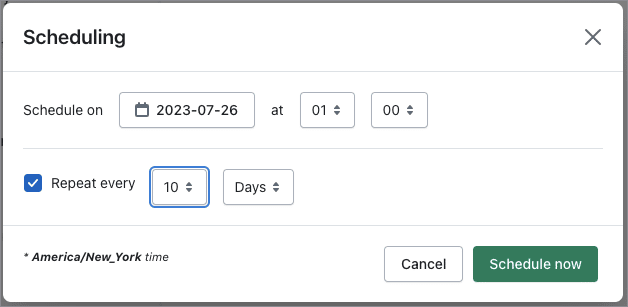
Once the Schedule button is clicked, a pop-up window will appear as shown below.
- Under Schedule on, specify the date and time you want the export to happen.
- If you want the export to happen periodically, enable the option Repeat every and choose the interval at which you want the export to happen. eg., 10 days as shown below.
- Click on Schedule now.

Once the action is scheduled, it will appear on the Scheduled Jobs page as shown. Edit the action if required. You can also choose to Pause and Cancel the process.

Steps to schedule import
To schedule the import:
- From the Shopify admin panel, navigate to Apps > SR Product Import Export > Home.
- Under Import Products, choose the import from location and the template.
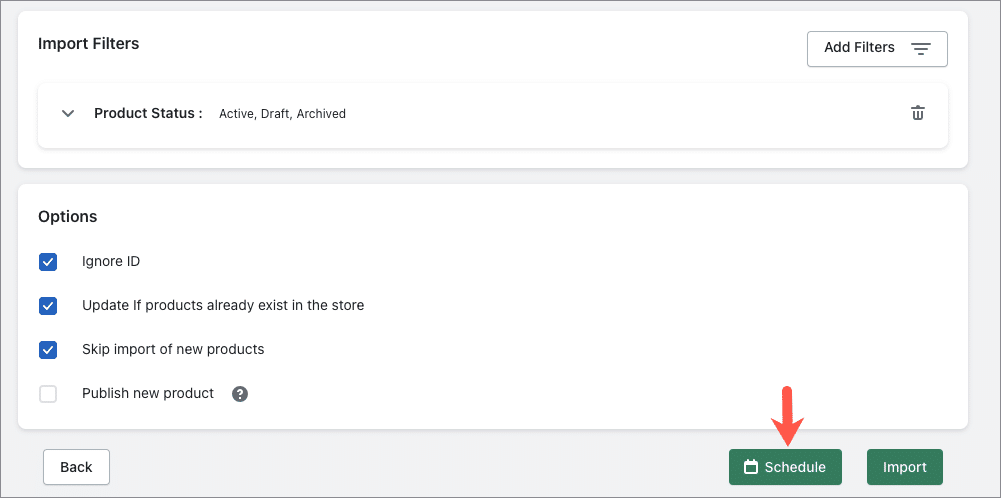
- Select the import filters and options as required.
- Click on Schedule.

Once the Schedule button is clicked, a pop-up window will appear as shown below.
- Under Schedule on, specify the date and time you want the export to happen.
- If you want the export to happen periodically, enable the option Repeat every and choose the interval at which you want the import to happen. eg., 10 days as shown below.
- Click on Schedule now.

Once the action is scheduled, it will appear on the Scheduled Jobs page as shown. Edit the action if required. You can also choose to Pause and Cancel the process.
