Order / Coupon / Subscription Export Import Plugin for WooCommerce helps you to quickly and efficiently import and export all subscription orders from one online store to another.
Export Subscriptions
To export WooCommerce subscriptions:
- Click on WebToffee Import/Export(Pro) > Export.
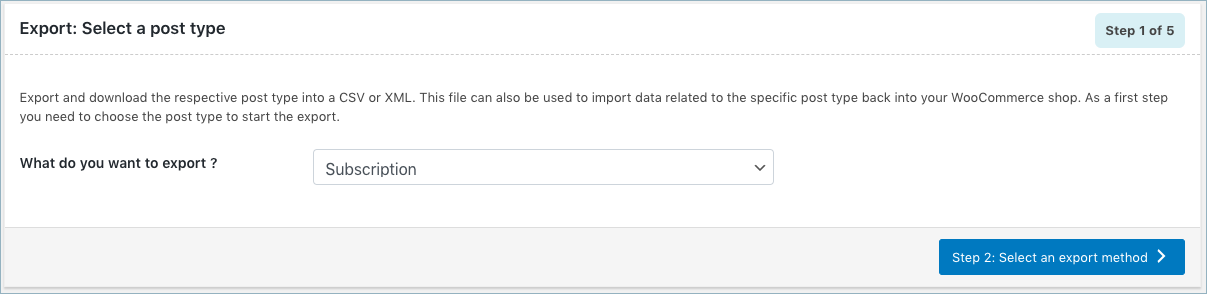
Step 1: Select a post type
As a first step, you need to choose the post type as Subscription.
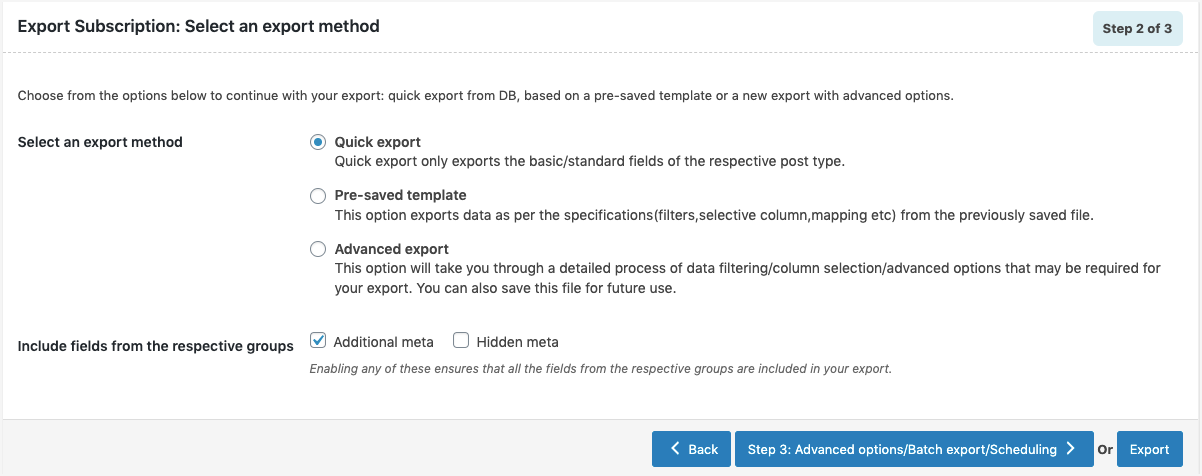
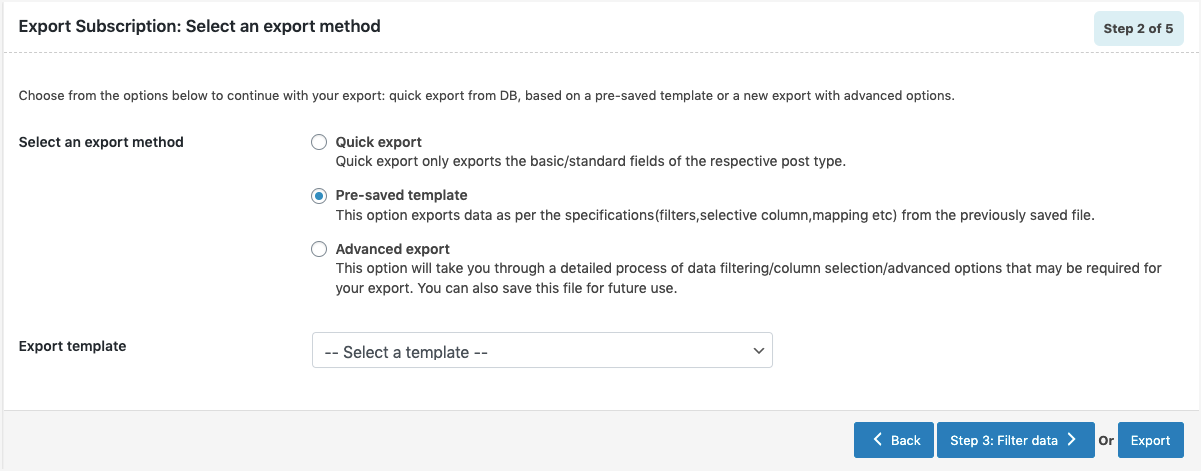
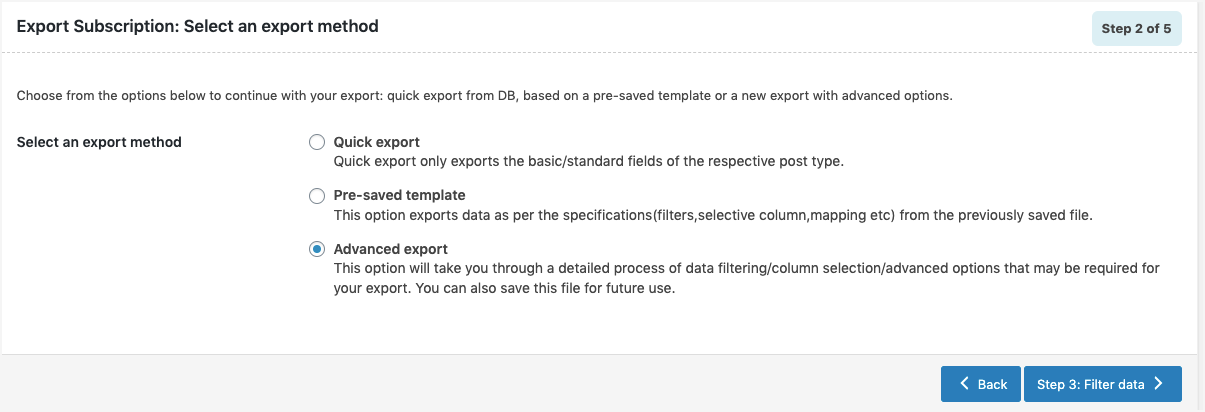
Step 2: Select an export method
Choose from the below options to continue with your export:
- Quick export from DB
- Based on a pre-saved template
- Advanced export
Let us have a look at each of these export methods:
Quick Export
- exports the basic/standard fields of the respective post type.
- To include fields from Additional meta and Hidden meta select the respective group’s checkboxes.
- Click the Export button to complete the action or proceed to Step3 for advanced options.
Pre-saved template
- exports data as per the specifications(filters, selective column, mapping.. etc) from the previously saved file.
- By selecting this option, one can choose a previously saved template from the Export template drop-down.
- Click the Export button to complete the action or proceed to Step3 to filter data.
Advanced Export
- Takes you through a detailed process of filtering/column selection/advanced options that may be required for your export.
Note: You can also save this file as a template for future use.
- Click on Step3 to filter data.
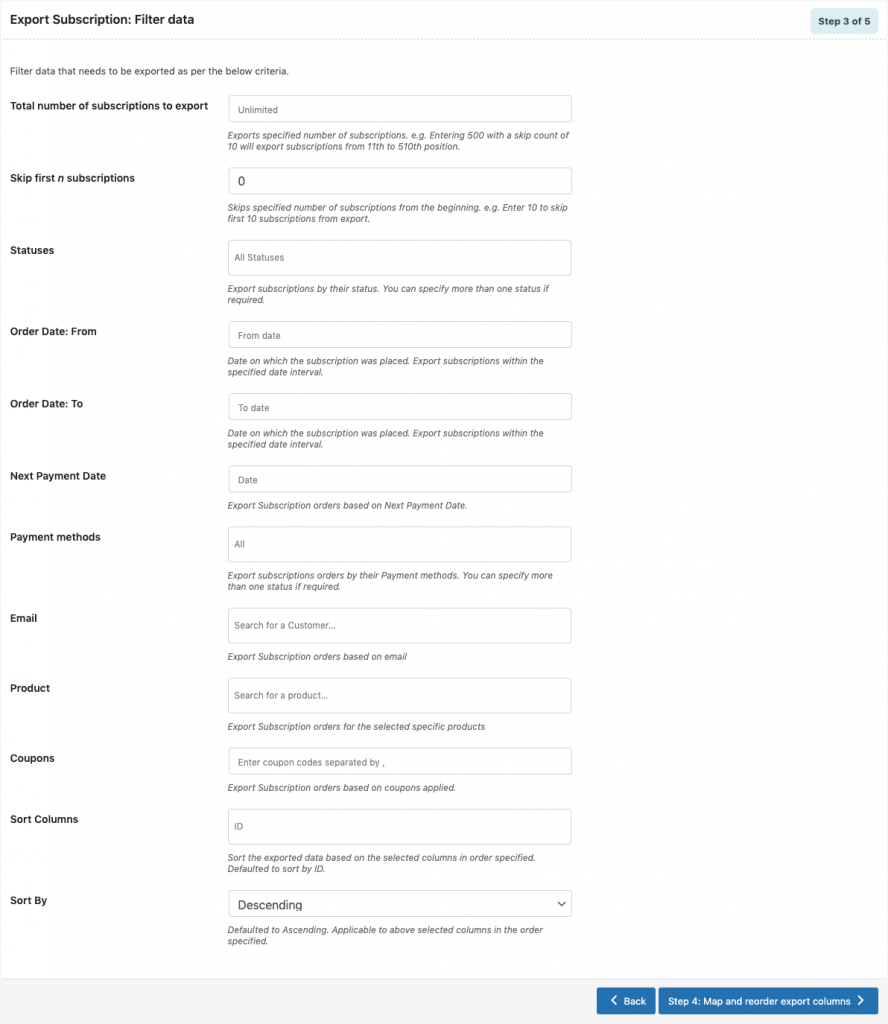
Step 3: Filter data
Filter data that needs to be exported as per the below criteria.
- Total number of subscriptions to export : The actual number of subscriptions you want to export. e.g. Entering 500 with a skip count of 10 will export subscriptions from 11th to 510th position.
- Skip first n subscriptions : Specify the number of subscriptions to be skipped from the beginning. e.g. Enter 10 to skip first 10 subscriptions from export.
- Statuses : Export subscriptions by their status(pending, on hold, active, cancelled..etc). You can specify more than one status if required.
- Order Date: From : Specify the date from which the subscription will be valid.
- Order Date: To : Specify the date till which the subscription will remain valid.
- Next Payment Date: Exports subscription orders based on Next Payment Date.
- Payment methods : Include bank transfer, cash on delivery, check payments.
- Email : Export subscription orders based on email.
- Product: Exports for the selected specific products.
- Coupons: Exports based on the coupons applied.
- Sort Columns: Sort the exported data based on the selected columns in the order specified. Defaulted to ascending order.
- Sort By: Defaulted to ascending. Applicable to above-selected columns in the order specified.
Step 4: Map and reorder export columns
The column names appearing in this section can be edited if required. The preferred names and choices that were last saved can be viewed on choosing a pre-saved template. One can also move the columns to reorder the arrangement.

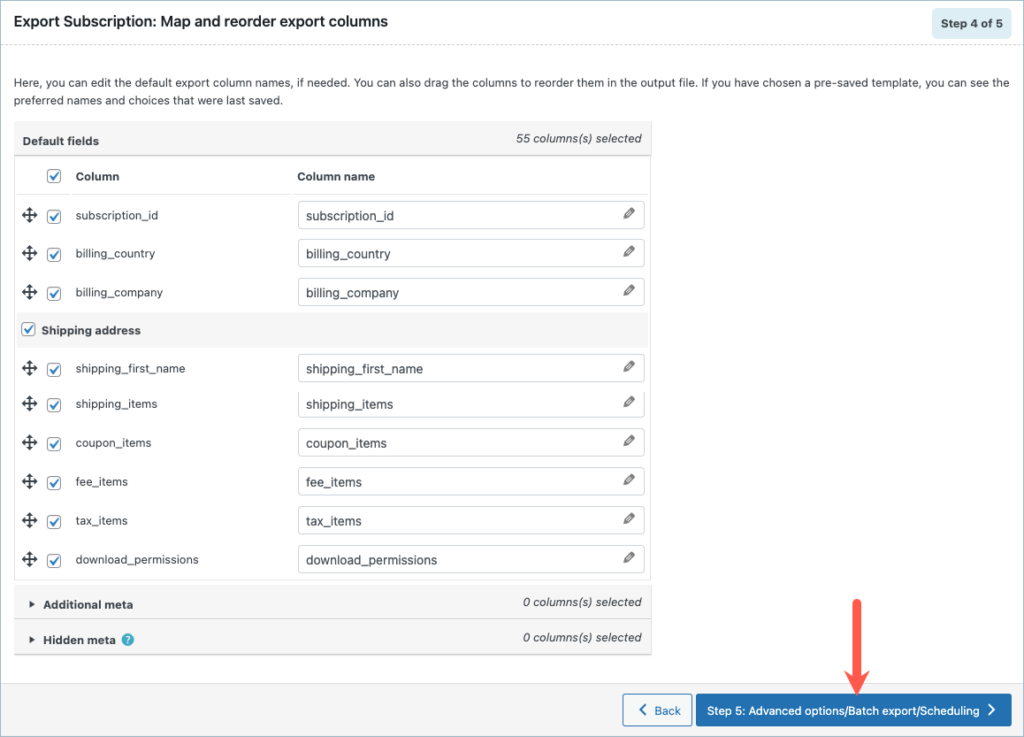
- Here, one can map and reorder the export columns under the following 3 fields:
- Default fields
- Additional meta
- Hidden meta
- Click on Step 5 to proceed.
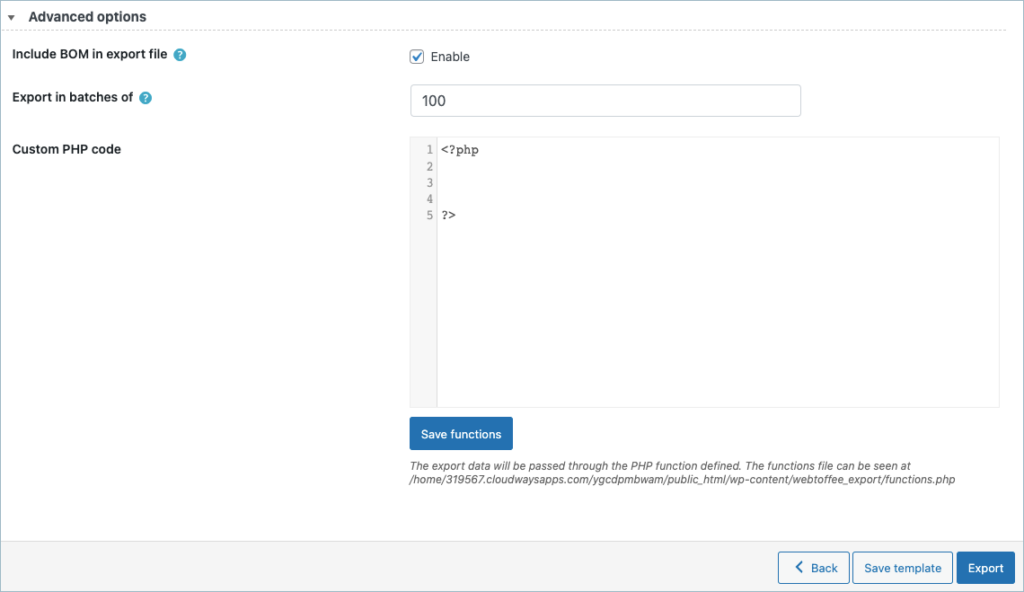
Step 5: Advanced Options/Batch Export/Scheduling
On reaching Step 5, the following window will appear, from where one can:
- Export file name: To specify a filename for the exported file. If left blank the system generates a default name.
- Export File Format: Both CSV and XML file formats are available.
- Delimiter: Separator for differentiating the columns in the CSV file. Assumes ‘,’ by default.
- Enable FTP export: On opting ‘Yes’, choose an FTP profile and specify the export path.
Note: On expanding Advanced options, one can set the number of records that the server will process for every iteration within the configured timeout interval. If the export fails due to timeout you can lower this number accordingly and try again.
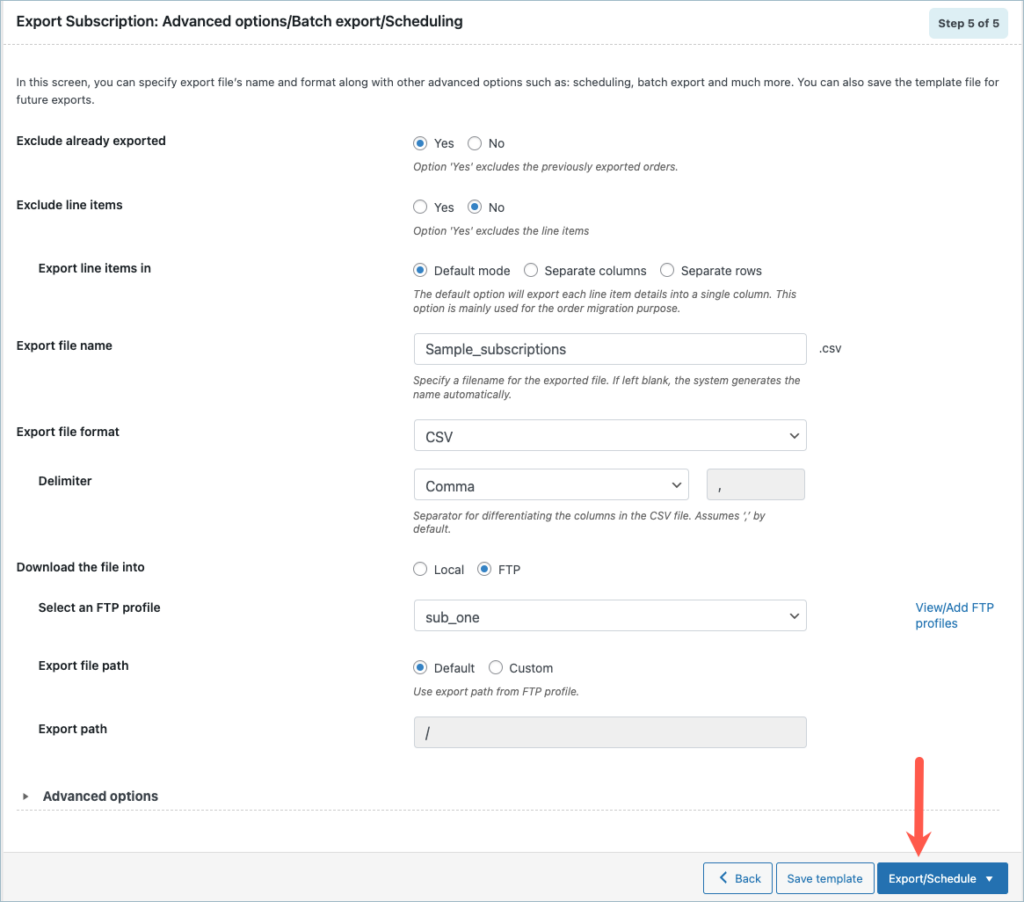
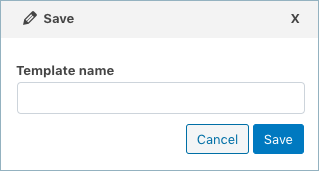
- Save the template file for future export as shown below(if needed).
- Click on Export and export or schedule the export to finish
Import Subscriptions
Renewals will not work if subscriptions paid using PayPal are migrated using the Import export plugins.
PayPal does not consistently allow the IPN URL used for subscription event notifications, like recurring payments, to be updated after a migration.
Due to this reason, it is not possible for WooCommerce Subscriptions to keep the active and running subscriptions in sync with PayPal, or to generate renewal orders for renewal payments after a site migration. This is a known limitation with PayPal and it is not because of any data lost during migration.
For a detailed insight, refer: Can subscriptions with PayPal Standard be imported?
Download a Sample Subscription CSV.
To import WooCommerce subscriptions:
- Click on WebToffee Import/Export(Pro) > Import.
Step 1: Select post type
As a first step, you need to choose the post type as Subscription.
Step 2: Select import method
Choose from the below options to continue with your import:
- Quick import
- Based on a pre-saved template
- Advanced import
Let us have a look at each of these export methods:
Quick Import
- imports the basic/standard fields of the respective post type.
- primarily used when your input file was exported using the same plugin
- One can import file from:
- Local
- URL
- FTP
- Click the Import button to complete the action or proceed to Step3 for advanced options.
Pre-saved template
- This method retains the previous filter criteria and other column specifications as per the chosen file and imports data accordingly.
- By selecting this option, one can choose a previously saved template from the Import template drop-down.
Note: The template will be listed in the drop down only if you have saved it in previous imports, if you go through the Advanced import, at Step 4 you will get an option to save the template. Once you save that, next time when you want to import a pre-saved template, it will be populated within the drop down.
- Click the Import button to complete the action or proceed to Step3 to map and reorder columns.
Advanced import
- This option will take you through a detailed process of filtering/column selection/advanced options that may be required for your import.

Note: You can also save this file as a template for future use.
Step 3: Map import columns
Here, one can map the import columns under the following 3 fields:
- Default fields: The mapped column names appearing in this section can be modified/edited if required. The preferred names and choices that were last saved can be viewed by choosing a pre-saved template.
- Additional meta
- Hidden meta

Evaluate field
Evaluate field can be used to append a value/expression to an existing item while importing. It basically selects/maps any column from the input file and compute the values with expressions and creates output.
- Expression: Any of the operators +*/-()&@ or string constants can be used along with the attributes to manipulate the respective value.
- Input: Select the column from the drop down which has to be modified.
- Output: Sample value will be created based on the first record from input file.

- Click on Step 4 to proceed.
Step 4: Advanced Options/Batch Export/Scheduling
On reaching Step 4, the following window will appear, from where one can:
- Update Only: On selecting “Yes”, the store is updated with the data from the input file only for matching/existing records from the file. On selecting “No”, the entire data from the input file is processed for an update or insert as the case maybe.
- If the subscription exists in the store: One can either Skip or Update the entry.
- If conflict with an existing post ID
- Link orders using _wt_import_key
- Delete non-matching coupons from store
Note: On expanding Advanced options, one can set the number of records that the server will process for every iteration within the configured timeout interval. If the import fails due to timeout you can lower this number accordingly and try again.
- Save the template file for future (if needed).
- Click on Import/Schedule to finish.
You can either import the subscriptions directly into your store or schedule the import using FTP.
To schedule the import:
- Hit the Schedule option, and you will be taken to the cron schedule window as shown below:
The plugin supports two different schedule types:
- WordPress Cron: Upon a visit, WordPress Cron will check to see if the time/date is later than the scheduled event/s, and if it is– it will fire those events.
- schedules your job at the specified time.
- is dependent on your website visitors.
- Server Cron: You may need to trigger the URL every minute depending on the volume of data to be processed.You can use this option :
- to generate a unique URL that can be added to your system in order to trigger the events.
- if you have a separate system to trigger the scheduled events.
You can also configure the time at which the import is to be scheduled.
To directly import:
- Hit on the Import option
Once the import is completed, a pop-up will be displayed showing import status which contains the number of successful imports and failed imports (if any).
Know more about Order / Coupon / Subscription Export Import Plugin for WooCommerce.
- Was this article helpful?
- Yes, thanks!Not really
Comments (6)
Rodrigo
July 10, 2021
The most important:
How to export subscription by product???
I need to separate my subscribers by products and I don’t want to export all subscribers.
Mark
July 16, 2021
Hi,
There is a product filter option in the premium version plugin using which you can only export subscription orders of a particular product.
Augustus Villanueva
June 10, 2021
Do we also need to export and import the orders first before migrating the subscription?
Mark
June 14, 2021
Hi,
Yes, you need to migrate the orders(parent & renewal) first before migrating the subscriptions.
Robyn
October 28, 2021
How do we link the specific order to the specific subscription. If we import all the orders, how do we get that specific order number out of the system to match the sub.
Mark
November 3, 2021
Hi,
The orders and subscriptions will be linked using the number that is present in the wt_import_key column of the order CSV and post_parent & renewal order column in the subscription CSV file. Please go through the below article to know more about it.
https://www.webtoffee.com/steps-to-import-subscription-order-with-parent-order/