By default, WebToffee’s WooCommerce PDF Invoices, Packing Slips, and Credit Notes plugin helps to display metadata using pre-defined placeholders. Adding custom placeholders enables businesses to insert dynamic information, such as customer names, order details, and personalized messages, directly into the invoice. The plugin helps to add custom placeholders to WooCommerce invoices using a custom code snippet. To achieve this add the custom code snippet provided to the WordPress site and then add the custom placeholders into the invoice template’s HTML code.
Prerequisites
- Install and activate the free plugin WooCommerce PDF Invoices, Packing Slips, Delivery Notes, and Shipping Labels.
- Now as a final prerequisite, install and activate the premium plugin WooCommerce PDF Invoices, Packing Slips, and Credit Notes.
Step 1: Adding the custom code snippet
The first step is to add the custom code snippet to the WordPress site. To do this either add the snippet into the active child theme’s functions.php file or use a third-party plugin. To know more about how to add a custom code snippet using a third-party plugin, refer to this article.
In the custom code snippet below replace ‘_metakey1’ and ‘_metakey2’ with the preferred meta keys.
Step 2: Adding the placeholders
Now add the two custom placeholders into the invoice template’s HTML code. To achieve this follow the basic steps below:
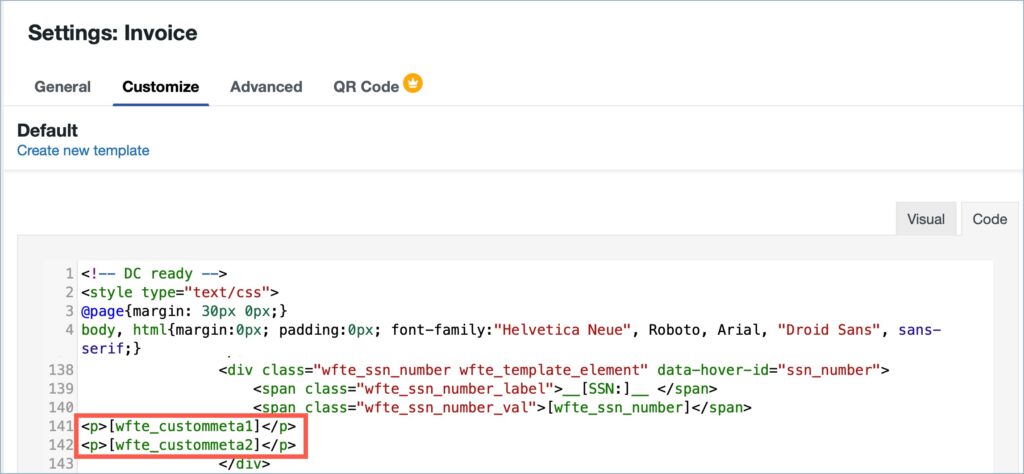
- First, copy the two placeholders [wfte_custommeta1] and [wfte_custommeta2] from the custom code.
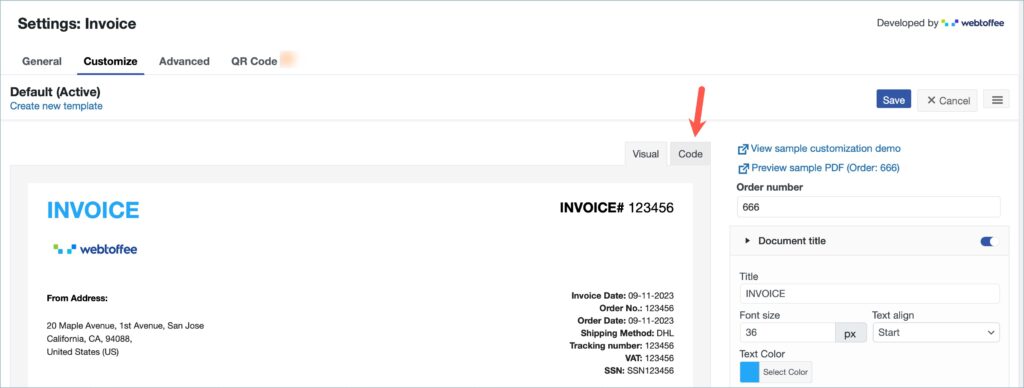
- Now, navigate to the invoice template HTML code.
- To do this, From the WordPress dashboard, navigate to Invoice/Packing > Invoice.
- Under the Customize tab, navigate to code.
- Paste the placeholders in the invoice template HTML code.
- The position of custom placeholders in the invoice document is based on their position in the invoice template HTML code.
- Now click on Save to reflect the changes.
Example
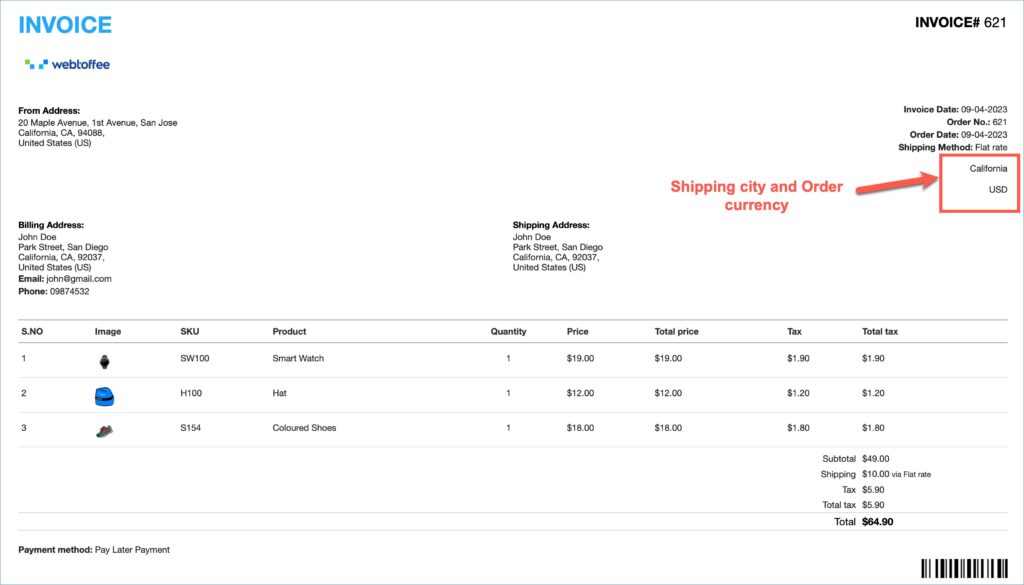
Let’s take an example of displaying two metadata ‘shipping city‘ and ‘order currency’ using custom placeholders.
- First, replace ‘_metakey1’ and ‘_metakey2’ in the custom code with the metakeys of the shipping city and order currency.
- Now, add the updated custom code snippet to the WordPress site.
- Finally, paste the two custom placeholders into the invoice template HTML code.
The WooCommerce invoice document, containing the two custom placeholders, will look like this.
Max
October 19, 2023
Doesn’t work, the code creates a critical error
Hema
October 19, 2023
Hello Max,
Thanks for reaching out.
From the given data, the issue that is causing the error is not very clear. Kindly contact customer support for further assistance.
James Edwards
October 22, 2021
How do you find the customer note? What’s the meta?
Mike
October 26, 2021
Hi James,
Thanks for reaching out. You can use the placeholder [wfte_customer_note] to your active template HTML to show the customer note.
Santiago Rocha
December 16, 2020
Hello, how can I add custom fields at product detail level? I need to replace the price with a pre calculated retail price in a meta custom field under products.
Mark
December 16, 2020
It would require some filters to do so. Please contact us via the support forum.
MUDIT
August 26, 2020
How can I copy the place holders in the template HTML code?
Mark
August 26, 2020
Go to whichever label settings that you want to add then open the Customize tab > Code menu.
Theo moulos
June 22, 2020
and if I want invoice and deliverynote?
Mark
June 22, 2020
Please update below line in code:
if($template_type=='invoice' || $template_type=='deliverynote' )