The WebToffee’s WooCommerce PDF Invoices, Packing Slips, and Credit Notes plugin allows store owners to customize the invoice numbers of their store by adding a prefix, a suffix, or by choosing between the order number or a custom number as the invoice number. In addition to this, the plugin also provides an option to automatically reset the WooCommerce invoice numbers annually. In this article, we will guide you through the steps involved in resetting the invoice numbers annually. Below are the brief steps involved in the same:
- Select “Custom numbers” as the invoice number.
- Specify a prefix, a suffix, or both containing the placeholder year [Y].
- Input a starting number for the invoice numbers.
- Enable the “Reset invoice number automatically every year” option.
- Finally, click on Update Settings to save changes.
To ensure the annual reset feature functions properly, the following conditions must be fulfilled:
- Use custom numbers for invoices.
- Add a prefix or suffix with the year [Y] placeholder.
- Enable the ‘Reset invoice number automatically every year’ option.
Reset invoice numbers annually
Below are the detailed steps:
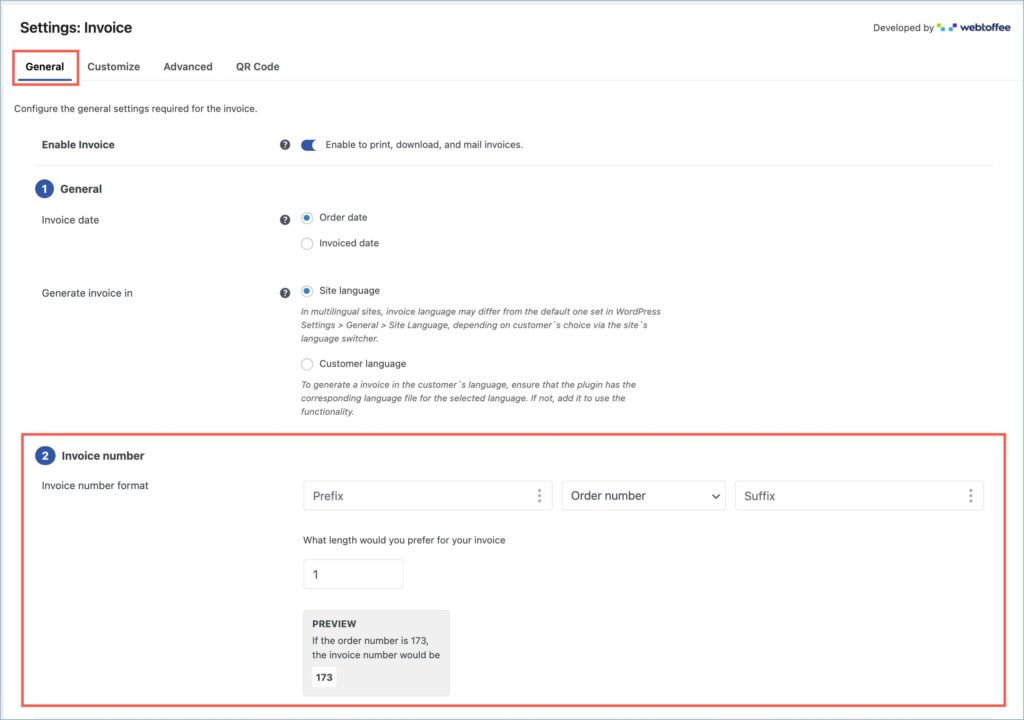
- From the WordPress dashboard, navigate to Invoice/Packing > Invoice.
- Under the General tab, head to the Invoice number section and find the Invoice number format option.
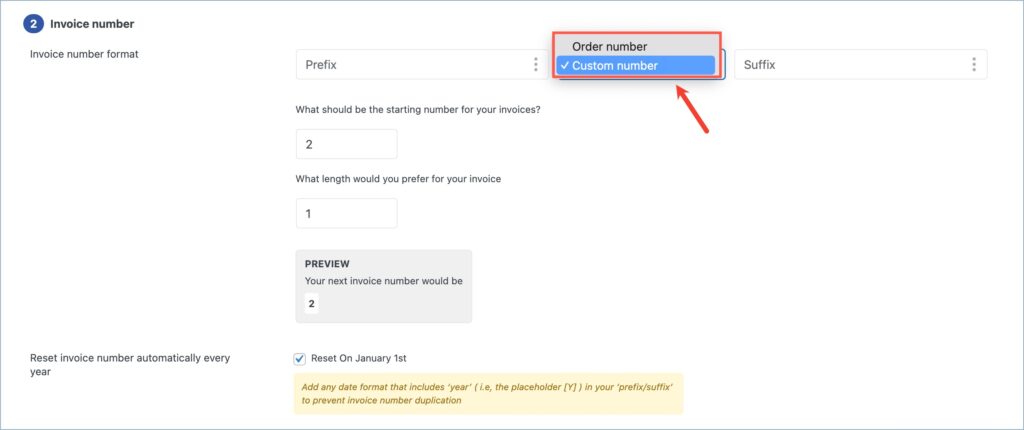
- From the dropdown, select “Custom number” as the invoice number.
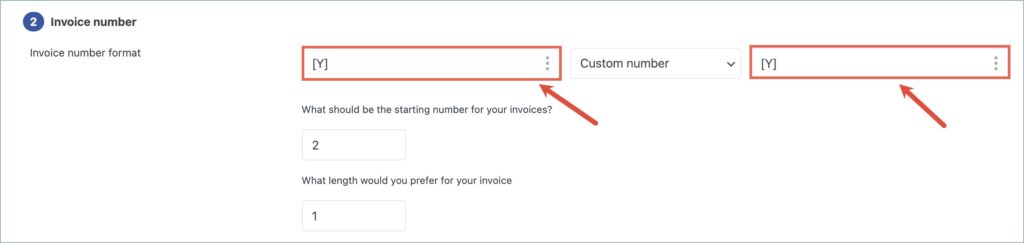
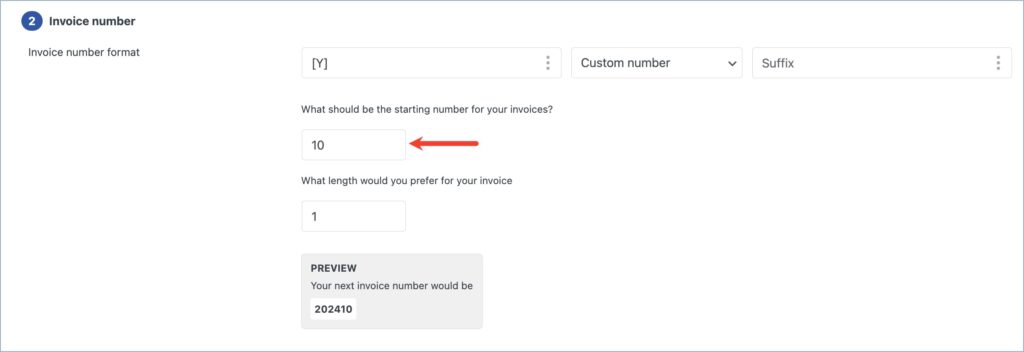
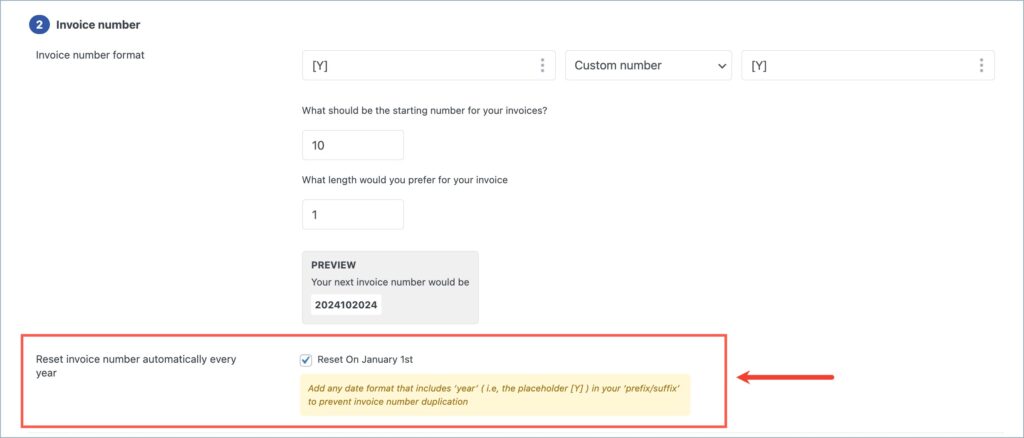
- Now, specify a prefix, a suffix, or both containing the placeholder year [Y]. To add the year as either the prefix or suffix, click on the three-dot menu, then select ‘Choose date,’ and pick the date format string indicating the year [Y].
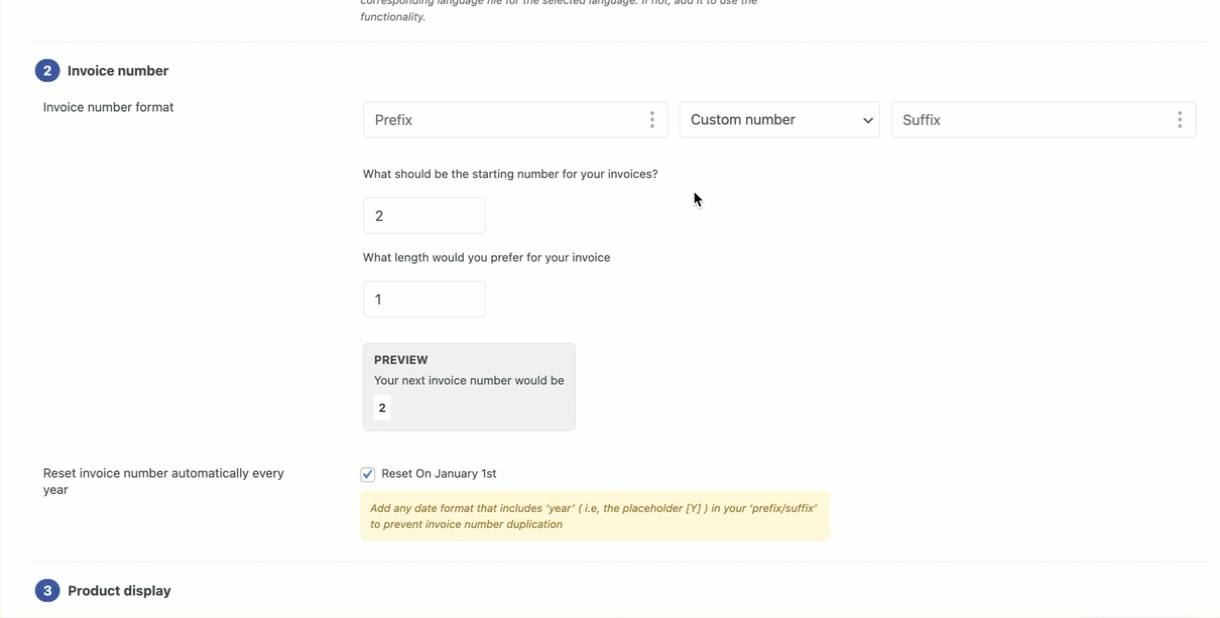
- Next, input a starting number for the invoice number series. This will serve as the initial number following each annual reset, with the latest number specified taking precedence.
- Head to the “Reset invoice number automatically every year option” and enable it.
- Finally, click on Update Settings to save changes.
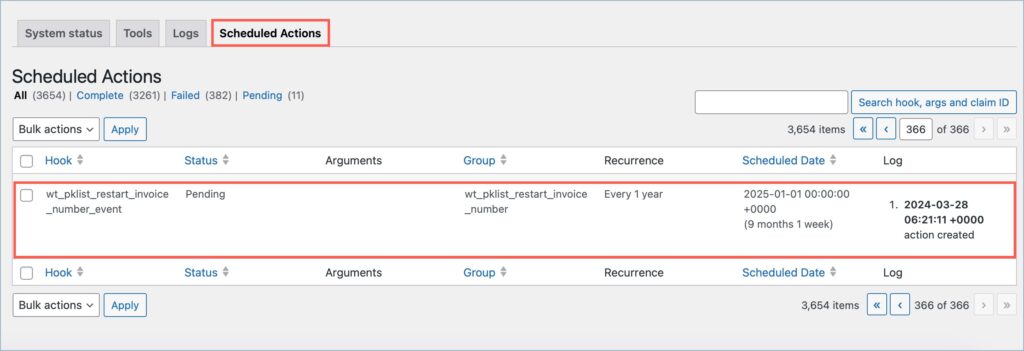
After configuring the annual invoice number reset functionality correctly, you can monitor its status by navigating to WooCommerce > Status > Scheduled Actions. Within this tab, you will find a hook named “wt_pklist_restart_invoice_number_event” associated with the reset functionality. Here, you can review the status of the action, its recurrence duration, the scheduled date for its next occurrence, and the time of action creation.