Stripe Payment Gateway Plugin for WooCommerce provides a hassle-free process to integrate the Apple Pay payment method for your WooCommerce store.
Registration steps:
1. Download the domain association file and host it at /.well-known/apple-developer-merchantid-domain-association on your site.
2. Make that file available at https://example.com/.well-known/apple-developer-merchantid-domain-association.
3. Next, register your domain with Apple. Go to the Apple Pay tab in the Account Settings of your Dashboard. All domains, whether in production or testing, must be registered.
If you wish to go live with your domain, refer to this article, and follow the given procedure.
All right, now let’s get down to configure the plugin.
Settings
- As a first step, install and activate the Stripe payment gateway for the WooCommerce plugin.
- Go to plugin settings or from the WordPress dashboard, go to WebToffee Stripe > General Settings.
- Head on to the Apple Pay tab.
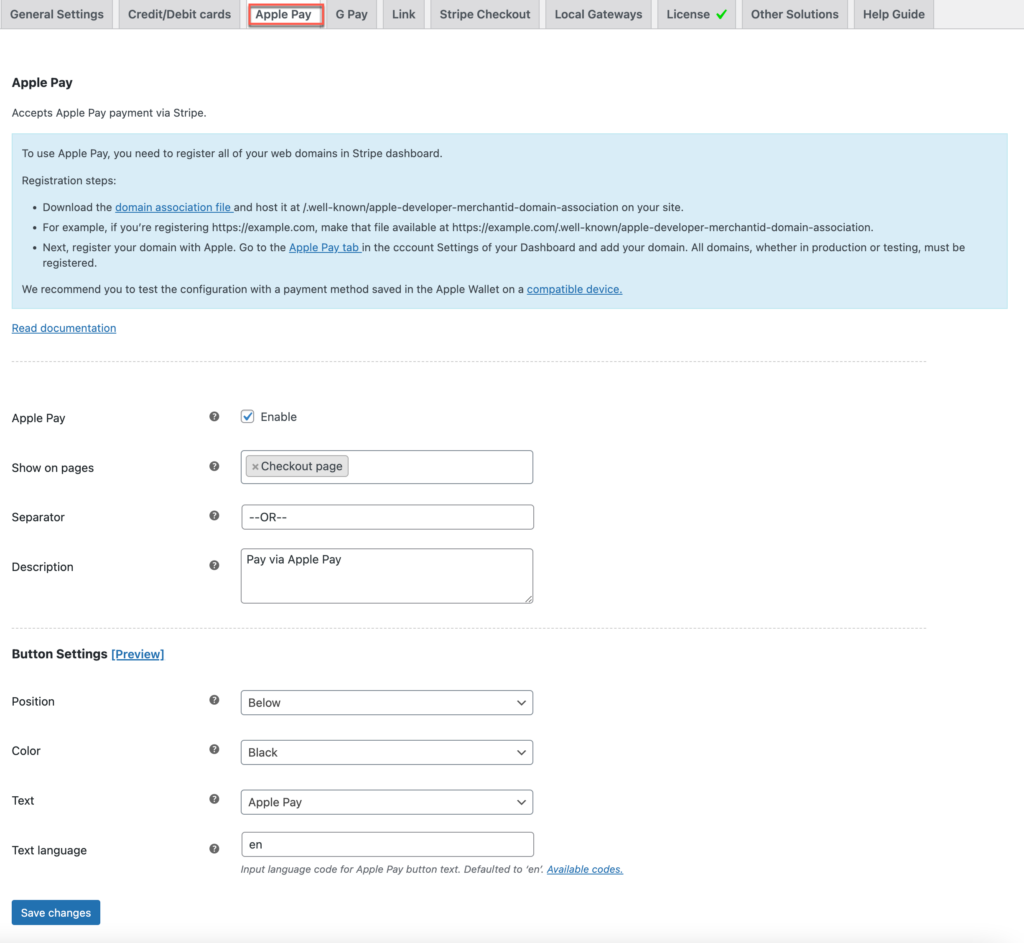
- Apple Pay: Enable to accept payment via Apple pay.
- Show on pages: Apple pay button will be shown on selected pages.
- Separator: Separator will be displayed between the Apple pay button and the order button at the checkout.
- Description: Description will be displayed between the Apple pay button and the separator at the checkout.

- Button settings:
- Position: You can choose to place the Apple Pay button Above or Below the order button.
- Color: Choose the button color from the standard white or black for it to appear accordingly at the checkout.
- Text: You can choose a suitable Apple Pay button text from the following options:
- Apple Pay
- Buy with Apple Pay
- Set up Apple Pay
- Language: You can set any custom language for the Apple Pay button. You should enter the 2-letter code of the desired language. Refer to this table for language codes.
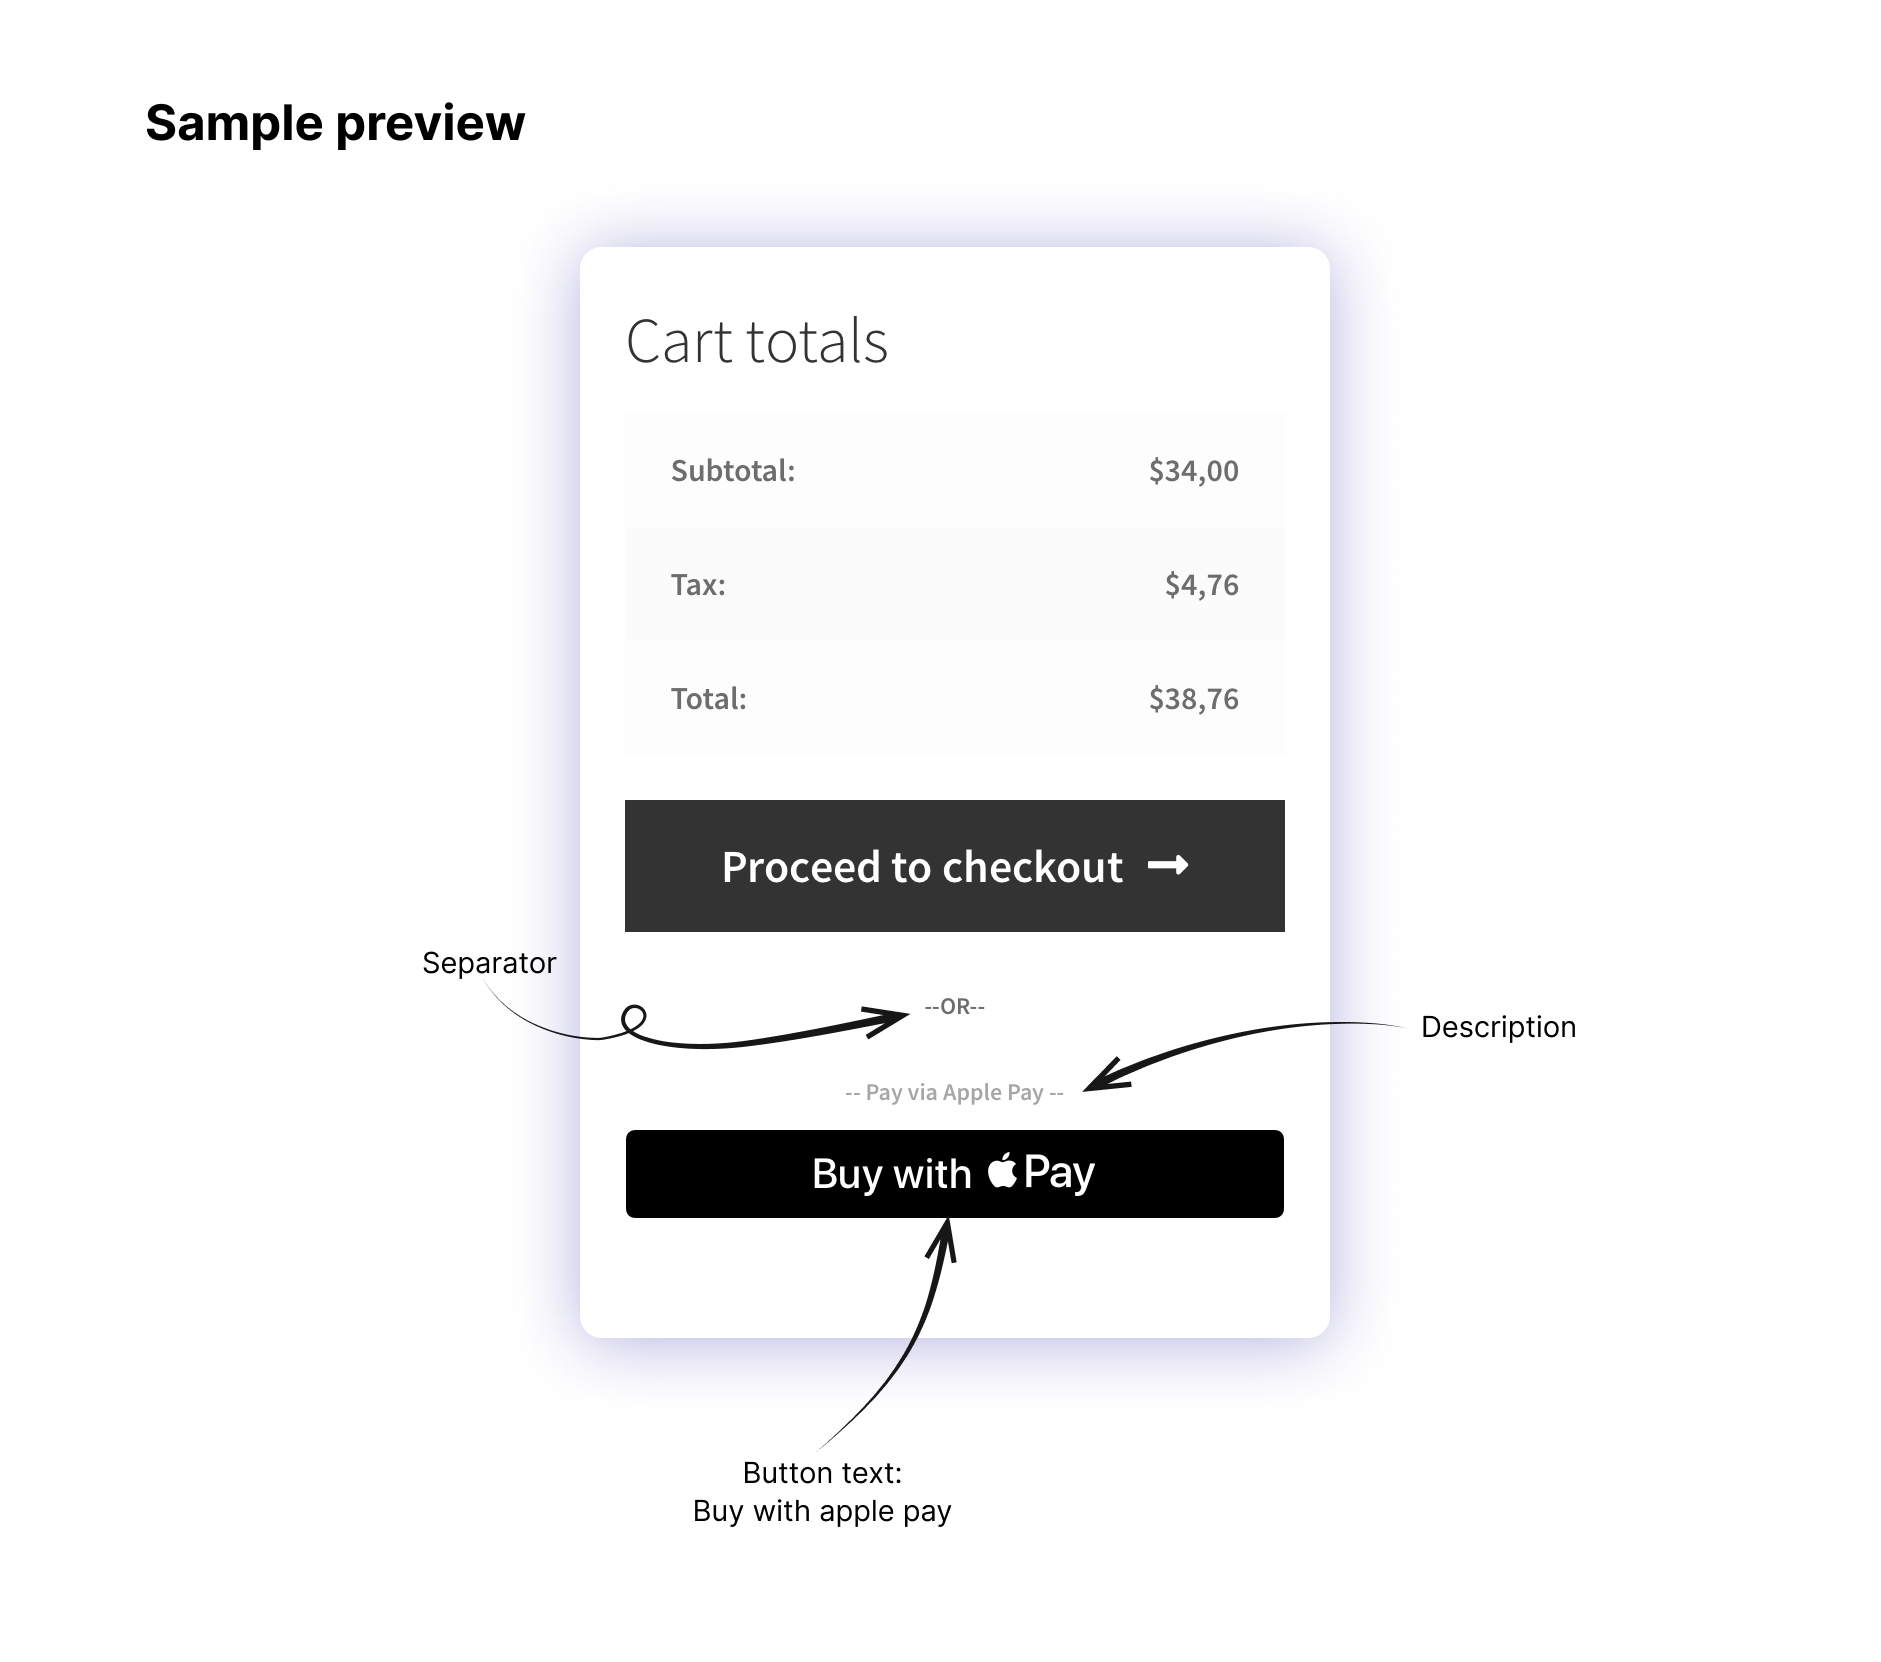
Pay via Apple Pay
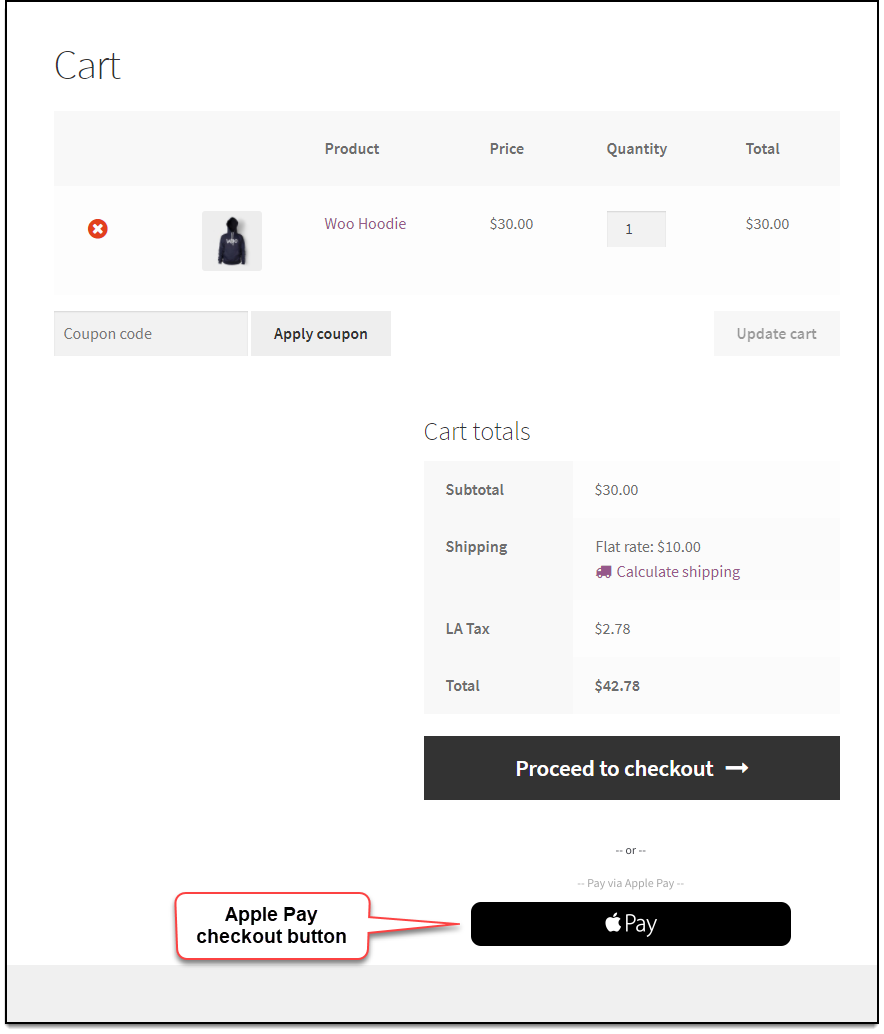
The Apple Pay checkout button will be available on the cart and checkout page, as configured in the plugin settings.
- Apple Pay checkout on Cart page:

- Apple Pay checkout on Checkout page:

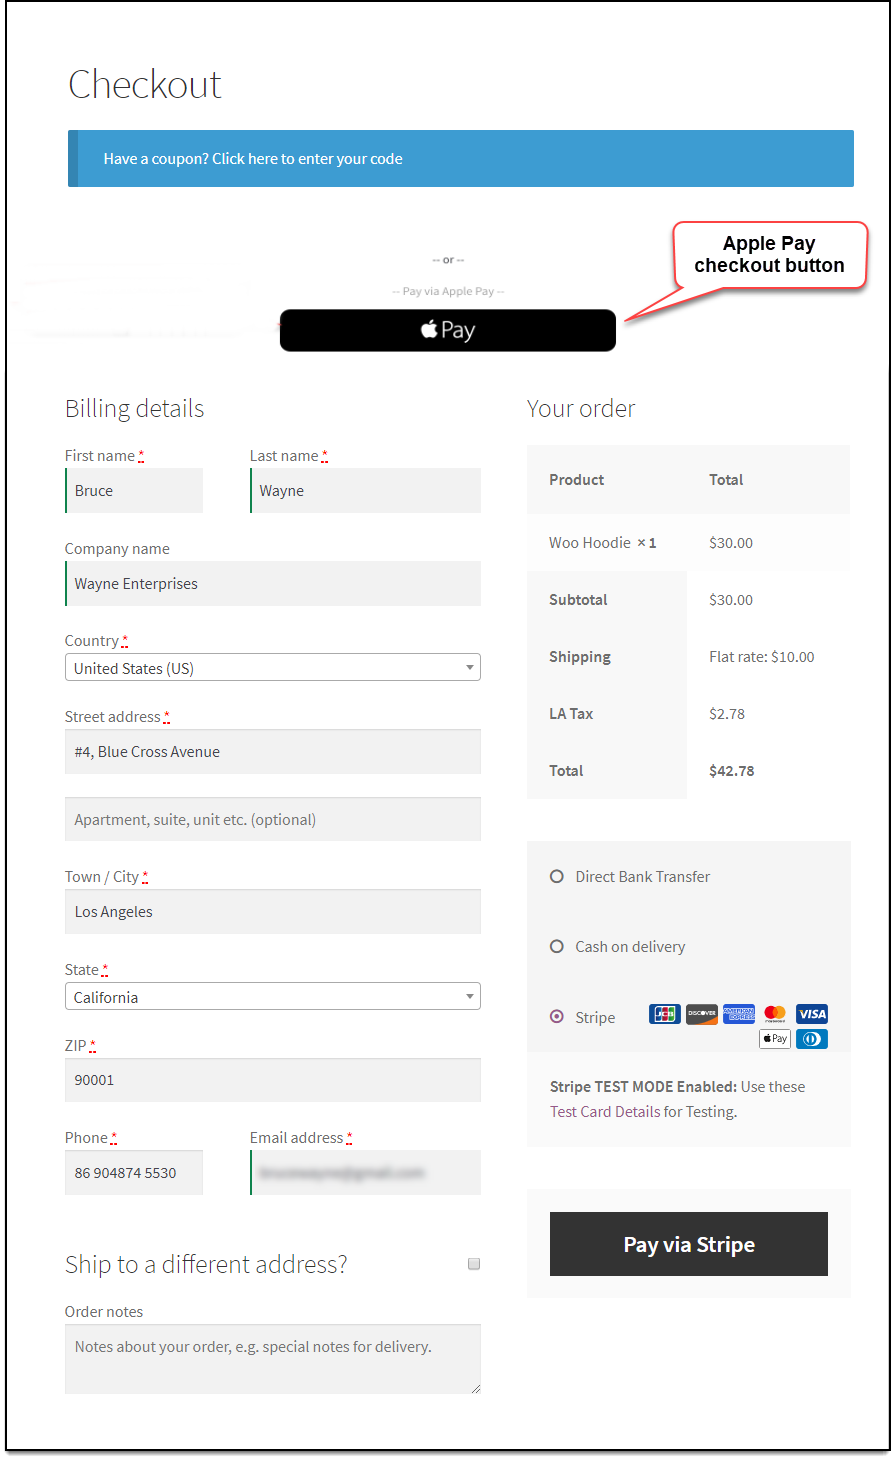
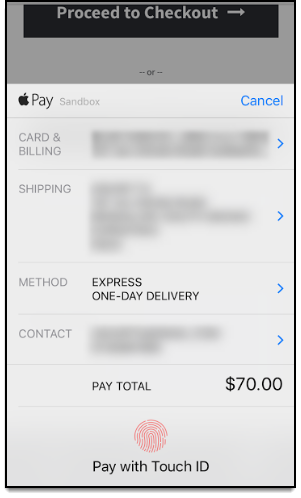
After you click on the Apple Pay checkout button, the Apple Pay checkout form appears. A sample checkout form is as shown below.
In this way, we can integrate Apple Pay payments with Stripe Payment Gateway Plugin for WooCommerce.
To know more about the product, check out Stripe Payment Gateway Plugin for WooCommerce.
For understanding each feature of the plugin, refer to the product setup guide.
Or check out the documentation section for more related articles.
MARTINO SINVIL
June 26, 2021
Hello there,
I am having trouble to see the Apple Pay button on my side. I need major help please.
Thank you
Eduardo
May 29, 2020
Hi guys,
I am unable to move the button and eliminate separator in the Woocommerce admin panel, they do not appear as shown on the screenshots, has it changed? Right now my site shows the Apple Pay button on cart first and proceed to checkout afterwards and it has a second separator for Amazon Pay and Paypal
Mark
June 2, 2020
You can change the position of Apple Pay button from the plugin settings.
Mustafa
May 16, 2020
Hello,
I want to buy this plugin for United Arab Emirates is the country listed in your plugin or not?
Mark
May 18, 2020
These are the list of countries supported by Stripe and UAE is not among them. As such, you won’t be able to use Stripe.