This article applies to the following document types:
- Invoice
- Packing Slip
- Delivery Note
- Shipping Label
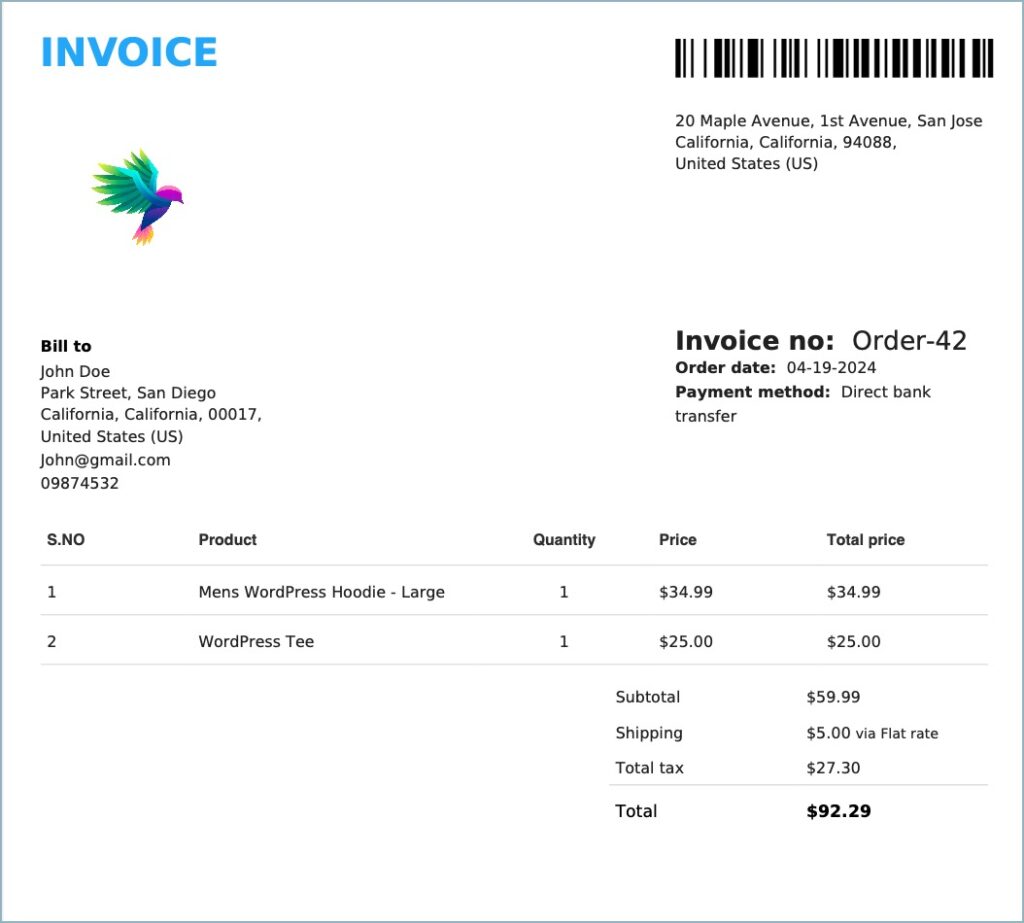
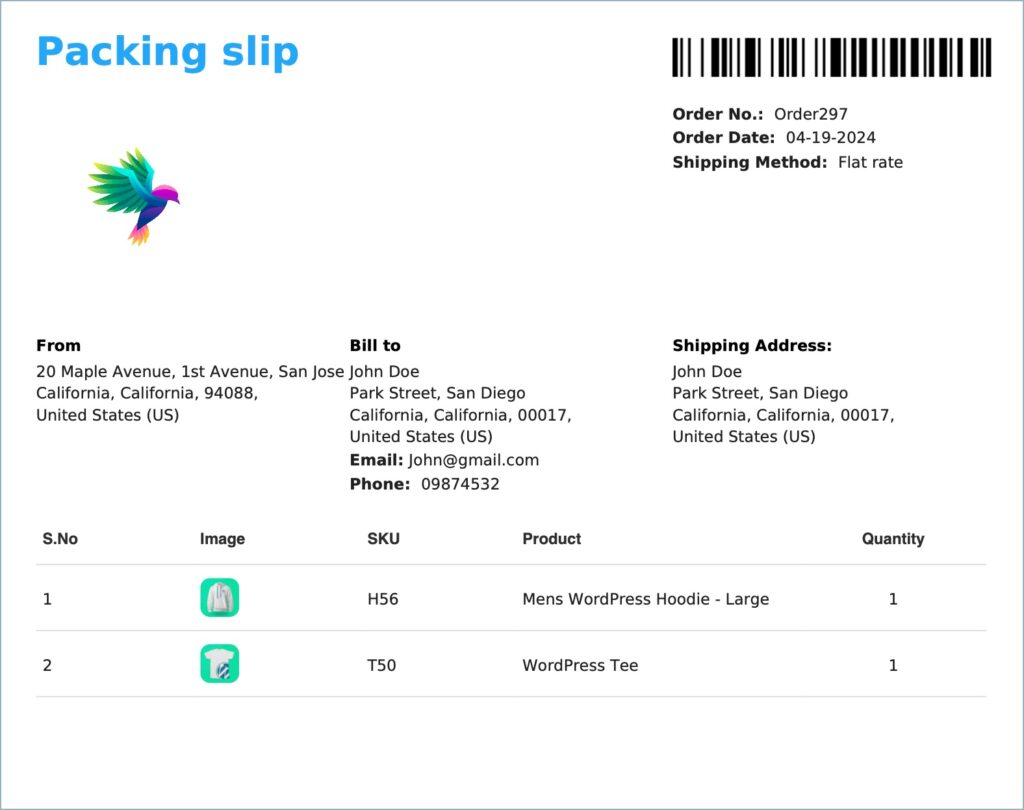
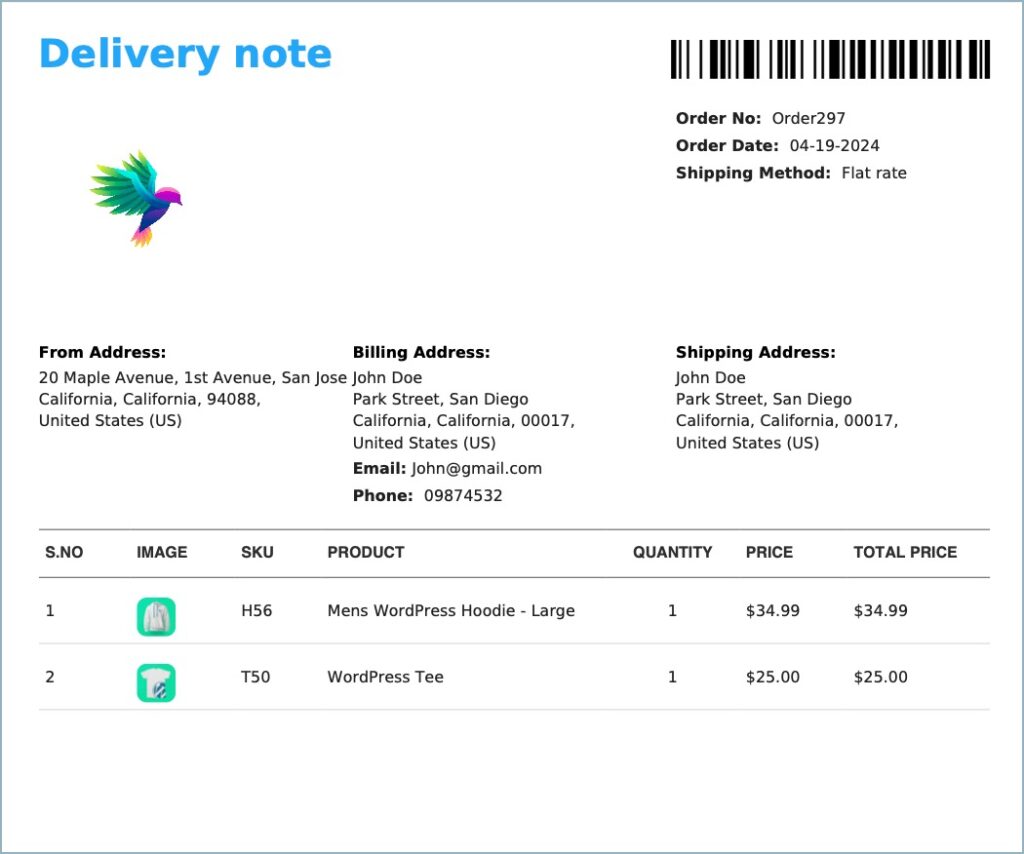
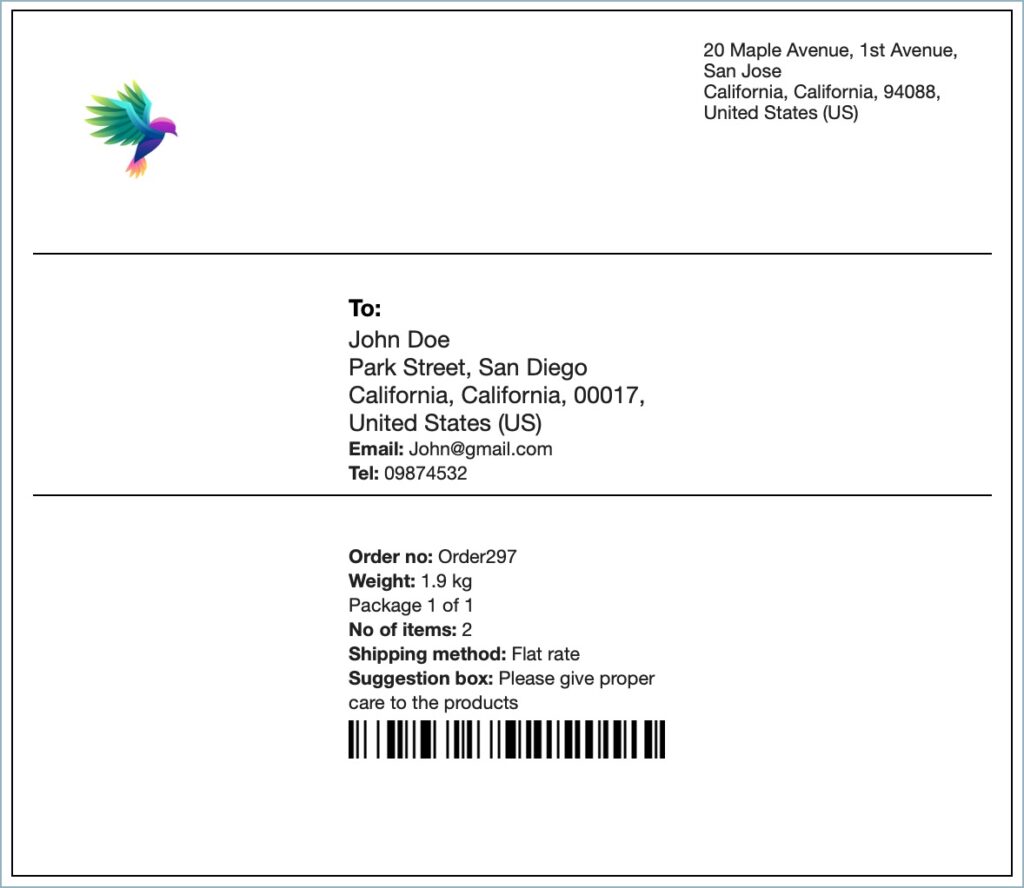
The WebToffee’s WooCommerce PDF Invoices, Packing Slips, and Credit Notes plugin enables store owners to generate invoices, packing slips, and credit notes for their WooCommerce store. Additionally, the plugin offers the functionality to include barcodes on these documents. By default, the barcode displayed on invoices and other document types corresponds to the order’s invoice number.
Adding a barcode to the documents
Below are the detailed steps for adding a barcode to WooCommerce documents:
- From the WordPress dashboard, navigate to Invoice/Packing > Preferred document type(eg. invoice or packing slip).
- Under the Settings page, head to the “Customize” tab.
- Next, go to the “Editor pane” located on the right side of the “Customize” page. Here, you’ll find a list of all the elements present in the template.
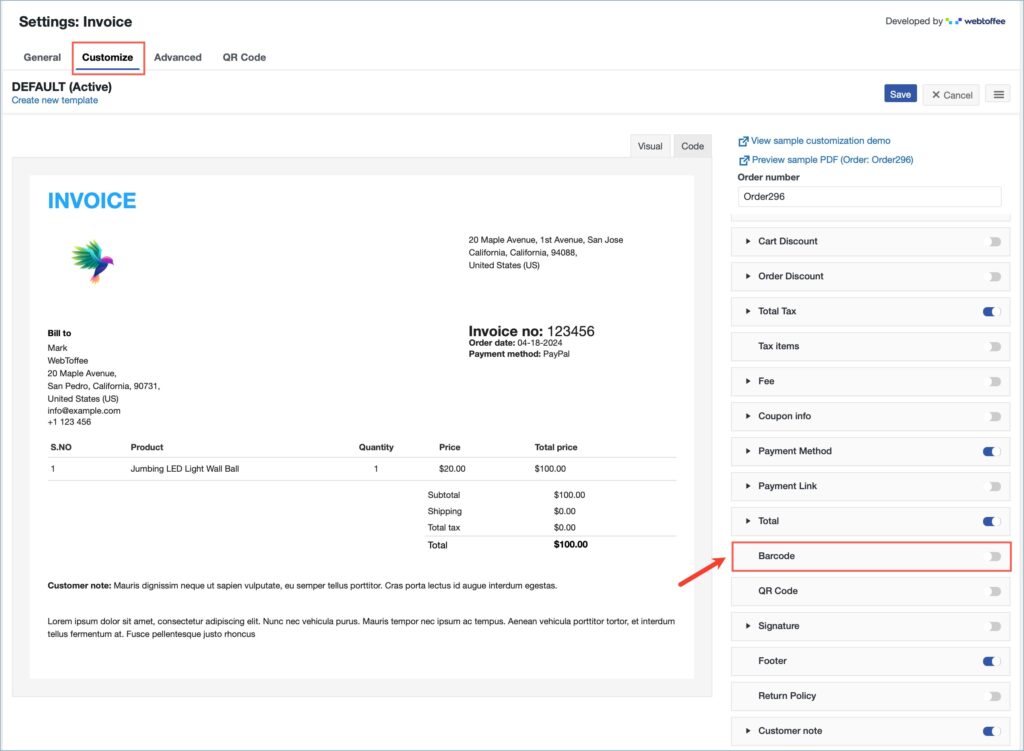
- Scroll down and enable the “Barcode” element from the Editor pane. Use the toggle button next to the element to enable it.
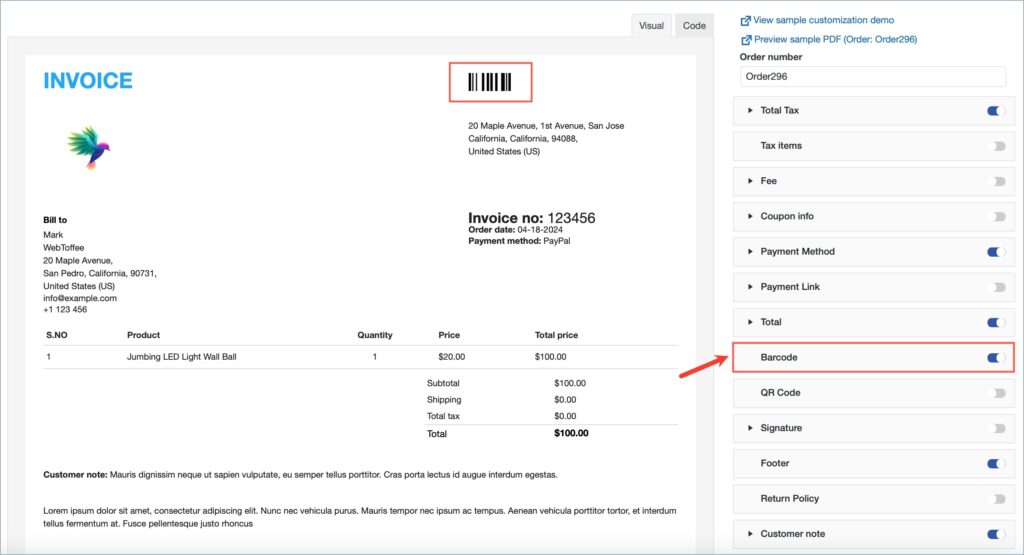
- Click on “Save” to save the changes. If you have selected a new template, click on “Save and Activate” to save the changes and set it as the active template.
Note: Since the barcode represents the invoice number of an order. The barcode will appear on packing slips, delivery notes, and shipping labels only after the corresponding invoice for that order has been generated.
Scanning the barcode on the document will reveal the corresponding invoice number for the order.
The images below depict documents containing barcodes.
Comments (2)
James Tye
April 22, 2024
Is it possible to include the barcode for the Order ID on the pick lists?
Sanjai Valsan
April 24, 2024
Hi James Tye,
Thank you for reaching out!
Unfortunately, the barcode feature is not currently available for picklists.