The invoice number is one of the most important components of an invoice. Every invoice should possess a unique invoice number. But if you have chosen a number system that gets confusing as it gets higher, it can get difficult to manage.
What do you do then? You will have to reset the number system of the invoice number. Using WebToffee’s PDF Invoices and Packing Slips Plugin for WooCommerce you can set and reset invoice numbers easily.
This article will guide you through the process of resetting invoice numbers for your WooCommerce store with the help of a plugin.
Create/Reset invoice number
- Install and activate the plugin on your WooCommerce site. Learn more about the setup of the PDF Invoice.
- Navigate to Invoice/Packing > Invoice from your WordPress dashboard.
- Head on to the Invoice number tab. You can set up a custom invoice number with prefix/suffix/number series or even mirror the order number as invoice number respectively.
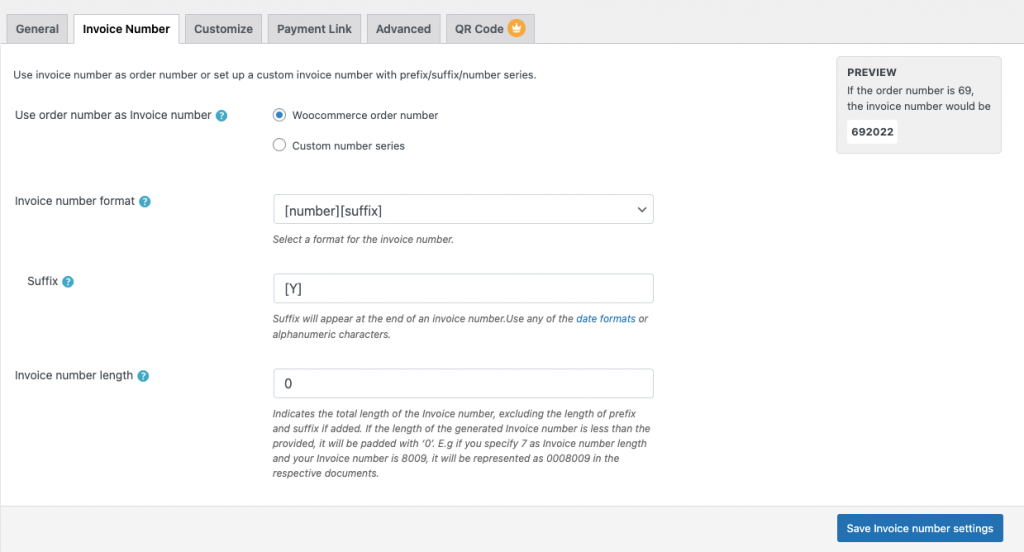
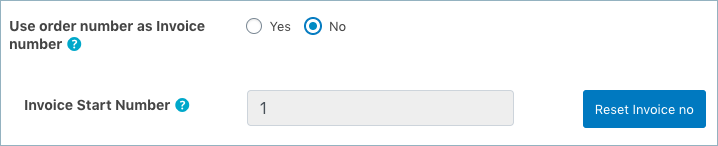
Use the order number as invoice number: Choose Woocommerce order number to use the order number as the invoice number. To have a custom invoice number, select Custom number series and input the necessary details into the respective fields.
Invoice Start Number: Enter the Invoice Start Number.
Invoice number format: Specify the format in which the invoice has to be generated. For example, [prefix][number][suffix]

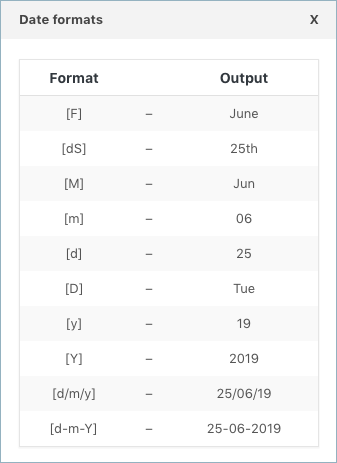
Suffix: Enter the suffix that will appear at the trailing end of the invoice number. You can use any of the date formats or alphanumeric characters as a suffix as shown in the image below.
Invoice number Length: Indicates the total length of the invoice number padded with zeroes. For example, Input invoice number length as 7 with initial number as 8009. then, the newly generated number will be 0008009, padded with 3 zeroes.
At last, click on the Update and Reset button.
Sample Invoice
For example, if the prefix is chosen to be as [m] referring to the numerical form of the active month and the suffix as [Y] referring to the numerical form of the active year.
Let’s have a look at the invoice number with the above configuration in place.
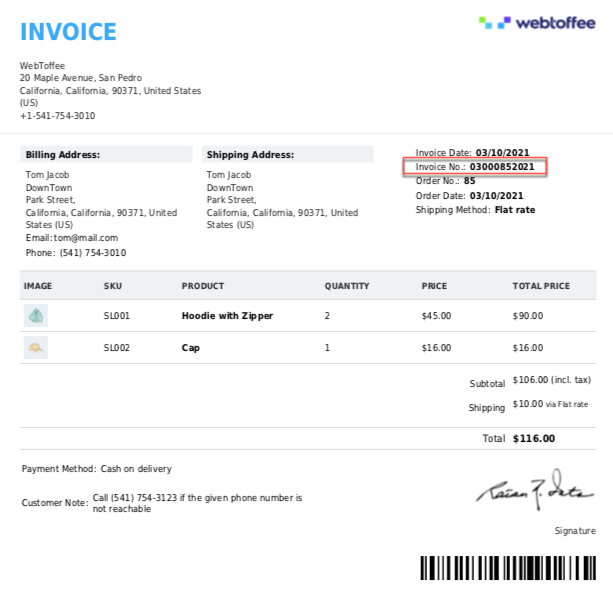
In the above invoice,
- 03 is the prefix
- the rest of the five numbers indicate the invoice length (padded with three zeroes)
- suffix 2021
Emanuel
May 4, 2023
Hi,
I am trying to reset the invoice number but after saving and going back to the orders to generate new invoie, old number order comes back and the invoices are generated wrong. Can you tell me what to do?
Another thing: I am using 2 invoice plugins to have 2 Invoice Series and numbers, when I generate with one of the plugins it generates with both. Any chance to solve this out?
Hema
May 15, 2023
Hello Emanuel,
Thanks for reaching out. We need more details about the reset procedure that you follow to answer your query. Kindly reach support to know more.
BEN
October 16, 2022
Hello,
i want to change invoice number in compeleted order.
Can you help me with that ?
Regards
Mike
October 19, 2022
Hi Ben,
If we understand your query correctly, you are looking for an option to alter the invoice number of a completed order. The invoice numbers are saved in the custom field section of each order detail under the key wf_invoice_number. You can edit it manually to alter the invoice number of that particular order.
Martyna
November 29, 2021
Hi, I created Invoice number for my client. I’ve tested the billing process. Now my Invoice number is RAD0005. I want to reset again from 0001, but when I click “Reset Invoice No” – nothing happens. I continue to test and the sequence continues. What I have to do?