Bulk printing is a huge time saver for a busy store which has a hundred things going on at the same time. This feature enables your store to print invoices in bulk with only one click. Webtoffee’s Print invoice, Packing list, Delivery Note & Label plugin for WooCommerce enables your store to bulk print all the shipping related documents in addition to invoice by configuring only a few simple settings.
Print invoice list by viewing the order details
- Navigate to Dashboard > WooCommerce > Orders.
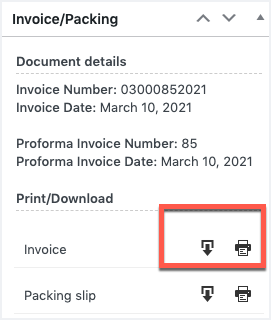
- On the Admin order page, Click #OrderNumber for which you want to print the Invoice list. The Print Action appears as :

Bulk Invoice Printing
From your dashboard, navigate to WooCommerce > Orders.
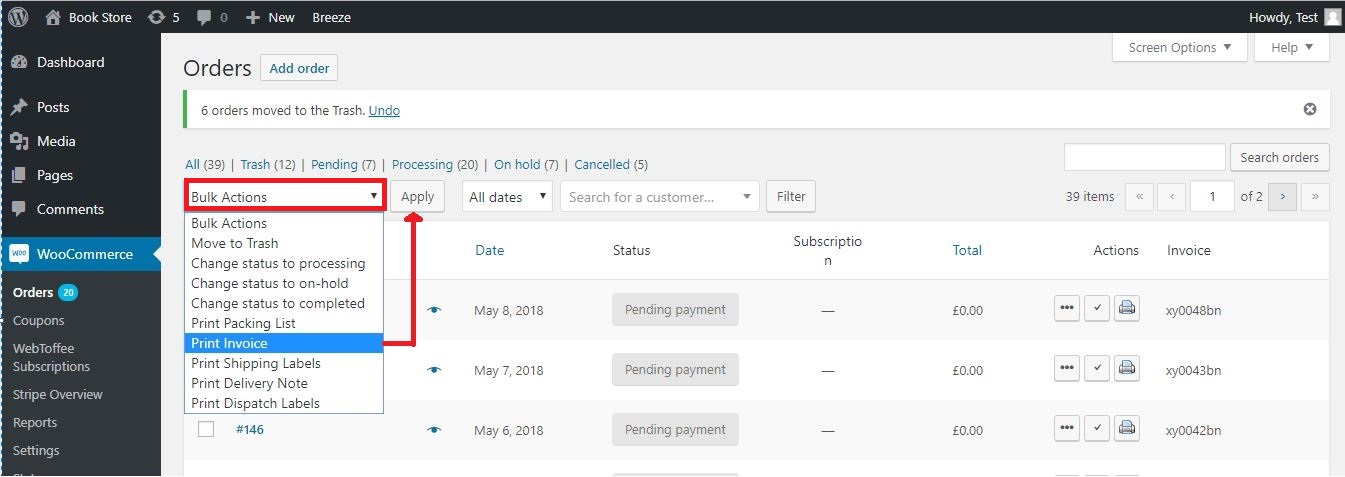
Select orders for printing invoices > Click Bulk Actions > Choose Print Invoice from the drop-down > Then click Apply.
Comments (2)
Developer
April 10, 2023
bulk print invoice options are not showing on my site.?
Hema
April 17, 2023
Hello developer@yopmail.com
Thanks for reaching out. Can you kindly give us more details via the support page ? Our customer support team can help you better.