Including all the products in your new website or adding each product’s information manually, can be dawdling! Product Import Export Plugin for WooCommerce helps you to export all the WooCommerce product’s data to a CSV/XML/Excel file in a quick and efficient manner. To export WooCommerce products:
- Select the post type as Product.
- Select an export method.
- Filter data.
- Map and reorder export columns.
- Use advanced options/ batch export and scheduling.
Export Products
To export WooCommerce products, click on WebToffee Import/Export(Pro) > Export.
Step 1: Select a post type
As a first step, you need to choose the post type as Product.

Step 2: Select an export method
Choose from the below options to continue with your export:
- Quick export from DB
- Based on a pre-saved template
- Advanced export
Let us have a look at each of these export methods:
Quick Export
- exports the basic/standard fields of the respective post type.
- To include fields from Taxonomies, Meta(custom fields), Attributes and Hidden meta select the respective group’s checkboxes.
- Click the Export button to complete the action or proceed to Step3 for advanced options.
- Navigate to Step 5 to know more about Advanced options/ Batch export/ Scheduling.
Pre-saved template
- exports data as per the specifications(filters, selective column, mapping.. etc) from the previously saved file.
- By selecting this option, one can choose a previously saved template from the Export template drop-down.
- Click the Export button to complete the action or proceed to Step3 to filter data.
- Navigate to Step 3 to know more about filtering options.
Advanced Export
- This option will take you through a detailed process of filtering/column selection/advanced options that may be required for your export.

Step 3: Filter data
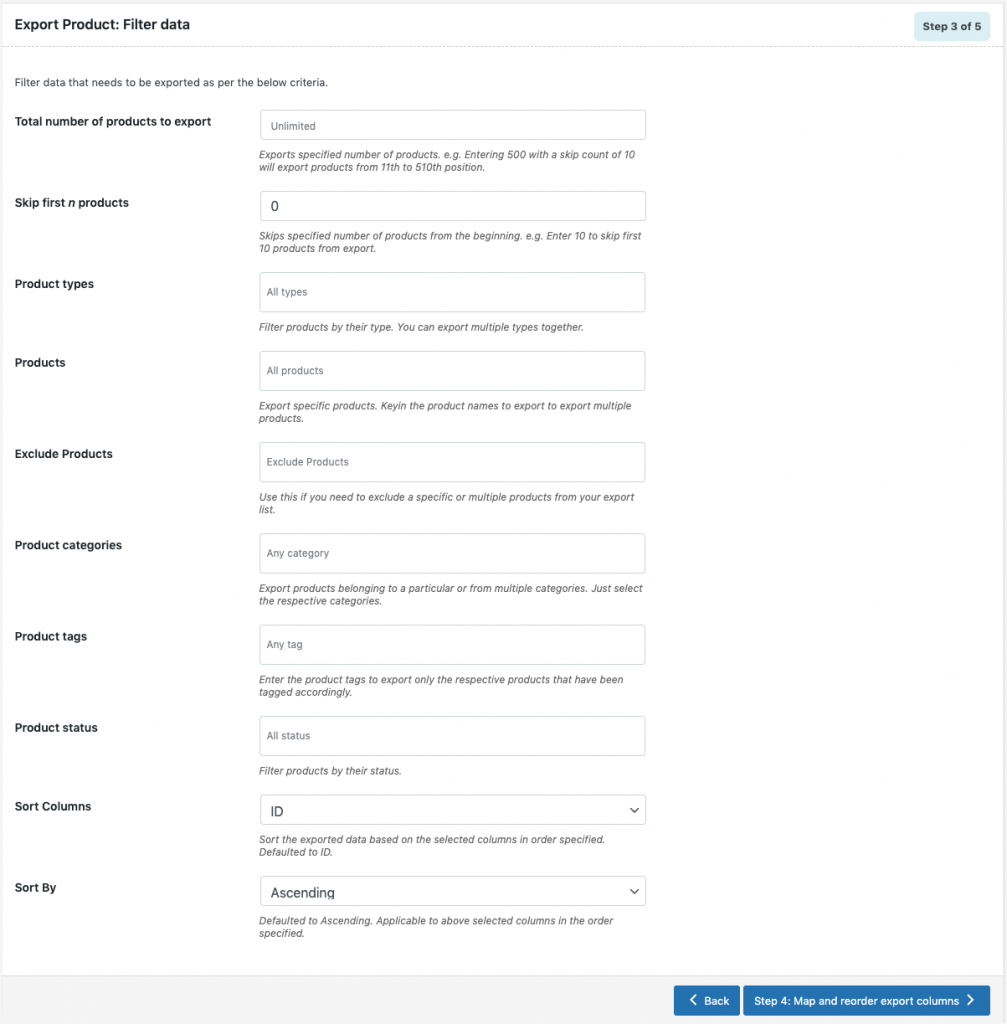
- Click on Step 3, to view the following window where one can filter data on the basis of:
- Total number of products to export : The actual number of products you want to export. e.g. Entering 500 with a skip count of 10 will export products from 11th to 510th position.
- Skip first n products : Specify the number of products to be skipped from the beginning. e.g. Enter 10 to skip first 10 products from export.
- Product types : Filter products by their type. You can export multiple types together.
- Products : Export specific products. Key in the product names to export to export multiple products.
- Exclude Products : Use this if you need to exclude a specific or multiple products from your export list.
- Product categories : Export products belonging to a particular or from multiple categories. Just select the respective categories.
- Product tags : Enter the product tags to export only the respective products that have been tagged accordingly.
- Product Status: Filter products by their status private/draft/pending/future.
- Sort Columns: Defaulted to Ascending. Applicable to above selected columns in the order specified.
- Sort By: Sorts in Ascending/Descending order.

- Click on Step 4 to proceed further.
Step 4: Map and reorder export columns
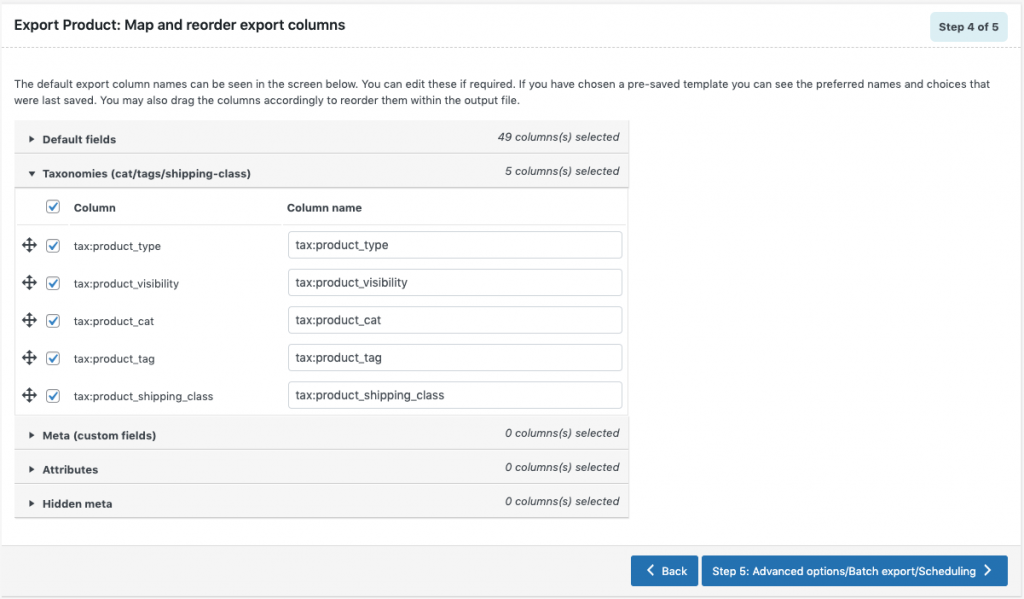
The column names appearing in this section can be edited if required. The preferred names and choices that were last saved can be viewed on choosing a pre-saved template. One can also move the columns to reorder the arrangement.

- Here, one can map and reorder the export columns under the following 5 fields:
- Default fields
- Taxonomies
- Meta(Custom fields)
- Attributes
- Hidden meta
- Click on Step 5 to proceed.
Step 5: Advanced Options/Batch Export/Scheduling
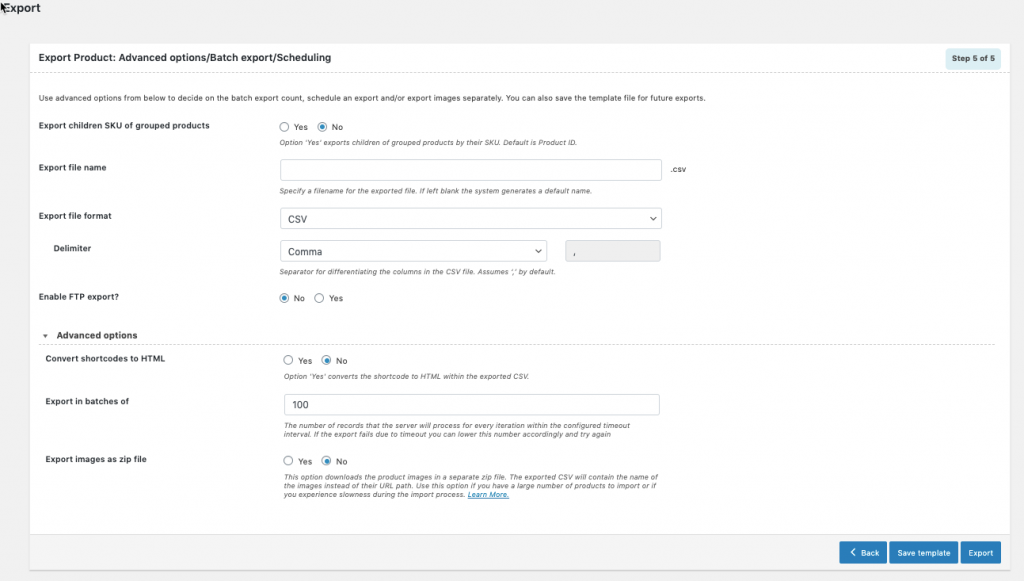
- On reaching Step 5, the following window will appear, from where one can:
- Export children SKU of grouped products: Exports children of grouped products by their SKU. Default is Product ID.
- Export file name: Filename for the exported file.
- Export File Format: Supports both CSV, XML, TSV, XLS, and XLSX.
- Delimiter: Separator for differentiating the columns in the CSV file. Assumes ‘,’ by default.
- Enable FTP export: On opting ‘Yes’, choose an FTP profile and specify the export path.

- On expanding Advanced options, one can:
- Convert shortcodes to HTML
- Export in batches of
- Export images as .zip file
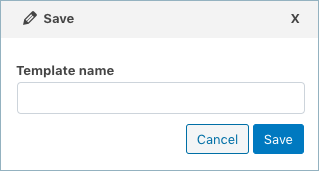
- Save the template file for future export (if needed).

- Click on Export to finish and export or schedule the export to finish.