Product Import Export Plugin For WooCommerce lets you export and import products in different manners irrespective of product types, count, etc. Basically, the plugin allows you to import products locally, via existing files, via FTP and by using the URL where the file is residing. To import products using URL:
- Select the post type as Product.
- Select an import method and the option Import from as URL.
- Enter the file URL.
- Map the import columns.
- Use advanced options/ batch import and scheduling.
- Click on Import to finish.
Import products using URL
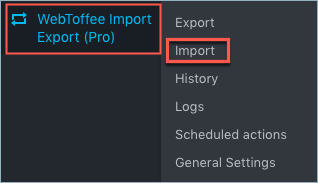
From the WordPress admin panel’s menu, click on WebToffee Import /Export (Pro) > Import.
- Select the required post type.
- Select either Quick or Advanced import method.
- Select URL under Import from and enter the file URL.
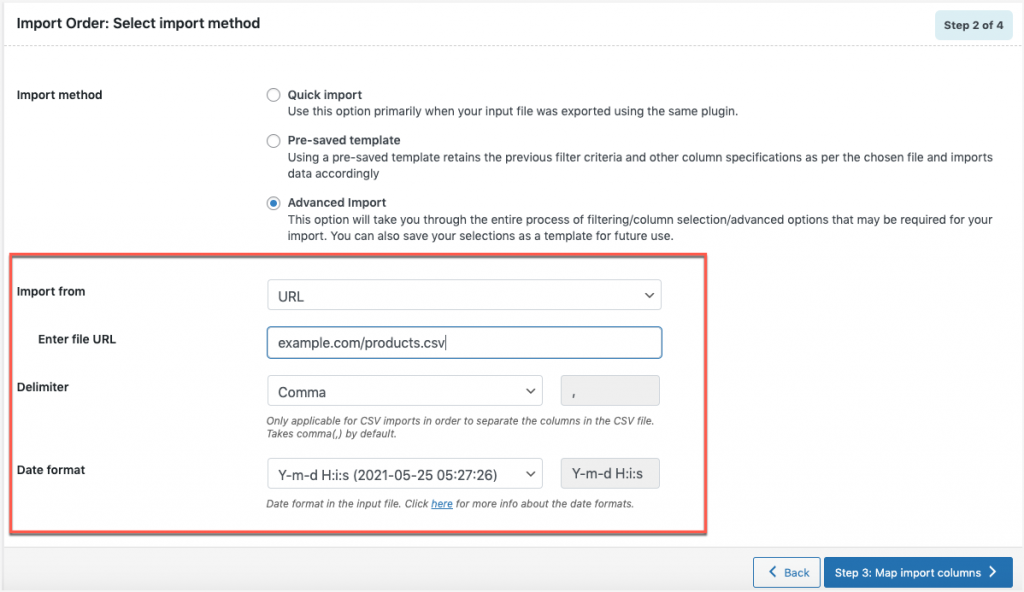
- Click on Step3 to map the columns and move to step 4.
Follow the steps in How to import products for more detailed documentation.
Cron Scheduling
On reaching the Advanced Options/Batch Export/Scheduling step, you can either import the products directly into your store or schedule the import using FTP.
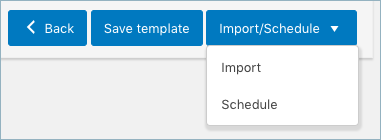
To schedule the import:
- Hit the Schedule option, and you will be taken to the cron schedule window as shown below:
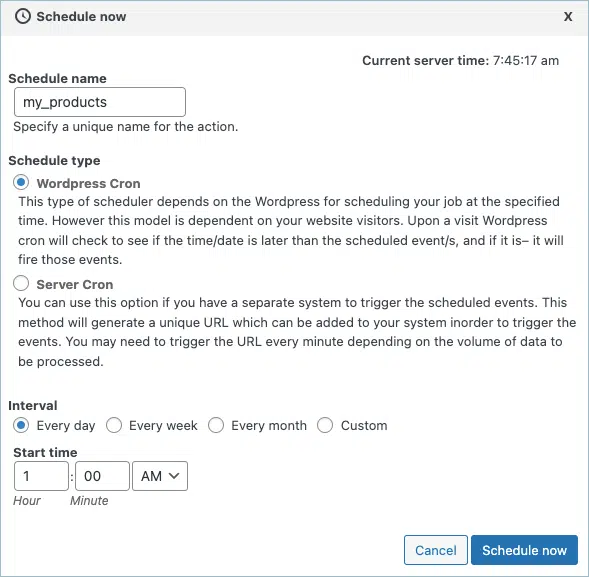
The plugin supports two different schedule types:
- WordPress Cron: Upon a visit, WordPress Cron will check to see if the time/date is later than the scheduled event/s, and if it is– it will fire those events.
- schedules your job at the specified time.
- is dependent on your website visitors.
- Server Cron: You may need to trigger the URL every minute depending on the volume of data to be processed. You can use this option :
- to generate a unique URL that can be added to your system in order to trigger the events.
- if you have a separate system to trigger the scheduled events.
You can also configure the time at which the import is to be scheduled.
To directly import:
- Hit on the Import option
Once the import is completed, a pop-up will be displayed showing import status which contains the number of successful imports and failed imports (if any).
Chiloane
April 29, 2023
Hi, I want to buy the plugin but I have a question before I do. I have a supplier that doesn’t have a csv nor an xml. Can I import their products to my WordPress store using their shop page url that requires reseller username and password in order to view their products and pricing?
Vineetha
May 2, 2023
Hi Chiloane,
Thanks for reaching out! Unfortunately, the plugin needs a CSV or XML file to import data.
Yulia
March 16, 2023
Hi,
Does the plugin work well with multivendor marketplace plugins? For example, is it compatible with Dokan?
Thank you
Vineetha
March 29, 2023
Hi Yulia,
Thanks for reaching out. Unfortunately, we haven’t tested the compatibility with the Dokan plugin exclusively. However most of the third party plugins are compatible if their data are stored as metadata along with the product details. We suggest you to purchase the plugin and test it out, as we offer 30 day refund period.
omar
December 14, 2022
Hi
I want to buy import and export plugin through URL, will I get the products details and image’s ?
Alan
January 2, 2023
Hi,
Yes, you can import product details and images from a CSV using a CSV URL.
aymen
May 17, 2022
une question,
Je souhaite faire une refonte a mon site et je veux importer les produits et l’exporter sans qu’il y a un probleme de changement d’URL de produits. Car dans mon ancien site, vous pouvez trouvez un produit avec un nom qui est diffèrent de slug
Alan
May 25, 2022
Hi aymen,
As the old and new sites would be in two different domains, a new URL will be generated on importing the products to a new site. There is no option to migrate the URL!
Gonzalo Ayala
March 29, 2022
hi i’m planing to buy your plugin for a client, it is possible to import products from google sheets using the URL method?
Alan
April 12, 2022
Hi,
Yes, you can import data from google sheets using the URL method of the plugin. You might have to make some changes to the google sheet URL before importing it. Please go through the below article to know more about it
https://www.webtoffee.com/how-to-import-woocommerce-products-using-google-spreadsheet/
NAPOLEON ALBERTO CONTRERAS ECHEVERRIA
January 24, 2022
Hello.
I am importing the data from an ftp location and I want the source file to be deleted once finished.
Alex
September 16, 2021
Hello!
Where can I see the logs of the import task for URL mode?
Mark
September 17, 2021
Hi,
You can find the import log from WebToffee import export>Logs.
MoOooo
March 10, 2021
Hello,
We are working in stateless mode on a GCP server (google cloud platefome).
We cannot store the file locally on our server (due to replicaset).
This import mode would suit us if the file is not uploaded to the server. What is it ?
Alan
March 16, 2021
Hi,
Using the URL method you can import CSV files by specifying the URL which points to the CSV file. Please make sure that the URL is publically accessible and points directly to the image file. If you face any issues then please share the URL via support so that we can check it.
Maik
February 11, 2021
Hello, I would like to clear something. About the 3rd method to import through url, it is only for an CSV file or also XML file?
Thank you.
Mark
February 12, 2021
Hi,
You can import both CSV and XML files using the URL import method. Just make sure that the URL is publicly accessible and points directly to the file.
kazi
November 24, 2020
Bonjour,
Nous utilisons la méthode URL pour importer des produits à l’aide de votre plugin. Récemment, le plugin ne fait pas le matching des champs ( n’importe pas les données du fichier csv). Nous pensons que cela pourrait être un problème, comment pouvons-nous y remédier?
Merci
Mark
November 30, 2020
Please send your importing CSV URL via support so that we can check it.
EMRULLAH YIGIN
October 9, 2020
While importing url, we can only get 1 image. no way to reproduce?
Alan
October 9, 2020
Hi,
Please share your importing CSV URL via support so that we can check it.
WHITE RUNTZ
July 3, 2020
we automatically upload the updated CSV file into the path URL, and this is the URL we have set in your plugin settings. The issue is that sometimes the plugin uses an “older” version of the CSV file. We think could be a cache issue, or something like this. Is that possible? And how can we fix it?
Alan
July 4, 2020
Hi,
Please share with us your importing CSV URL via support so that we can check it.
Riccardo
May 4, 2020
Hi,
We use the URL method to import products using your plugin. Sometimes (not always, and this is another interesting thing), seems that the plugin uses an “older” version of the file located in the path indicated by the URL provided. In short, we automatically upload the updated CSV file into the path URL, and this is the URL we have set in your plugin settings. The issue is that sometimes the plugin uses an “older” version of the CSV file. We think could be a cache issue, or something like this. Is that possible? And how can we fix it?
Thank you