The Product Import and Export plugin for WooCommerce schedules the import and export of products. By providing the starting time and intervals, one can automate the import-export process at regular intervals from the input file present on the FTP Server. In this article, we will have a detailed look at cron, import and export of products using an FTP server and automating the import and export of products.
What is Cron?
The software utility, Cron is a time-based job scheduler in Unix-like computer operating system. It is most suitable for scheduling repetitive tasks. Scheduling onetime tasks are often more easily accomplished using this utility. Other functionalities include :
- Automating system maintenance and administration.
- Setting up and maintaining the software environments to schedule jobs (commands or shell script) and run periodically at fixed times, dates, or intervals.
- Downloading files from the Internet and downloading emails at regular intervals because of its general-purpose nature.
Note: The Cron will run only when the site is visited in the scheduled interval. For more information, refer: Setting Up the Cron Job.
Important: You must import a product from FTP manually at least once before automating it using Cron.
Importing products using FTP Server
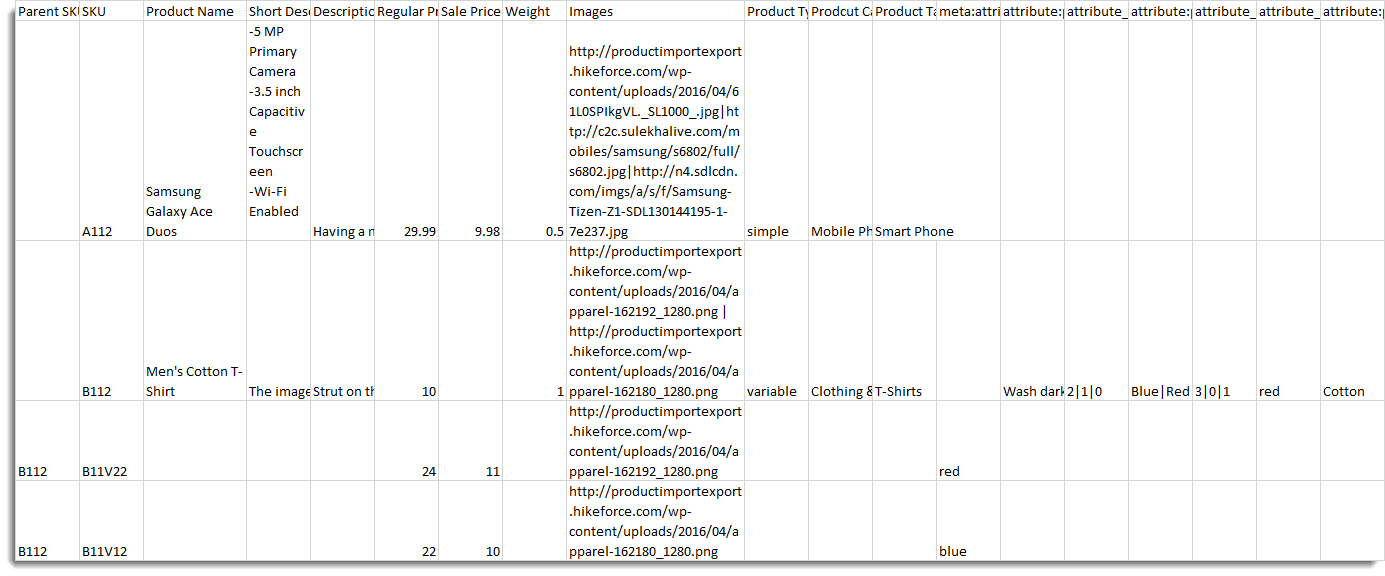
Click to download the Sample CSV for Cron.
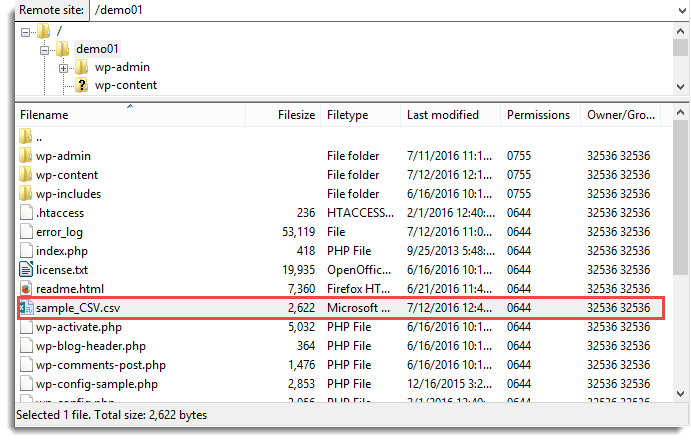
- The uploaded CSV file on the FTP server (you can use FileZilla) is as shown below:
- From the WordPress admin panel’s menu, click on WebToffee Import /Export (Pro) > Import.
- Select the post type as Product.
- Select either Quick or Advanced import method.
- Select FTP under Import from and enter the following FTP details:
- Select an FTP profile.
- Choose the Import file path between Default and Custom.
- Specify the Import file name.
- After import, delete the import file if needed.
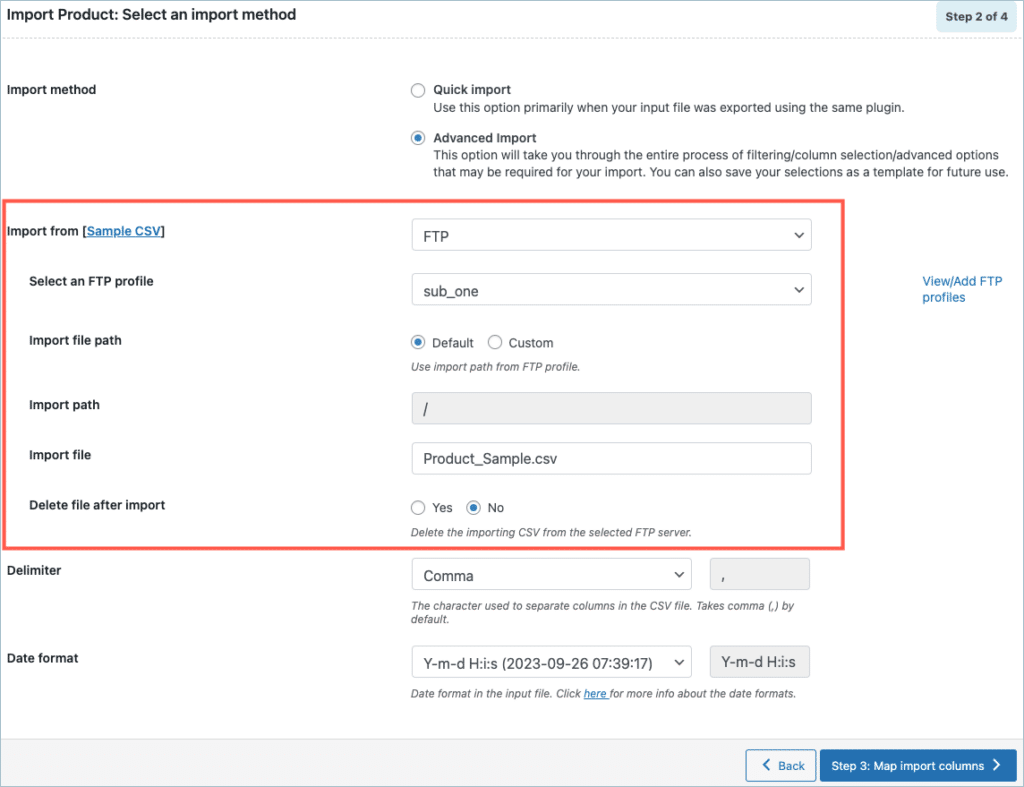
- Choose the delimiter and select the Date format.
- Move to step 3, to map the import columns.
- Proceed to step 4 and finish the process.
One can either directly import or automate the import process. Follow the steps in How to import products for a more detailed documentation. On successful import, the products will get added to your online store as shown below.

Automate Product Import
Automate all your imports via FTP profiles and schedules. To schedule the import:
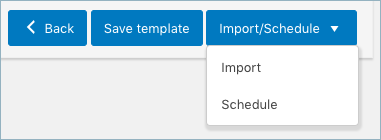
- Click on Import/Schedule button.
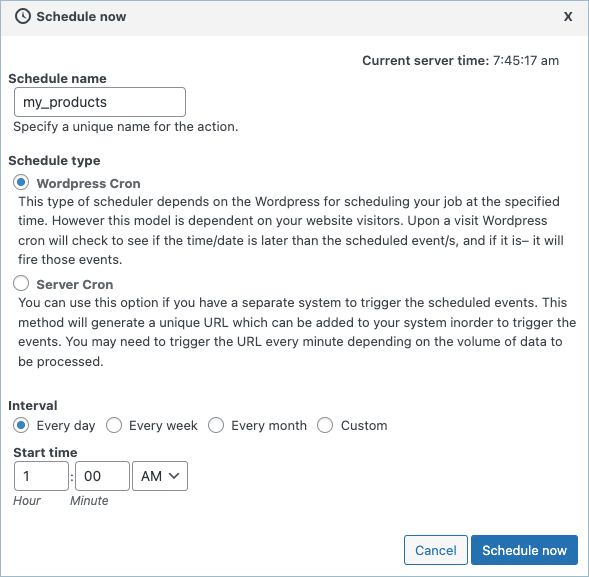
- Hit the Schedule option, and the cron schedule window will appear as shown below:
The plugin supports two different schedule types:
- WordPress Cron: Upon a visit, WordPress Cron will check to see if the time/date is later than the scheduled events, and if it is–it will fire those events.
- schedules your job at the specified time.
- depends on your website visitors.
- Server Cron: You may need to trigger the URL every minute depending on the volume of data to be processed.You can use this option :
- to generate a unique URL to add to your system in order to trigger the events.
- if you have a separate system to trigger the scheduled events.
Also, we can schedule the import on a daily, weekly, monthly, custom basis. One can also configure the time at which the import has to be scheduled. Click on Schedule now to finish.
Exporting products to the FTP Server
To export the following products as listed on the Product page.

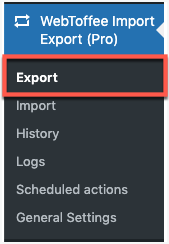
From the WordPress admin panel’s menu, click on WebToffee Import /Export (Pro) > Export.
- Select the post type as Product.
- Select the required export method and move to the next of Advanced options or Filter data as required.
- After data filtration, proceed further by mapping and reordering the columns.
- On reaching step 5, select FTP for the option Download the file into and fill up the details:
- Select the FTP profile.
- Select the Export file path.
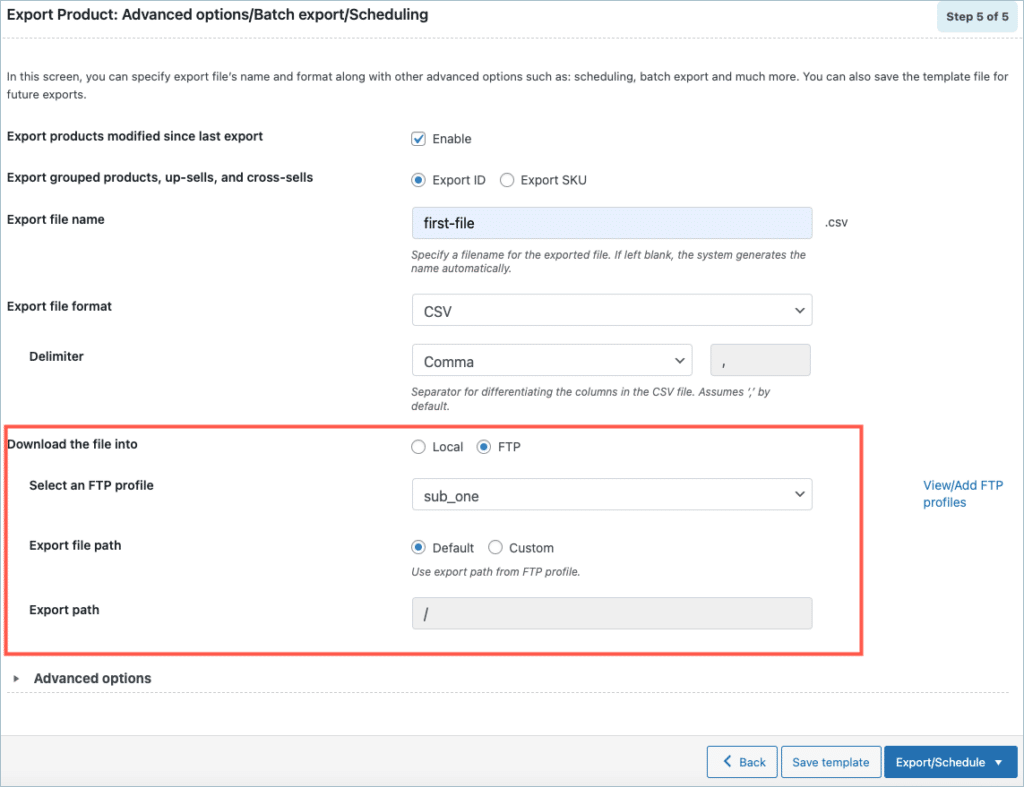
- Click on Export to finish.
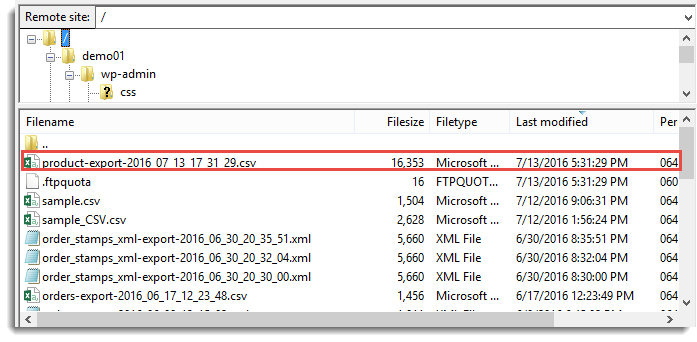
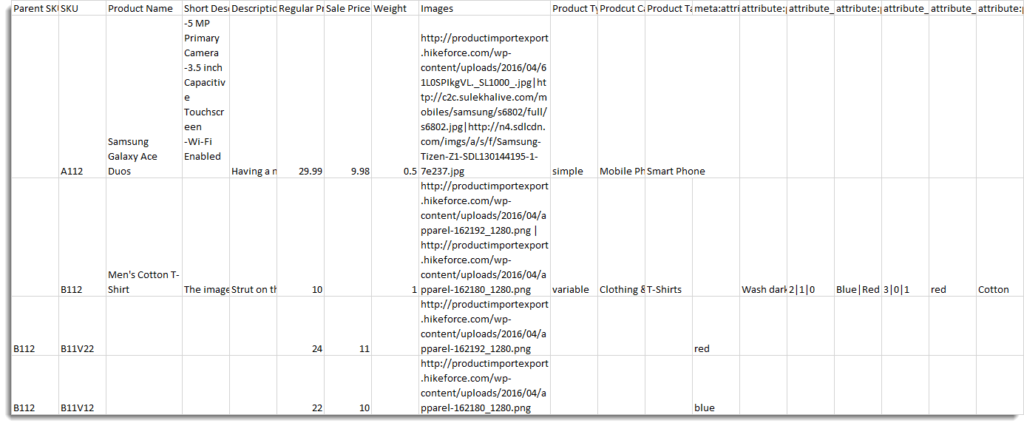
One can either directly export or automate the product export process. Follow the steps in How to export products for more detailed documentation. On successful export, The CSV file gets exported to the FTP root folder on the server(you can use FileZilla) and it is as shown below:
Automate Product Export
Automate all your exports via FTP profiles and schedules. To schedule the export:
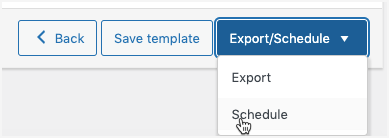
- Click on Export/Schedule button.
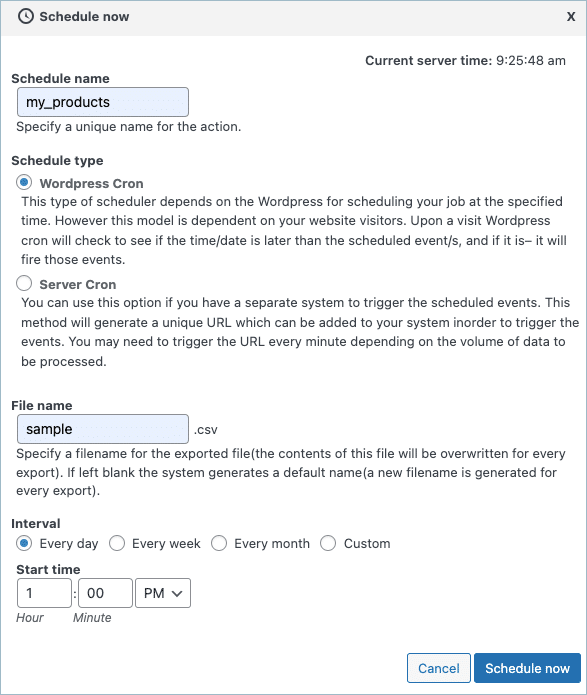
- Hit the Schedule option, and the cron schedule window will appear as shown below:
The plugin supports two different schedule types:
- WordPress Cron: Upon a visit, WordPress Cron will check to see if the time/date is later than the scheduled events, and if it is–it will fire those events.
- schedules your job at the specified time.
- depends on your website visitors.
- Server Cron: You may need to trigger the URL every minute depending on the volume of data to be processed.You can use this option :
- to generate a unique URL and add to your system in order to trigger the events.
- if you have a separate system to trigger the scheduled events.
File name: Specify a filename for the exported file (this will overwrite the contents of this file for every export). If left blank, the system generates a default name (generated a new filename for every export).
Schedule the time at which you want the automatic export to occur and also give other necessary information for the export. And then click on Schedule Now.
Related articles:
Anto
March 2, 2021
Hi, friends.
I’m really interested in buy this plugin, but I have a pre-sale question: ¿do is possible to apply mapping settings in automatized exports? I see that option at Automatized Import, but not on importing.
Thanks.
Mark
March 2, 2021
Hi,
Yes, you can select the export mapping profile in the automatic export settings.
Anto
March 2, 2021
Thanks, Mark. My original message should have said “I see that option at Automatized Import, but not on EXporting.”
Sorry, regards.
Jonas
December 19, 2020
For me the cron job FTP option “Import From Folder” doesn’t work. Just the option “Import File” with path to the csv file. How would a folder path look like?
/folder/subfolder
folder/subfolder/
/folder/subfolder/
There is no example in your documentation. Any other reasons for not working (web hosting setup, etc?)
Mark
December 22, 2020
Hi,
Please share the FTP details from which you are importing the files via support so that we can check it.
AJ
December 22, 2020
I’m having the same problem. Using ftp with a specific file works fine but trying to import all files that are in a directory doesn’t work.
Please let me know if you have already more info.
Mark
December 29, 2020
Hi,
Could you please reach us via support.
Charles Daniels
October 6, 2020
Is there a way to automatically add the date to the filename when exporting to a server? Example ACME-{mm-dd-yy} so that the filename would be ACME-10-05-20? Is this possible? Thanks
Alan
October 6, 2020
Hi,
We can provide you with a snippet to do it. Please reach us via support.
Craig
July 28, 2020
Is it possible to set a scheduled import from a url at, say, 1 hours invervals? I see this question has been asked in the comments and the answer is yes, but there is nothing on the videos or in the support documentation that confirms or shows how this is achieved – everything relates to the scheduled FTP import, but I need to be able to do it from a URL. I know you offer a refund, but I’d rather confirm in advance that this will work before purchasing. If you could clarify that would be appreciated!
Alan
July 29, 2020
Hi,
Yes, using the plugin you can schedule import from URL at an interval of 1 hour. In the URL import settings, you may please specify the import start time and import interval as 60 in order to run the import every hour.
Scott Donald
June 15, 2020
Hi,
Can I set a URL that I can call to do run the import instead of doing it automatically? i.e. I want to run it only when I want to.
Alan
July 8, 2020
Hi,
By default, there is no option to set a URL to run the cron import when needed instead of running it automatically.
Gertrude
April 22, 2020
Great post.
frits.erasmus
November 1, 2019
I am selling fresh products for doorstep delivery.
Certain products are only available for purchase on certain days of the week.
My plan is to create two files “Available” = file 1 & Un-Available” = file 2 using the visible switch to control what customers can see to buy.
So having two files that will, in turn, be loaded on Monday Morning file 1 and file 2 on Tuesday night and then file 1 on Thursday morning and file 2 Friday evening.
How would I accomplish this?
Alan
November 2, 2019
Hi,
Yes, you can schedule the import on desired days by providing the details of the FTP in which the CSV files are present. You may please provide the FTP details, import start time, and the import interval time in the plugin settings so that the import will run at a specific time automatically.
Currently, there is no option to scheduled import two CSV files at different intervals of time from the FTP. You will have to change the file name/path each time for the CSV files to import. Or else you can schedule one import using the FTP import method and other with the URL method.
For better understanding, you can go through the documentation on how to set up cron import process using the plugin. If you still have any more queries regarding scheduling the import please reach us via support.
Ian
October 4, 2019
I have this integrated in a website and it works if update the feed manually but the automation don’t seem to be working even though the automatic product import is checked for the feed. I don’t know enough about wordpress or the plugin to see what the issue is, can anyone help please?
Alan
October 5, 2019
Hi,
Kindly make sure that you have provided the correct FTP details, import start time, interval time, and the CSV file path including the file name in the scheduled import settings of the plugin. If the issue still persists please reach us via support.
Ian Haney
June 22, 2020
Hi. I am still having this issue, the FTP info, import start time, interval time, and CSV file path and file name is correct. The file name is just the name of the file as it’s in the root on the FTP server. I have just contacted you via the support link
katy
September 17, 2019
Hello,
Can i set a automatic update for URL import? Just want to update my stock every day using cron job .
Thank you.
Alan
September 17, 2019
Hi,
Yes, you can schedule an automatic update of products using the URL import method to update the stock quantity on a daily basis.
Jacob
August 20, 2019
Hi,
Is it possible to make a cron job, where the quantity will be updated from sold products..
Like; If there is 10 in stock, and we upload a .csv with -1, there will be 9 in stock.
Alan
August 21, 2019
Hi,
Yes, you can manage the stock quantity of the products by scheduling the import. If you are required to reduce the stock amount of a product from 10 to 9 then you may please provide the data (-)1 in the stock column.
Laurens
August 1, 2019
Can I export all my sold items to my supplier automatically or manually?
Alan
August 2, 2019
Hi,
By default, there is no option to export only the sold-out items automatically to the FTP server. We can provide you with a custom code snippet for the premium version of the plugin to export only the sold-out items automatically to the FTP.
Please reach us via support if you are interested in having the code snippet.
Bäthge Maximilian
July 4, 2019
Hello,
can i set a automatic update for URL import? Just want to update my stock every 15 minutes.
Alan
July 4, 2019
Hi,
Yes, you can schedule automatic import/update via URL import to update the stock of products at a specific interval of time.
Bäthge Maximilian
July 4, 2019
Can u describe me how?
I have imported everything now and it works fine. But i can’t find the Option for the automatic update, may u have a tutorial for me?
Thanks.
gchisholm
June 15, 2019
What should the time interval in minutes for importing the products be set to or based on?
Mark
June 16, 2019
It depends on your requirement. ie how frequent you need to update the data. Say for eg, if you need to update it once per day set 1440 minutes as the interval.
Luis
January 14, 2019
Where i can see the debug log? is active by default the DEBUg log of the cron processs?
Alan
January 14, 2019
Hi Luis,
You can find the cron import log from Woocommerce>Status>Logs>csv-import.
carlos
November 23, 2018
Hi, I am interested in the pro-version of your product
Yesterday night I find a “sandbox” to test, but now I cannto find….
Please, can you send me the url for test ??
Thanks
Carlos
Mark
November 26, 2018
Hi,
Currently, there are no demo servers to test the plugin due to some server issues.
You may go ahead and purchase the plugin. We offer 30 days-No Questions Asked-100% refund guarantee for our plugin purchase.
Luis
March 22, 2018
is there some logs if the cron fails or is ok?
James
December 7, 2016
Where can I find this Cron plugin?
Ando
December 7, 2016
Hi James,
We have a product import export plugin which has cron job feature in it.
kindly find the link to it – https://www.xadapter.com/product/product-import-export-plugin-for-woocommerce/