Import and export all the product tags of a WooCommerce store using the premium version of the Product Import Export Plugin for WooCommerce. The plugin helps you to export and import product tags as a separate post type in a quick and efficient manner. To export the WooCommerce product tags:
- Select the post type as Product Tags.
- Select an export method.
- Filter data.
- Map and reorder export columns.
- Use advanced options/ batch export and scheduling.
Exporting Product Tags
To export WooCommerce product tags, click on WebToffee Import/Export(Pro) > Export.
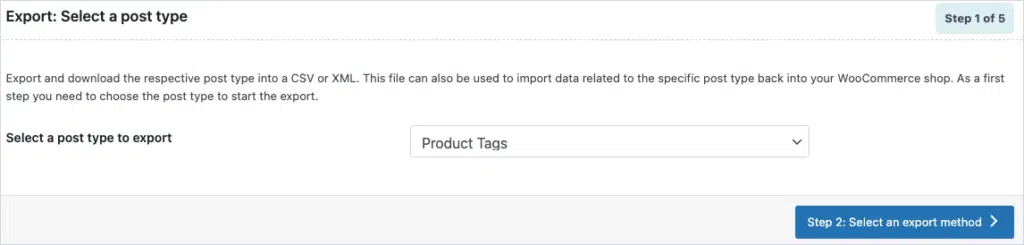
Step 1: Select a post type
As a first step, you need to choose the post type as Product Tags.
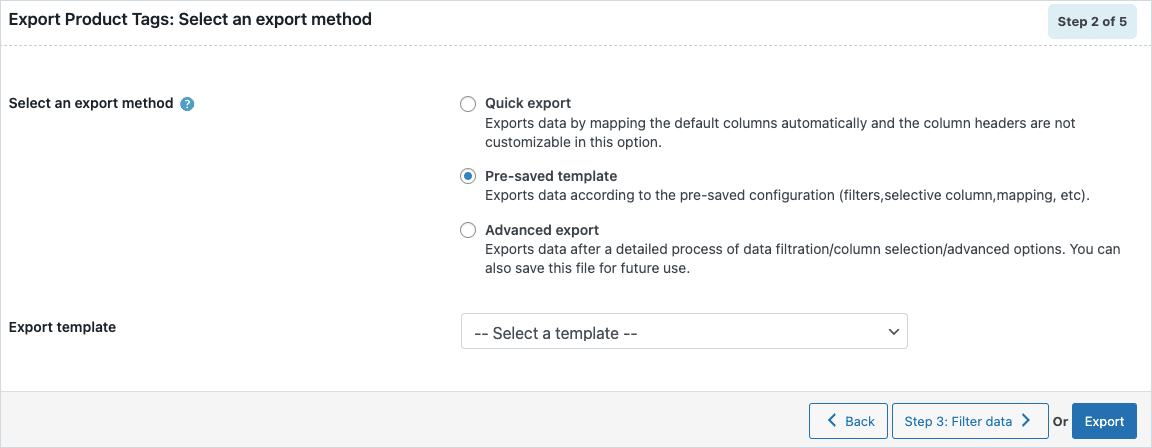
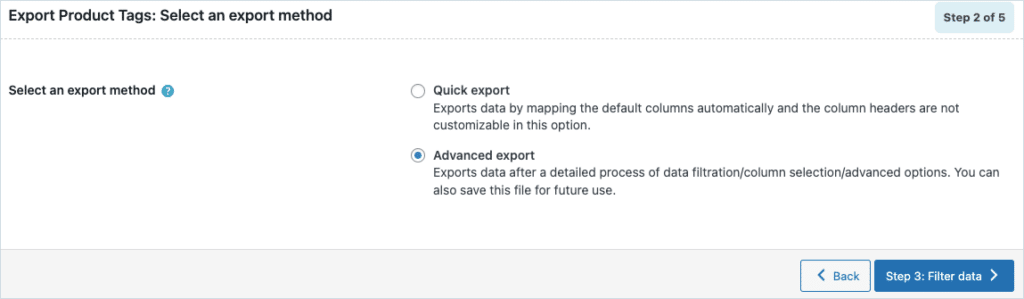
Step 2: Select an export method
Choose from the below options to continue with your export:
- Quick export : exports the basic/standard fields.
- Pre-saved template : exports data as per the specifications(filters, selective column, mapping etc) from the previously saved file.This export method will be visible only if you satisfy both of these:
- exported data using the Advanced export method in any of your previous exports.
- saved the selections as a template for future use.

Note: The template will be listed in the drop down only if you have saved it in previous exports, if you go through the Advanced export, at Step 5 you will get an option to save the template. Once you save that, next time when you want to export a pre-saved template, it will be populated within the drop down.
- Advanced export: Takes you through a detailed process of filtering/column selection/advanced options that may be required for your export.
Note: You can also save this file as a template for future use.
Step 3: Filter data
Filter data that needs to be exported as per the below criteria.
- Sort Columns: Select the column on the basis of which you want to sort the export data.
- Sort: Sorts the selected sort column in ascending or descending order as specified.
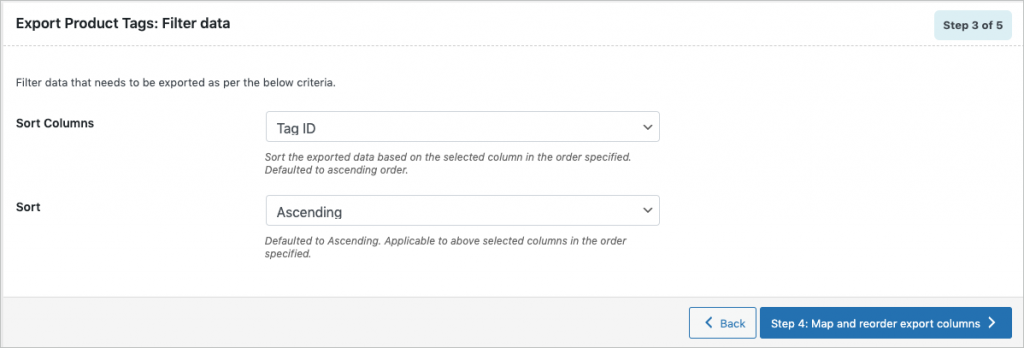
- Click on Step 4 to proceed further.
Step 4: Map and reorder export columns
The column names appearing in this section can be edited if required. The preferred names and choices that were last saved can be viewed by choosing a pre-saved template. You can also move the columns to reorder the arrangement.

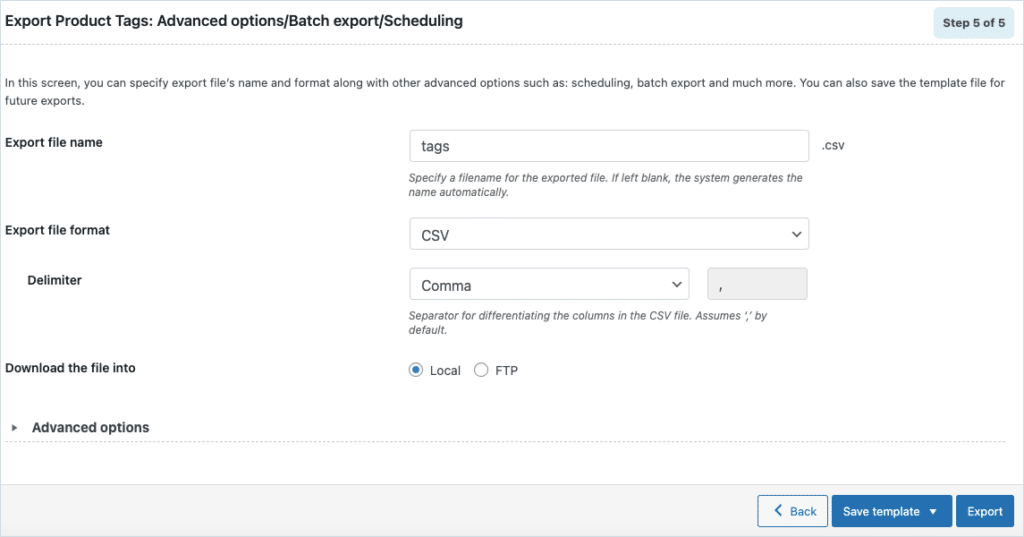
Step 5: Advanced Options/Batch Export
On reaching Step 5, the following window will appear, from where you can:
- Specify the Export file name.
- Choose the Export file format between CSV, XML, TSV, XLS and XLSX.
- Select the required delimiter among: Comma, Semicolon, Tab, Space and other.
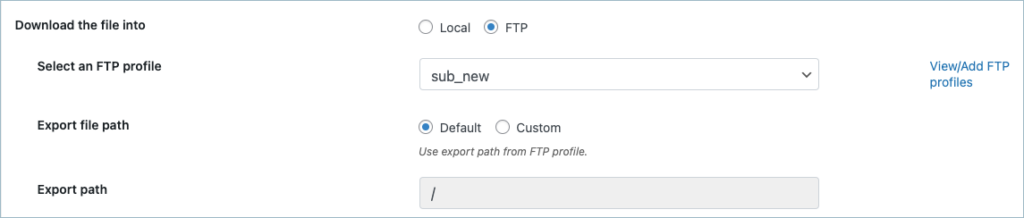
To enable FTP export, select FTP for the option Download the file into.
- Select an FTP profile.
- Use the default export path or specify a new one as required.
- Click on Export/Schedule and select the Schedule button.
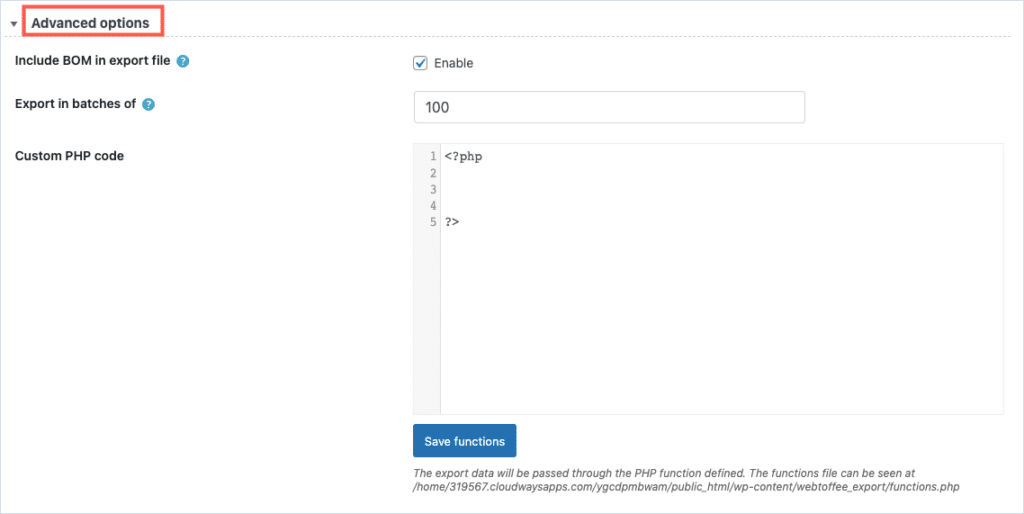
On expanding the Advanced options, you can :
- Include BOM in export file by selecting the Enable option. This will help the applications like Microsoft Excel to read your export file, even if it contains non-English characters.
- Export in batches based on the number specified. This value specifies the number of records the server will process for every iteration within the configured timeout interval. NOTE: If the export fails due to timeout, you can lower the batch count and try again.
- Custom PHP code: Here, the export data will be passed through the PHP function defined. Click on Save functions to save the code.
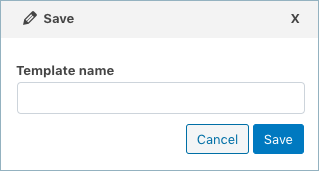
- Save the template file for future export as shown below(if needed).
- Click on Export to finish.